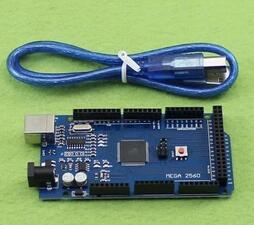
Difference between revisions of "Cutedigi MEGA2560 R3"
(→User instruction) |
(→User instruction) |
||
| Line 14: | Line 14: | ||
*3. Insert 2560 development board, the drive will be installed automaticlly. | *3. Insert 2560 development board, the drive will be installed automaticlly. | ||
*4. Select MEGA2560 in die | *4. Select MEGA2560 in die | ||
| − | *5. Select COM port, could check in '''My Computer''' | + | *5. Select COM port, could check the 2560 development board port in '''My Computer''' |
*6. It's better to select firstly the arduino tutorial program, and record in. | *6. It's better to select firstly the arduino tutorial program, and record in. | ||
*7. Standard accessories: 30CM square port USB cable. | *7. Standard accessories: 30CM square port USB cable. | ||
Revision as of 11:11, 29 August 2016
Introduction
- 1.This version is optimization of previous version. It completely solved the problem that the traditional 2560 board is not compatible with and not stable in Win7 and Win8 system.
- 2.Retain the master chip ATMEGA2560-16AU, replaced the USB chip 16u2.
User instruction
- 3. Insert 2560 development board, the drive will be installed automaticlly.
- 4. Select MEGA2560 in die
- 5. Select COM port, could check the 2560 development board port in My Computer
- 6. It's better to select firstly the arduino tutorial program, and record in.
- 7. Standard accessories: 30CM square port USB cable.
