Difference between revisions of "Ethernet Shield"
Katherine.d (talk | contribs) (→Usage) |
Katherine.d (talk | contribs) |
||
| Line 78: | Line 78: | ||
[[Image:Ethernet shield2.jpg|300px|Ethernet shield2.jpg]]<br> | [[Image:Ethernet shield2.jpg|300px|Ethernet shield2.jpg]]<br> | ||
| + | |||
| + | == Resource == | ||
| + | *[http://arduino.cc/en/Guide/ArduinoEthernetShield Ethernet shield Getting Start] | ||
| + | *[https://s3.amazonaws.com/linksprite/Shields/Ethernet-shield/Ethernet_Shield.zip Ethernet shield Eagle File] | ||
Revision as of 02:58, 20 December 2012
Contents
Introduction
Ethernet Shield instantly enables internet connectivity for Arduino projects. An on-board Wiz5100 ethernet controller handles up to four TCP and UDP connections, just stack it onto an Arduino to create your own networked devices. Easily check connection status with on board indicator lights. Extend your design further with two extra rows of pin header that connect to shields and prototyping boards.
Features
- Standard Arduino and Arduino Mega compatible
- Arduino Ethernet Library compatible
- Standard RJ45 ethernet Jack
- 16K byte internal buffer
- Indicator LEDs for all functions
- Easy to access reset button
- Standard pin headers for 0.1" grid prototyping boards
- Up to 4 TCP/UDP network connections
Specification
| Item | Min | Typical | Max | Unit |
|---|---|---|---|---|
| Voltage | 3.5 | 5 | 5.5 | V |
| Current | 120 | 210 | 350 | mA |
| Demension | 72.6x58.4x23.2 | mm | ||
| Supported Connection | TCP/UDP | / | ||
| Net Weight | 24.2 | g | ||
Interface Function
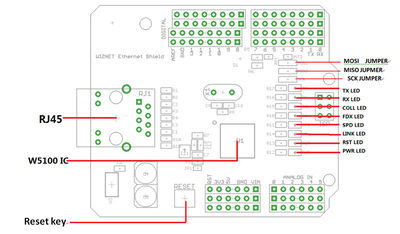
RJ45 - Ethernet Port
Power LED - Power
RST LED(red) - Red when Reset
LINK LED - Always ON when link is ok and flashes while in a TX or RX stat
SPD LED - Light indicates the link speed is 100Mbps
FDX LED - Light indicates the status of full-duplex mode.
Coll LED - Light indicates the presence of collision activity
Rx LED - Light indicates the presence of receiving activity
Tx LED - Light indicates the presence of transmitting activity
Reset KEY - Reset Ethernet shield and Arduino when pressed
Pins usage on Arduino
D0 - Unused
D1 - Unused
D2 - Connects the INT pin of the W5100
D3 - Contral the reset of the W5100
D4 - Unused
D5 - Unused
D6 - Unused
D7 - Unused
D8 - Unused
D9 - Unused
D10 - Used for SPI Chip Select
D11 - Used for SPI MOSI
D12 - Used for SPI MISO
D13 - Used for SPI SCK
D14(A0) - Unused
D15(A1) - Unused
D16(A2) - Unused
D17(A3) - Unused
D18(A4) - Unused
D19(A5) - Unused
Usage
Hardware Installation
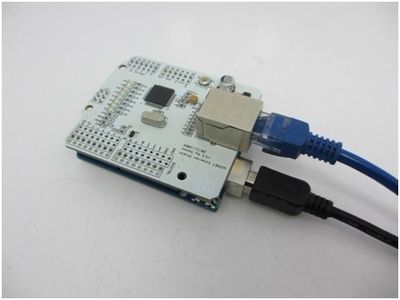
Connect the ethernet shield with internet via RJ45 connector, and Arduino with PC via USB cable. Insert ethernet shield onto Arduion board:
Software
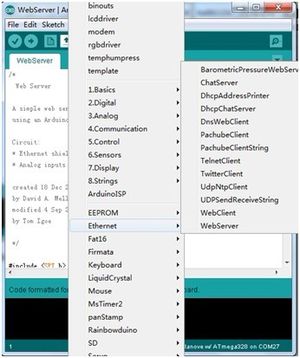
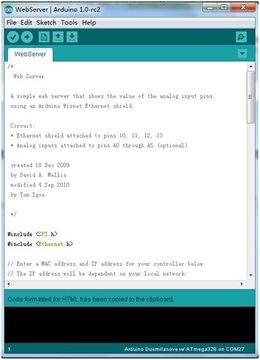
- Open the Arduino IDE(1.0), open the WebServer example in the Ethernet library:
- Select the corresponding Arduino board, like Arduino UNO or Duemilanove or others, in: Tools- Board; Select COM port you are using in: Tools- Serial port.
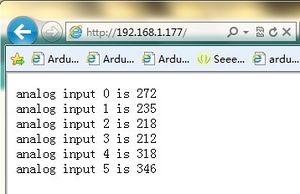
- Open your web browser and input the web address:192.168.1.177, you will see the operation result of the arduino board as web server:
