Difference between revisions of "4-Digit 7-Segment Module"
(Created page with " File:LINKER 4D7S 1.jpg") |
|||
| Line 1: | Line 1: | ||
| + | ==Introduction== | ||
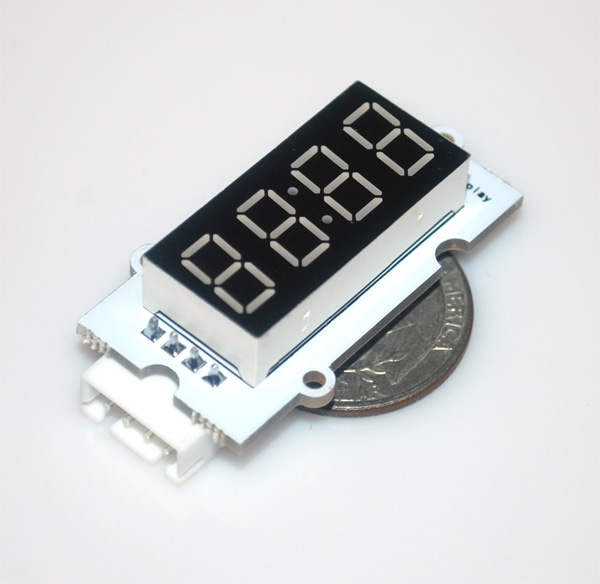
| + | Linker 4-digit 7-segment module uses a chipset of TM1637 to drive a 12-pin 4-digit command anode 7-segment LED. The MCU only needs two GPIO lines to control it. | ||
[[File:LINKER 4D7S 1.jpg]] | [[File:LINKER 4D7S 1.jpg]] | ||
| + | |||
| + | ==Schematic== | ||
| + | |||
| + | ==Sample Code and Setup == | ||
| + | |||
| + | ===Hardware === | ||
| + | We connect according to the following: | ||
| + | *D2 of Arduino to CLK of Linker 4-digit 7-segment module | ||
| + | *D3 of Arduino to DIO of Linker 4-digit 7-segment module | ||
| + | *+3.3V of Arduino to VCC of Linker 4-digit 7-segment module | ||
| + | *GND of Arduino to GND of Linker 4-digit 7-segment module | ||
| + | |||
| + | |||
| + | |||
| + | ===Software=== | ||
Revision as of 02:42, 27 April 2014
Introduction
Linker 4-digit 7-segment module uses a chipset of TM1637 to drive a 12-pin 4-digit command anode 7-segment LED. The MCU only needs two GPIO lines to control it.
Schematic
Sample Code and Setup
Hardware
We connect according to the following:
- D2 of Arduino to CLK of Linker 4-digit 7-segment module
- D3 of Arduino to DIO of Linker 4-digit 7-segment module
- +3.3V of Arduino to VCC of Linker 4-digit 7-segment module
- GND of Arduino to GND of Linker 4-digit 7-segment module
