Difference between revisions of "BLE4.0 Nano Shiled"
(Created page with "== Introduction == BLE4.0 Nano Shield is design for Arduino Nano which is based on TICC2541. TICC2541 integrated AT instruction set, it’s very easy to use can BLE4.0 Nano...") |
(→Test tool and test) |
||
| Line 78: | Line 78: | ||
Burning the following program to Arduino Nano | Burning the following program to Arduino Nano | ||
| − | + | #include<SoftwareSerial.h> | |
| − | + | #define RxD 2 | |
| − | + | #define TxD 3 | |
| − | + | SoftwareSerial mySerial(RxD,TxD); | |
| − | + | voidsetup() | |
| − | + | { | |
| − | + | pinMode(RxD, INPUT); | |
| − | + | pinMode(TxD, OUTPUT); | |
| − | + | mySerial.begin(9600); // the ble4.0 baud rate | |
| − | + | Serial.begin(9600); // the terminal baud rate | |
| − | + | } | |
| − | + | voidloop() | |
| − | + | { | |
| − | + | if(Serial.available()) | |
| − | + | { | |
| − | + | mySerial.print((char)Serial.read()); | |
| − | + | } | |
| − | + | if(mySerial.available()) | |
| − | + | { | |
| − | { | + | Serial.print((char)mySerial.read()); |
| − | + | } | |
| − | + | } | |
| − | |||
Revision as of 10:46, 26 April 2016
Introduction
BLE4.0 Nano Shield is design for Arduino Nano which is based on TICC2541. TICC2541 integrated AT instruction set, it’s very easy to use can BLE4.0 Nano Shield uses BLE4.0 module integrates AT command set ,very simple and quick, greatly reducing your development cycle.
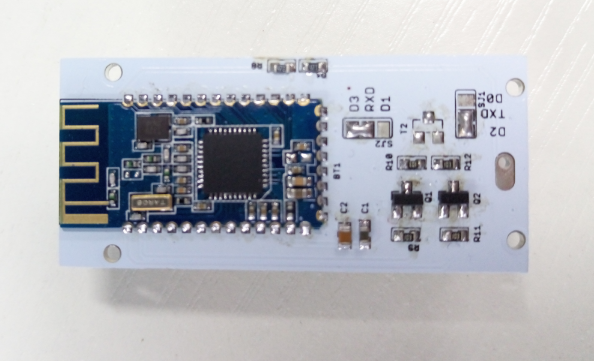
The BLE4.0 nano Shield for Arduino Nano integrates an openhapp Serial Bluetooth BLE module HM-10. It can be easily used with Arduino Nano for transparent wireless serial communication. You can choose two pins from Arduino D0 to D3 as Software Serial Ports to communicate with Bluetooth Shield (D0 and D1 is Hardware Serial Port).
Support Central and Peripheral mode switch, modify by AT command.
Support Remote control mode, remote device can control PIO pin or modify settings by AT commander when Connected. (such as Iphone4s/5 ipad, Note2 etc.)
The Bluetooth UART serial Converter Module can easily transfer the UART data through the wireless Bluetooth, without complex PCB layout or deep knowledge in the Bluetooth software stack, you can combine this bluetooth module with your system:
MCU, ARM or DSP systems. SOC systems. Personal Digital Assistants (PDAs) Computer Accessories Other systems your want to use under bluetooth functions.
Features
- CC2541 Bluetooth Chip Solution
- Fully Qualified Bluetooth V4.0 Ble
- Full Speed Bluetooth Operation with Full Piconet Support and Scatternet Support
- Increadible samll size with 3.3V input, and RoHS Compliant
- UART interface and with baudrate setup function
- iBeacon
Usage
- AT Command:
- AT (Test command)
- AT+BAUD (Query/Set Baud rate)
- AT+CHK (Query/Set parity)
- AT+STOP (Query/Set stop bit)
- AT+UART (Query/Set uart rate,parity, stop bit)
- AT+PIO (Query/Set PIO pins status Long command)
- AT+PIO (Query/Set a PIO pin sttus Short command)
- AT+NAME (Query/Set device friendly name)
- AT+PIN (Query/Set device password code)
- AT+DEFAULT (Reset device settings)
- AT+RESTART (Restart device)
- AT+ROLE (Query/Set device mode, Master or Slave)
- AT+CLEAR (Clear remote device address if has)
- AT+CONLAST (Try to connect last connect succeed device)
- AT+VERSION (Show software version information)
- AT+HELP (Show help information)
- AT+RADD (Query remote device address)
- AT+LADD (Query self address)
- AT+IMME (Query/Set Whether the device boot immediately)
- AT+WORK (if device not working, start work, use with AT+IMME command)
- AT+TCON (Query/Set Try to connect remote times)
- AT+TYPE (Query/Set device work type, transceiver mode or remote mode)
- AT+START (Switch remote control mode to transceiver mode)
- AT+BUFF (Query/Set How to use buffer data, Duing mode switching time)
- AT+FILT (Query/Set device filter when device searching) A
- AT+COD (Query/Set Class of Device. eg: phone, headset etc.)
Test tool and test
(1)Test tool
- Arduino Nano x 1
- BLE4.0 Nano Shield x 1
- Android or Iphone x1
(2)Program
Burning the following program to Arduino Nano
   #include<SoftwareSerial.h>
   #define RxD 2
   #define TxD 3
   SoftwareSerial mySerial(RxD,TxD);
  voidsetup()
   {
pinMode(RxD, INPUT); pinMode(TxD, OUTPUT); mySerial.begin(9600); // the ble4.0 baud rate Serial.begin(9600); // the terminal baud rate
   }
   voidloop()
   {
if(Serial.available()) { mySerial.print((char)Serial.read()); } if(mySerial.available()) { Serial.print((char)mySerial.read()); }
}
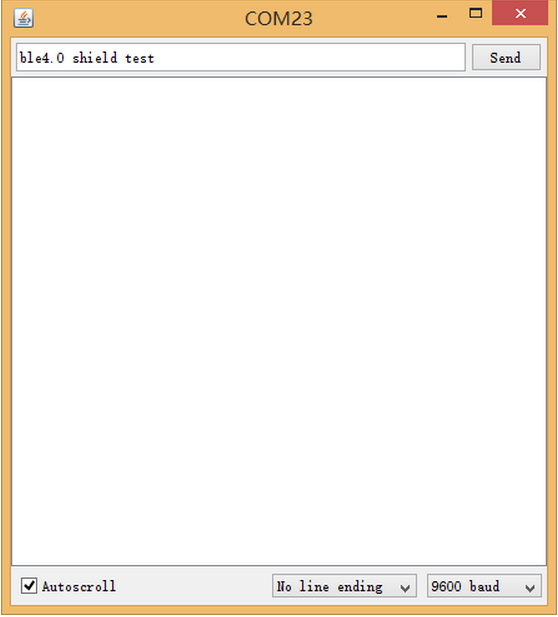
(3)Open serial debug tool on the right side of ArduinoIDE( 9600 baud ),send "AT" ( Note: The behind of AT of the module does not need to add carriage returns We needn’t to press Enter for this module) , we can see that the module returns "OK", then we are going to set the module to slave module:
- Query master- slave mode of module: AT+ROLE? Return: OK + Get: 0
(“0” means the slave mode, '1' means the master mode)
- Modify to slave mode “AT+ROLE0” Return: OK + Get: 0
- Query module’s name: AT + ROLE? Return: OK+NAME:BLE_Shield
- Modify module’s name: AT + NAMExxx Returns: OK + Set: xxx
(4)Results and Phenomena
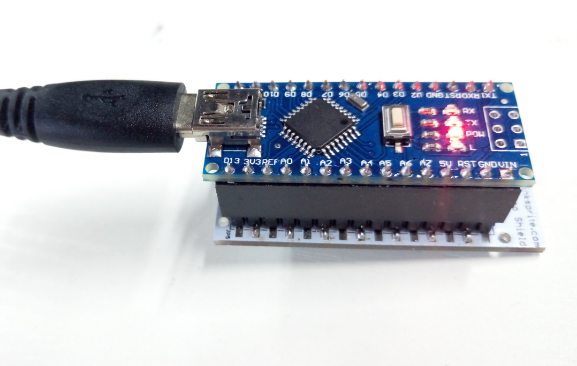
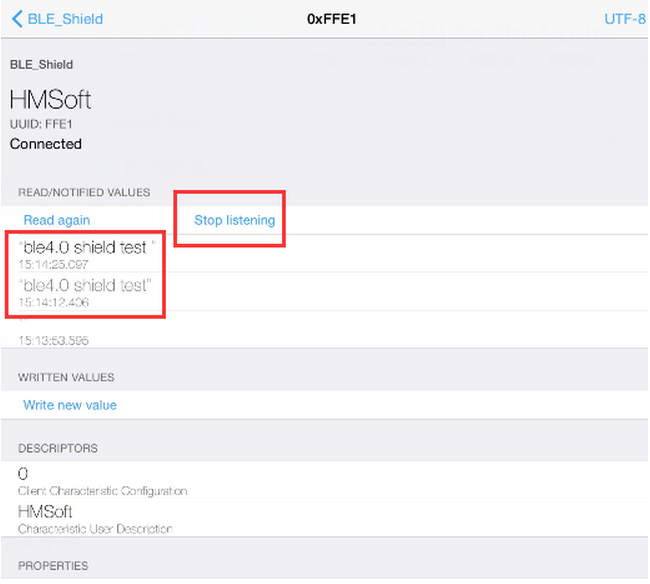
There are two solder points on BLE4.0 Nano Shield. We need Solder D2 and TX, D3 and RX together. Connecing BLE4.0 Nano Shield to the Arduino Nano, open the serial port tool of Arduino IDE and set the baud rate to 9600. We open the iPhone’s APP LightBule, now we can communication with serial port of Arduino IDE, and as shown below: Open the LightBule, searching and connecting to the Bluetooth device “Click” the button “Listen for notifications to listen”, receiving data, now send a message from Arduino IDE serial port, you can receive it on the mobile device.


