Difference between revisions of "BLE Gateway Shield"
(→Firmware burning) |
(→Firmware flash) |
||
| Line 31: | Line 31: | ||
2)Firmware burning | 2)Firmware burning | ||
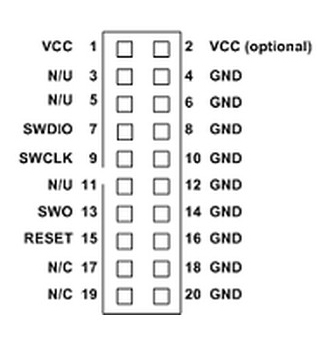
| − | Jlink | + | Jlink pins definition: |
[[File:1-226.png]] | [[File:1-226.png]] | ||
| Line 37: | Line 37: | ||
[[File:1-227.png]] | [[File:1-227.png]] | ||
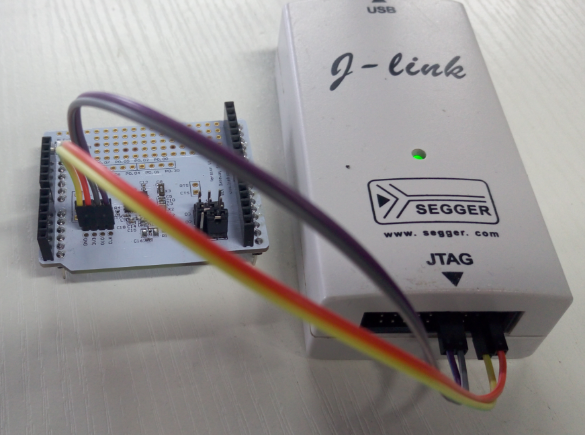
| − | + | Connecting Jlink JTAG’s VCC, GND, SWIO, SWCLK to corresponding pins of BLE Gateway Shield (some jlink JTAG DOESN’T have power output, we need provide power separately) . | |
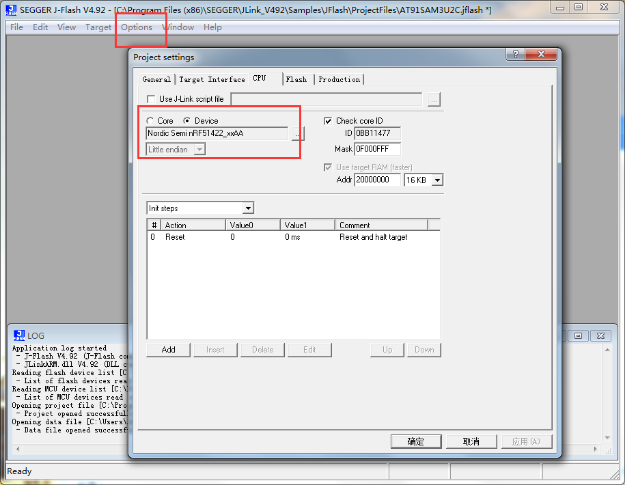
Open J-Flash software->Option->Project settings->CPU->Device->Nordic Semi | Open J-Flash software->Option->Project settings->CPU->Device->Nordic Semi | ||
Revision as of 17:42, 29 April 2016
Introduction
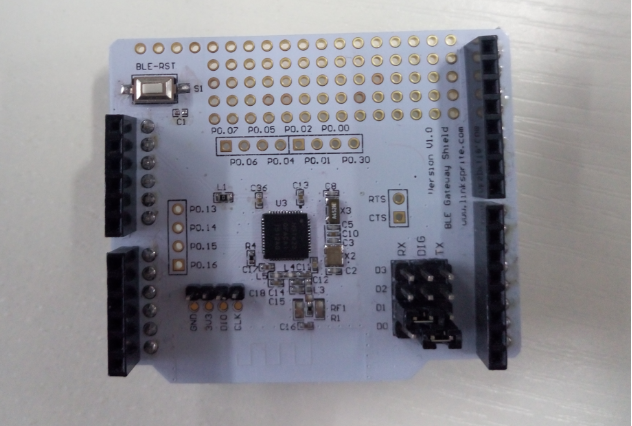
Bluetooth 4.0 BLE Gateway Shield is an addon that can turn pcDuino8 Uno into a Bluetooth 4.0 BLE gateway. It is using Nordic nRF51422 chipset and Arduino compatible. User have the flexibility to what serial ports (soft serial port or hard serial port on pcDuino) can be used to talk to the gateway by installing jumpers. User can also reflash the firmware of the nRF51422 chipset using the on-board debug headers. For example, user can choose to flash the chipset with MBED BLE and S110 protocol.
Features
- NRF51822 Bluetooth Low Energy & 2.4GHz Wireless SOC
- MBED program compatible
- Debug headers
- Arduino and pcDuino compatible serial port communication
- Soft serial-port and Hard serial port available.
Firmware flash
All BLE gateway shield comes with a gateway firmware pre-installed.
If we need to reinstall the firmware to the bluetooth shield. Please follow the following steps:
To flash the firmware the bluetooth chipset, we use Jlink to burn the firmware.
1)Preparation Tool
- Jlink JTAG x 1
- Jumper wires x 4
- BLE Gateway Shield x 1
2)Firmware burning
Jlink pins definition:
Connecting Jlink JTAG’s VCC, GND, SWIO, SWCLK to corresponding pins of BLE Gateway Shield (some jlink JTAG DOESN’T have power output, we need provide power separately) .
Open J-Flash software->Option->Project settings->CPU->Device->Nordic Semi nRF51422_xxAA
Project settings->Target Interface->SWD
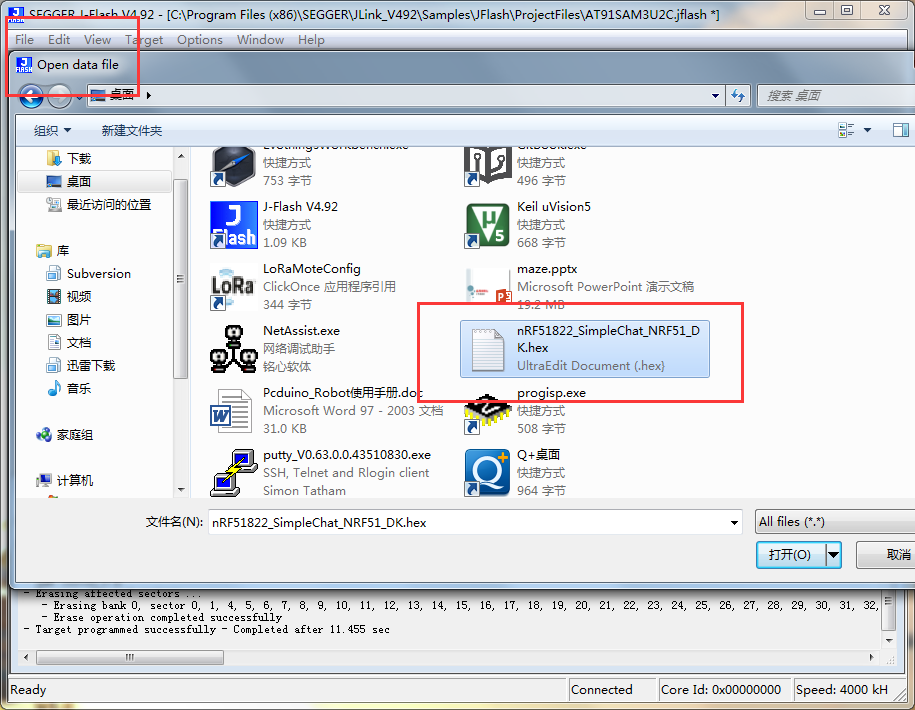
File->Open data file->nRF51822_SimpleChat_NRF51_DK.hex
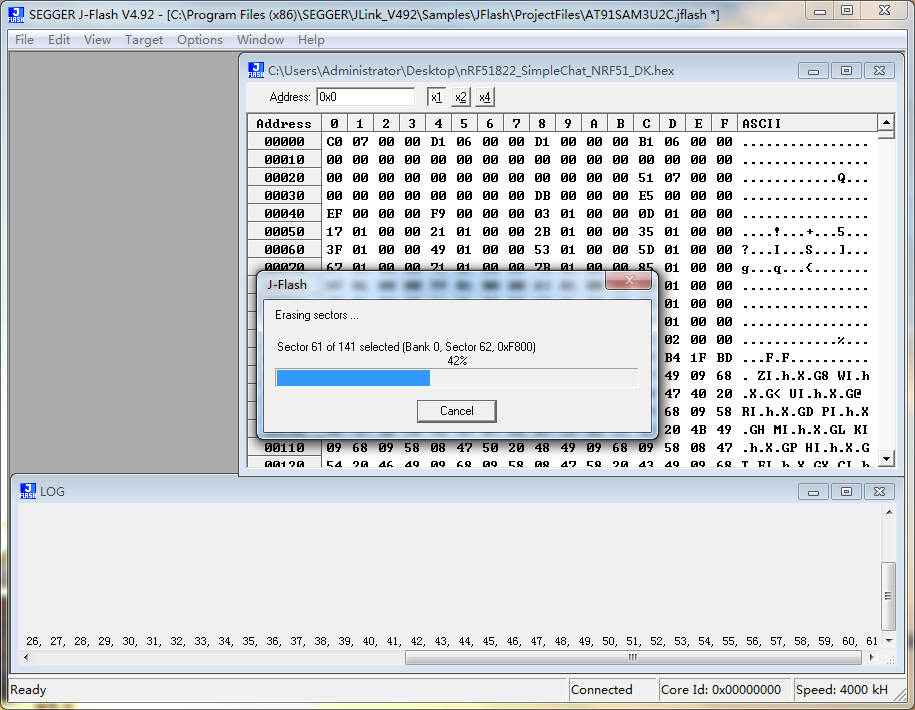
The resulting configuration is complete , After configuration completed, press F5 to download , waiting for the download to complete . As shown below:
Module Testing
(1)Preparation Tool
- Arduino UNO x 1
- BLE Gateway Shield x 1
- iphone/Android phone x 1
(2)program
The BLE Gateway Shield connected to the Arduino UNO, Connecting BLE Gateway Shield to Arduino then burn the program.
 byte inbuff[100];
 byte outbuff[100];
 // Baud Rate
 #define BaudRate 9600
 //#if defined SOFTUART
 #include <SoftwareSerial.h>
 SoftwareSerial mySerial(2, 3); // UNO RX=D5, TX=D6
 //SoftwareSerial mySerial(10, 6); // MEGA RX=D10, TX=D6
 //#endif
 void setup() {
 Serial.begin(BaudRate);
 while (!Serial) ;   // Leonardo
 //#if defined SOFTUART
   mySerial.begin(BaudRate);
 //#endif
 }
 void loop() {
   int i=0,x=0;
   while (Serial.available()) {
     inbuff[i]=Serial.read();
     i++;
   }
   for(x=0;x<i;x++){
     mySerial.write(inbuff[x]);
   }
 int j=0;
 while (mySerial.available()) {
 outbuff[j]=mySerial.read();
    j++;
  }
  for(x=0;x<j;x++){
    Serial.write(outbuff[x]);
  }
 }
( 3 ) experimental phenomena and results
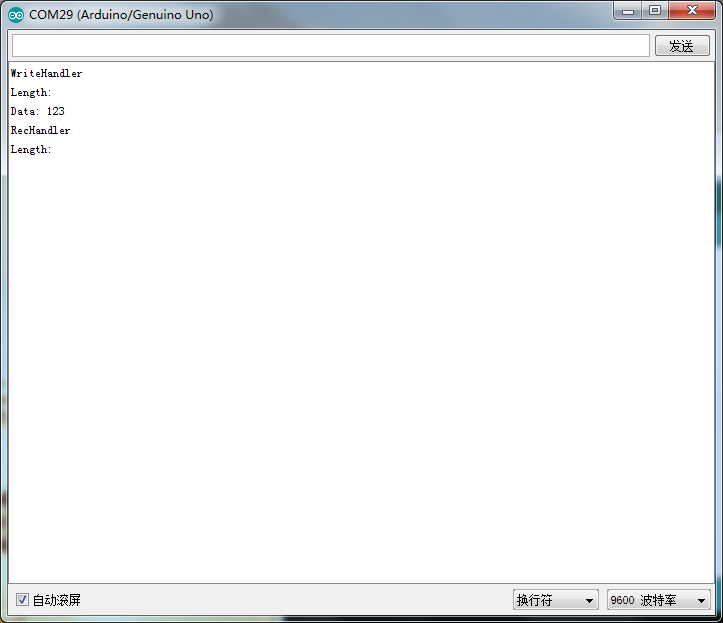
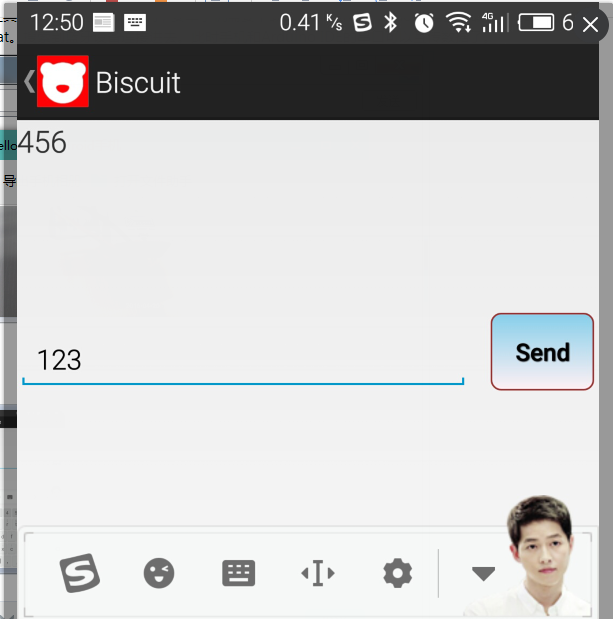
After we finished the firmware burn, open serial tool of Arduino IDE, for Android phone need download BLE Controller, iPhone need download Light Blue. Android phone for example, open BLE Controller, choose Simple Chat, then connect the gateway, we can send data now.
