Difference between revisions of "Linker Zigbee Gateway Module"
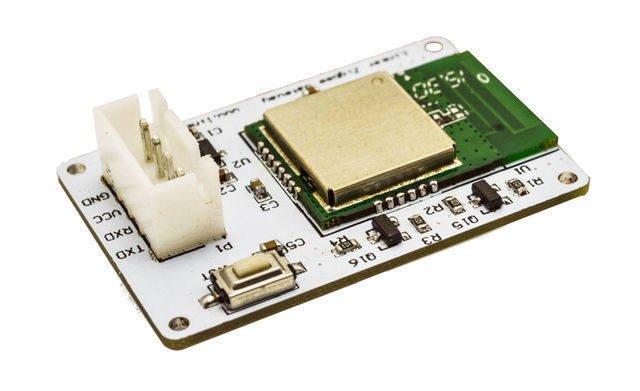
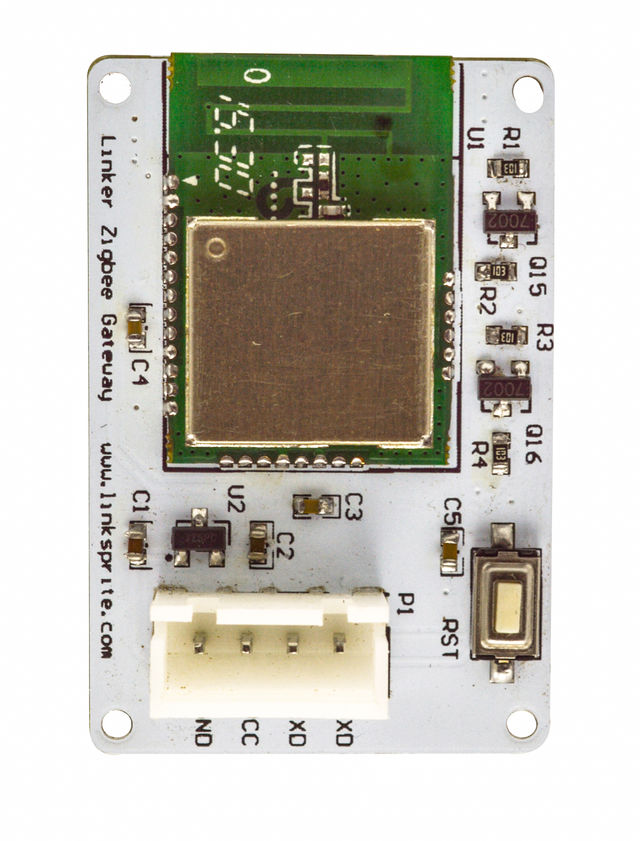
(Created page with "== Introduction == 640px 640px Linker ZigBee gateway module is one kind of Linker modules which can communicate...") |
(→Steps) |
||
| Line 50: | Line 50: | ||
*Create an account and login | *Create an account and login | ||
*Create a device with type 00, and arbitrary device name and group name. | *Create a device with type 00, and arbitrary device name and group name. | ||
| + | |||
| + | [[File:118101035-instruction-1.jpg]] | ||
| + | |||
| + | |||
| + | *Obtain deviceID | ||
| + | |||
| + | [[File:118101035-instruction-1.jpg]] | ||
| + | |||
| + | *Obtain apikey | ||
| + | |||
| + | [[File:118101035-instruction-1.jpg]] | ||
| + | |||
| + | |||
| + | 2. Hardware connection | ||
| + | |||
| + | According to the following diagram to connect pcDuino3B, ZigBee gateway and other equipment. | ||
| + | |||
| + | [[File:118101035-instruction-1.jpg]] | ||
| + | |||
| + | |||
| + | 3. Download the ZigBee gateway demo code | ||
| + | |||
| + | Turn on pcDuino3B, open a terminal and download the zigBee gateway code from the github. We also need to modify the deviceID and apikey with yours, run the code and add a ZigBee device. | ||
| + | |||
| + | Download source files | ||
| + | git clone https://github.com/YaoQ/zigbee.git | ||
| + | |||
| + | Modify apikey and deviceID using the ones obtained above. | ||
| + | |||
| + | cd zigbee | ||
| + | vim zigbee.py | ||
| + | |||
| + | [[File:118101035-instruction-1.jpg]] | ||
Revision as of 02:59, 29 June 2016
Introduction
Linker ZigBee gateway module is one kind of Linker modules which can communicate with up to 32 ZigBee node devices. It is powered by Marvell 88MZ100 ZigBee microcontroller SoC chip. This ZigBee offers advantages for many application scenarios, including lighting control, smart metering, home/building automation, remote controls and health care applications.
Features
- Marvell MZ100 ZigBee SoC chip
- A ZigBee compliant platform and IEEE802.15.4-2003/2006 transceiver
- 32 bit ARM Cortex M3 microcontroller running at 32 or 64 MHz with Marvell’s proven peripheral IPs
- On-chip DC-DC converter that can directly take input range from 2 volt to 3.6 volt
- UART serial communication protocol
- Linker port with 4 pins
- 3.3V
Tutorial
we will show how to interface Deepcam ZigBee sensors to LinkSpriteIO using the Linker ZigBee gateway, and serves as a basic framework for home automation sensors application.
Prerequisites
pcDuino3B or pcDuino8 Uno X1
ZigBee water leaking detector X1
For simplicity, this tutorial uses only one ZigBee sensor: ZigBee water leak detector.
Steps
1. Register and login www.linksprite.com
Go to www.linksprite.io, create an account if you don’t have one, and login, create a DIY device. The type is 00(Custom device type). The device name and device group can be arbitrary. The following summarizes:
- Go to www.linksprite.io
- Create an account and login
- Create a device with type 00, and arbitrary device name and group name.
File:118101035-instruction-1.jpg
- Obtain deviceID
File:118101035-instruction-1.jpg
- Obtain apikey
File:118101035-instruction-1.jpg
2. Hardware connection
According to the following diagram to connect pcDuino3B, ZigBee gateway and other equipment.
File:118101035-instruction-1.jpg
3. Download the ZigBee gateway demo code
Turn on pcDuino3B, open a terminal and download the zigBee gateway code from the github. We also need to modify the deviceID and apikey with yours, run the code and add a ZigBee device.
Download source files git clone https://github.com/YaoQ/zigbee.git
Modify apikey and deviceID using the ones obtained above.
   cd zigbee
   vim zigbee.py

