Difference between revisions of "RS485/GPIO Shield for Raspberry Pi"
Qian.zhang (talk | contribs) |
|||
| (3 intermediate revisions by 2 users not shown) | |||
| Line 1: | Line 1: | ||
| − | |||
| − | == | + | |
| + | ==Introduction== | ||
This is a shield to add a RS485 level shift to the UART of Raspberry Pi. Moreover, it also breakout the rest headers for easy access. | This is a shield to add a RS485 level shift to the UART of Raspberry Pi. Moreover, it also breakout the rest headers for easy access. | ||
| − | + | [[File:RS485 RPI 1.jpg]] | |
| + | |||
| + | ==Schematics== | ||
| + | |||
| + | [https://s3.amazonaws.com/linksprite/Shields/RS485_RPI/RS485+shield+for+RPi.pdf Schematic] | ||
==Tutorial== | ==Tutorial== | ||
| Line 46: | Line 50: | ||
Save the changes, and reboot. We will get an UART with baud rate of 115200. | Save the changes, and reboot. We will get an UART with baud rate of 115200. | ||
| + | |||
| + | == Resources == | ||
| + | |||
| + | *[http://learn.linksprite.com/raspberry-pi/shield/user-tips-of-rs485-shield-for-rpi/ User Guide of RS485 Shield for Raspberry Pi] | ||
==How to buy== | ==How to buy== | ||
Here to buy RS485/GPIO Shield for Raspberry Pi on [http://store.linksprite.com/rs485-gpio-shield-for-raspberry-pi/ store] | Here to buy RS485/GPIO Shield for Raspberry Pi on [http://store.linksprite.com/rs485-gpio-shield-for-raspberry-pi/ store] | ||
Latest revision as of 07:28, 16 September 2014
Introduction
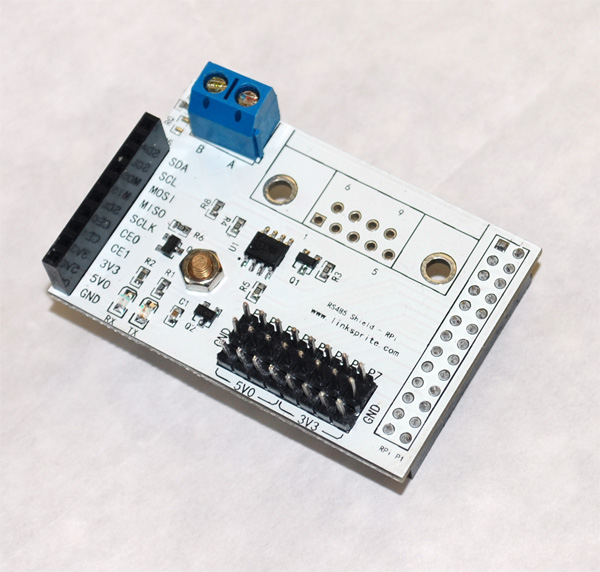
This is a shield to add a RS485 level shift to the UART of Raspberry Pi. Moreover, it also breakout the rest headers for easy access.
Schematics
Tutorial
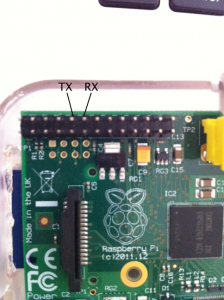
The UART on Raspberry Pi is on P1 and shown below:
The UART is /dev/ttyAMAO, it defaults to output system log. But if user wants to use this UART to connect to other modules through UART, for example, GPS module, we need to change the configuration.
The detailed steps are as following:
We need to modify two files: /boot/cmdline.txt and /etc/inittab.
Modify /boot/cmdline.txt:
Replace the original content:
dwc_otg.lpm_enable=0 console=ttyAMA0,115200 kgdboc=ttyAMA0,115200 console=tty1 root=/dev/mmcblk0p2 rootfstype=ext4 elevator=deadline rootwait
With:
dwc_otg.lpm_enable=0 console=tty1 root=/dev/mmcblk0p2 rootfstype=ext4 elevator=deadline rootwait
Modify /etc/inittab:
Comment out the last line of /etc/inittab. To comment out, it simply addess a '#'.
$ sudo vi /etc/inittab
- T0:23:respawn:/sbin/getty -L ttyAMA0 115200 vt100
Save the changes, and reboot. We will get an UART with baud rate of 115200.
Resources
How to buy
Here to buy RS485/GPIO Shield for Raspberry Pi on store

