Difference between revisions of "Hardware Kit for Off-line Store/Shopping mall Operational Management Solution Based on Face Recognition"
m (→Add Device) |
m (→Sign Up) |
||
| (3 intermediate revisions by the same user not shown) | |||
| Line 64: | Line 64: | ||
Click on the link below to enter the user login page of AISHOP. | Click on the link below to enter the user login page of AISHOP. | ||
| − | https://aishop. | + | https://aishop.linksprite.com/ |
| − | [[Image:AISHOP 2. | + | [[Image:AISHOP 2-1-1.jpg]] |
Click on 'Sign Up', then fill in the relevant information as required below, | Click on 'Sign Up', then fill in the relevant information as required below, | ||
| Line 83: | Line 83: | ||
[[Image:AISHOP-1-20.png]] | [[Image:AISHOP-1-20.png]] | ||
| − | |||
==== Add Store ==== | ==== Add Store ==== | ||
| Line 98: | Line 97: | ||
''The MAC address is a 12-bit string consisting of only numbers and letters. It must be filled in all uppercase. Do NOT put colon.'' | ''The MAC address is a 12-bit string consisting of only numbers and letters. It must be filled in all uppercase. Do NOT put colon.'' | ||
| + | |||
[[Image:AISHOP-9.jpg]] | [[Image:AISHOP-9.jpg]] | ||
Latest revision as of 05:43, 27 November 2019
Contents
Introduction
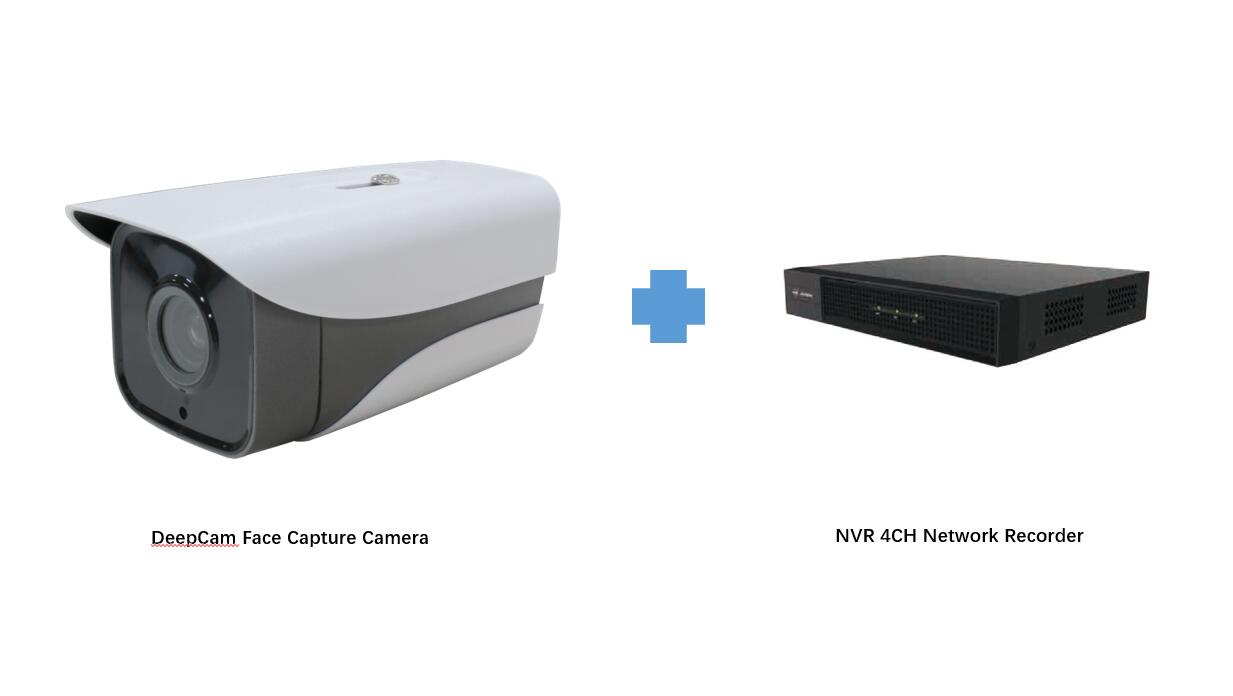
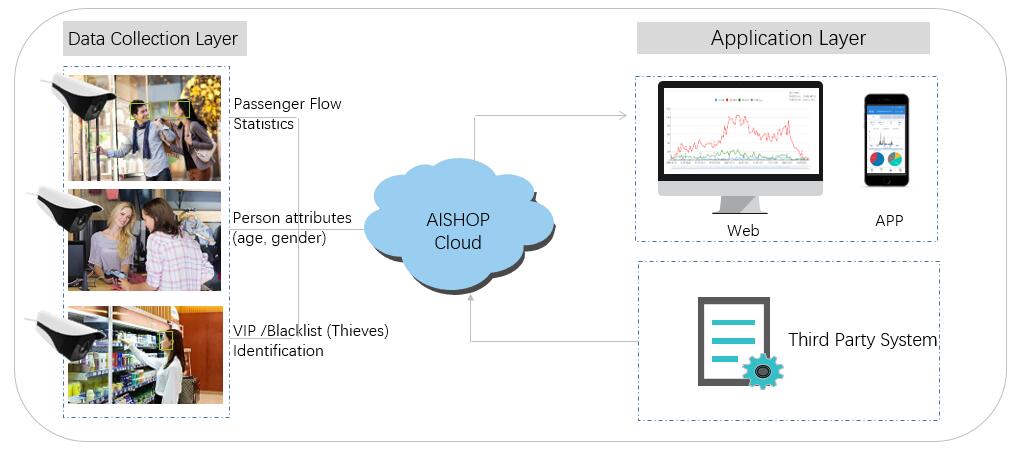
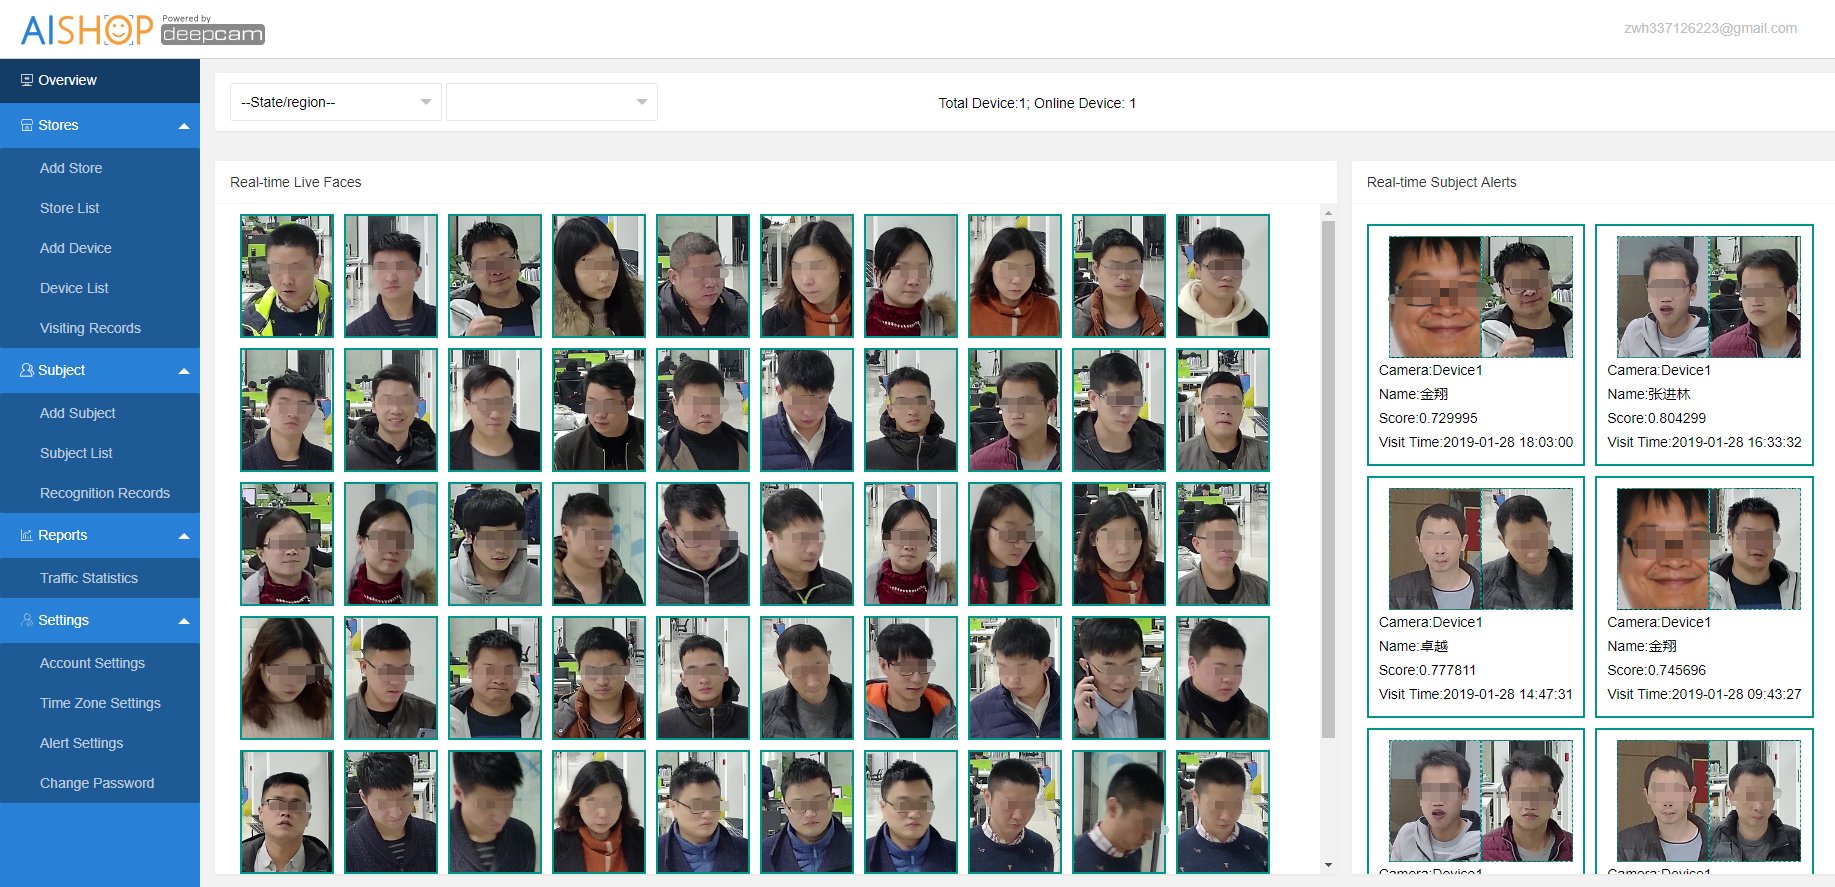
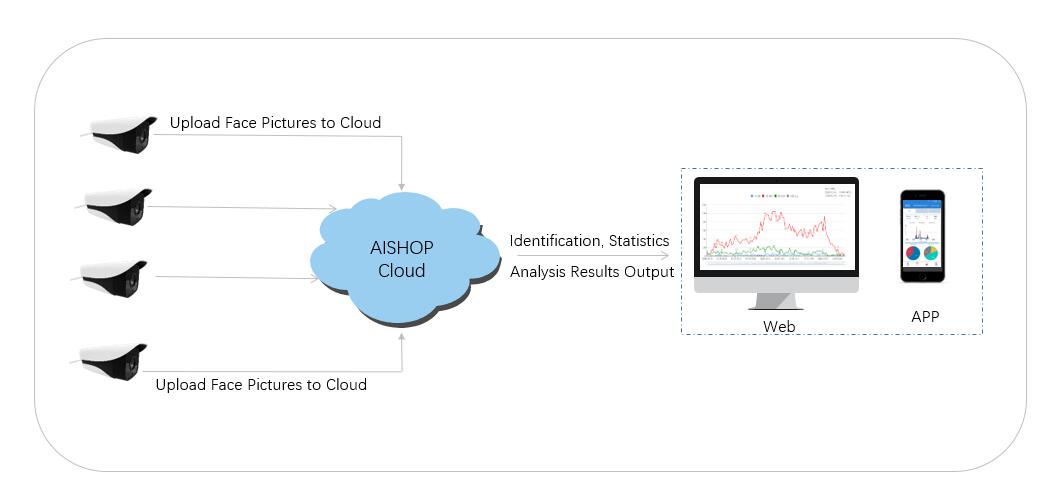
This is a set of system hardware device that uses face recognition technology to help customers manage shops and guard family safety. It can be connected with the DeepCam AISHOP system to view the statistical analysis data of the face pictures captured by the Face capture camera. The AISHOP system platform provides multi-dimensional data analysis and statistical results based on deep learning face recognition, computer vision and big data analysis technology, including store customer traffic, Person attributes (age, gender), VIP customer management. Blacklist (thieves) identification alarms, etc., to help managers arrest thieves, tap potential customers, predict consumption trends, optimize resource allocation, and achieve precise marketing.
LinkSprite AISHOP uses facial recognition camera to do face based people counting for brick and mortar store, customer management and loss prevention and security. In addition, it can be used for small business and home security to keep track of the person lingering around the premise.
System Display
Features
• Passenger Flow Statistics
• Age Recognition
• Gender Recognition
• VIP Customer Identification/Blacklist (Thieves) Identification
• Real-time Watching Monitoring Video on App/Web
• Real-time View Of Management Data On APP/Web
Package List
1x Deepcam face capture camera
1x DeepCam Face capture camera Adaptor
1x NVR 4CH Network Recorder
1x NVR Adaptor
Frame Diagram
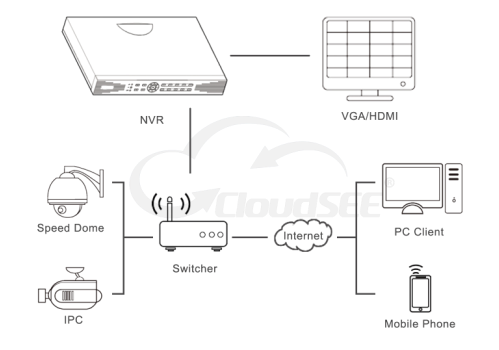
NVR Installation Diagram
AISHOP System Framework Diagram
How to add DeepCam Face capture camera to AISHOP system?
AISHOP provides web (aishop.deepcam.com) and mobile apps (android and iOS) clients. Search “NowYouKnow” in google play to find the Android app.
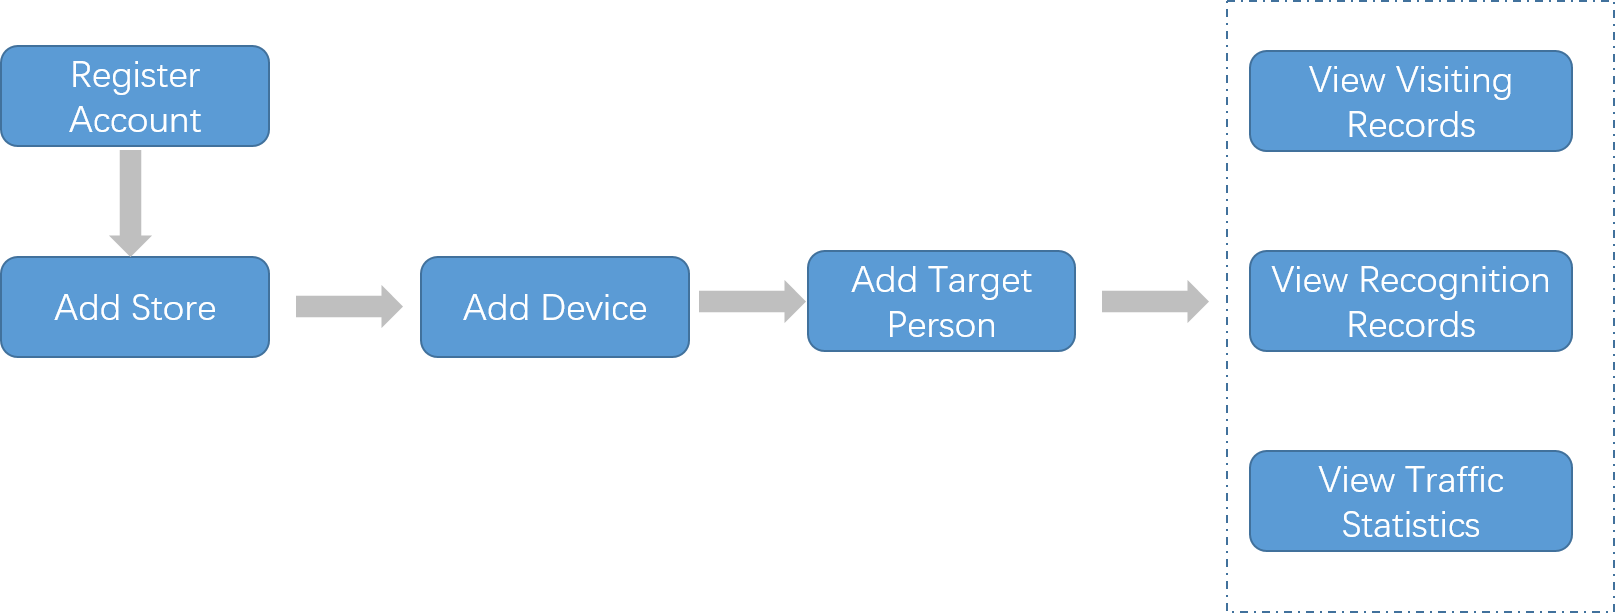
Whichever way you choose, the basic steps are as follows:
Using Web Application
Sign Up
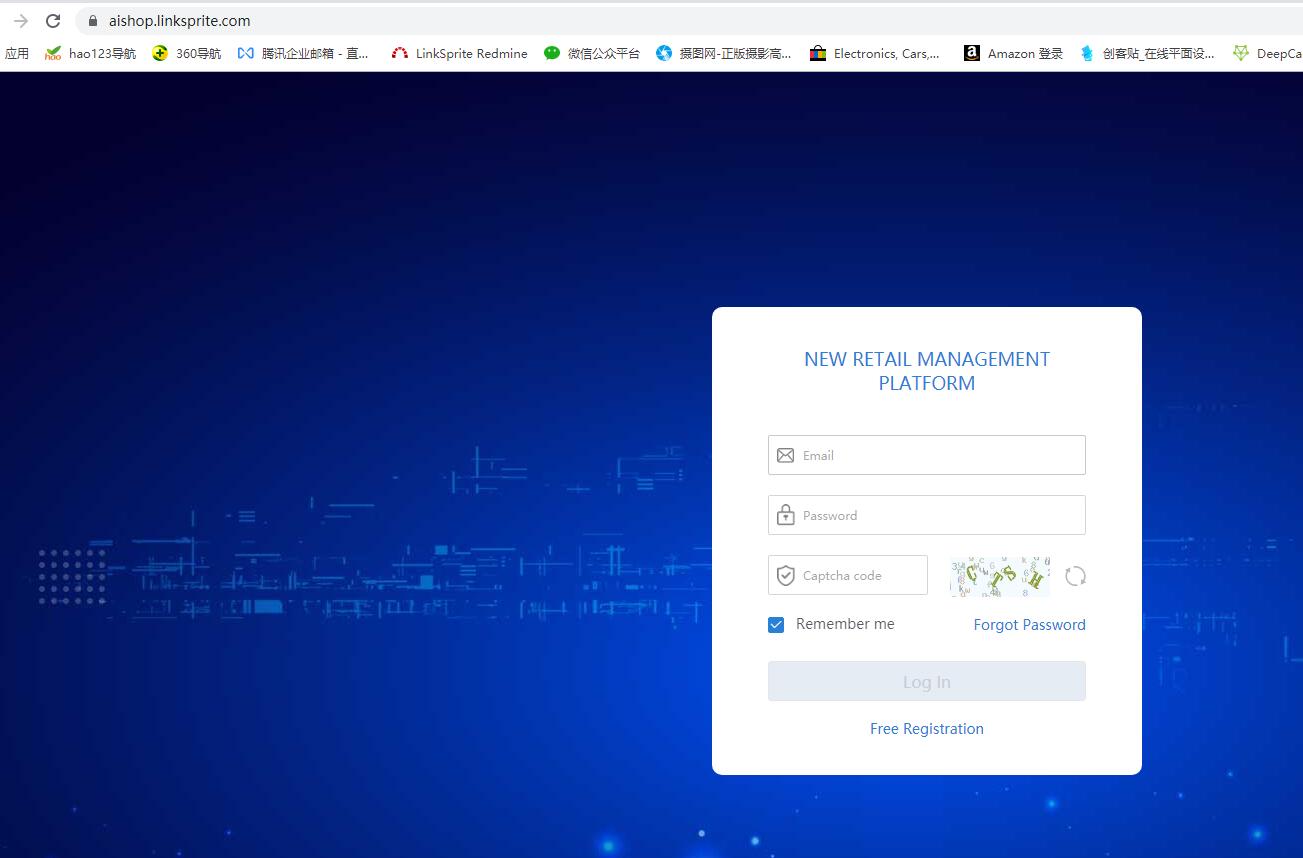
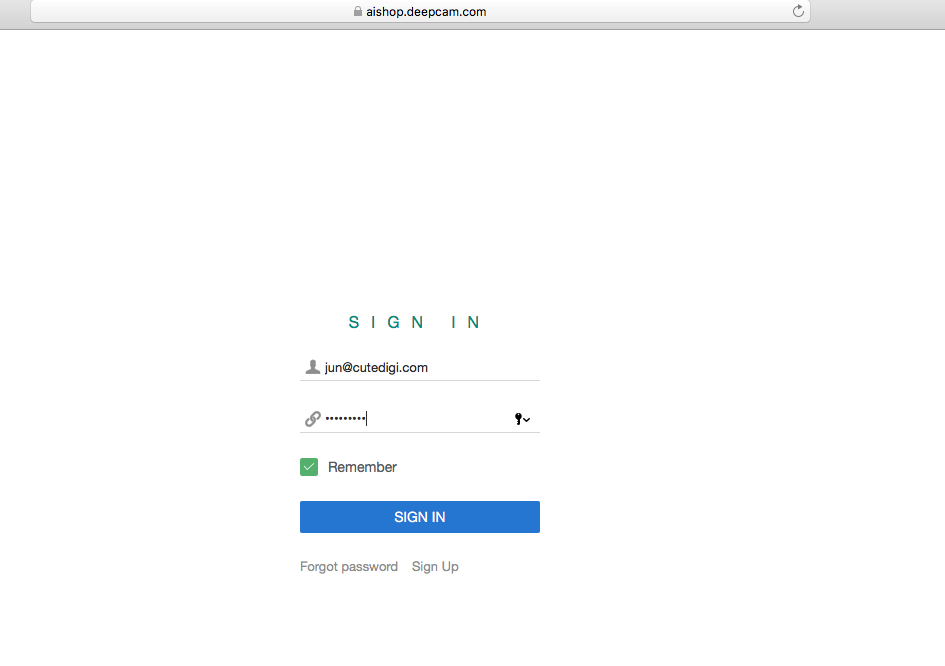
Click on the link below to enter the user login page of AISHOP.
https://aishop.linksprite.com/
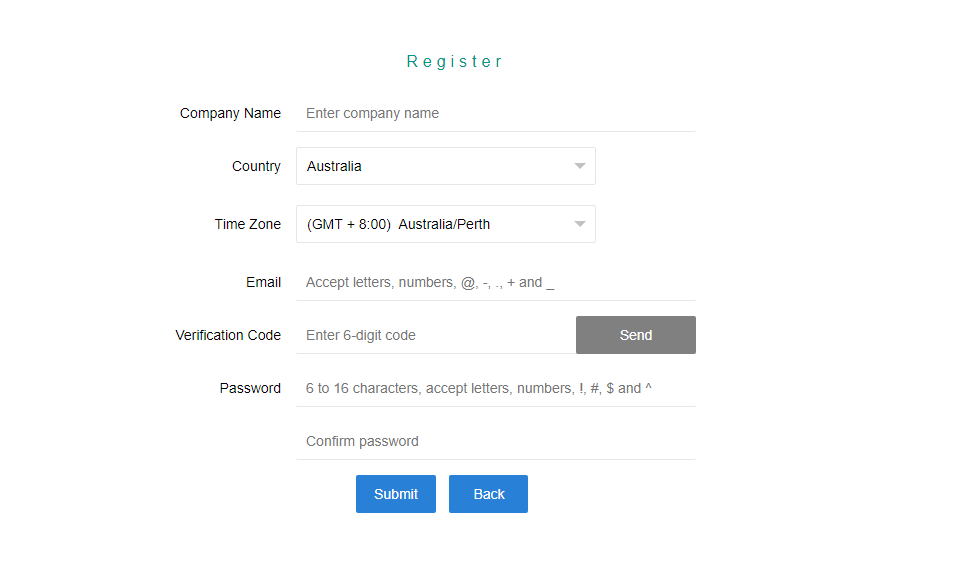
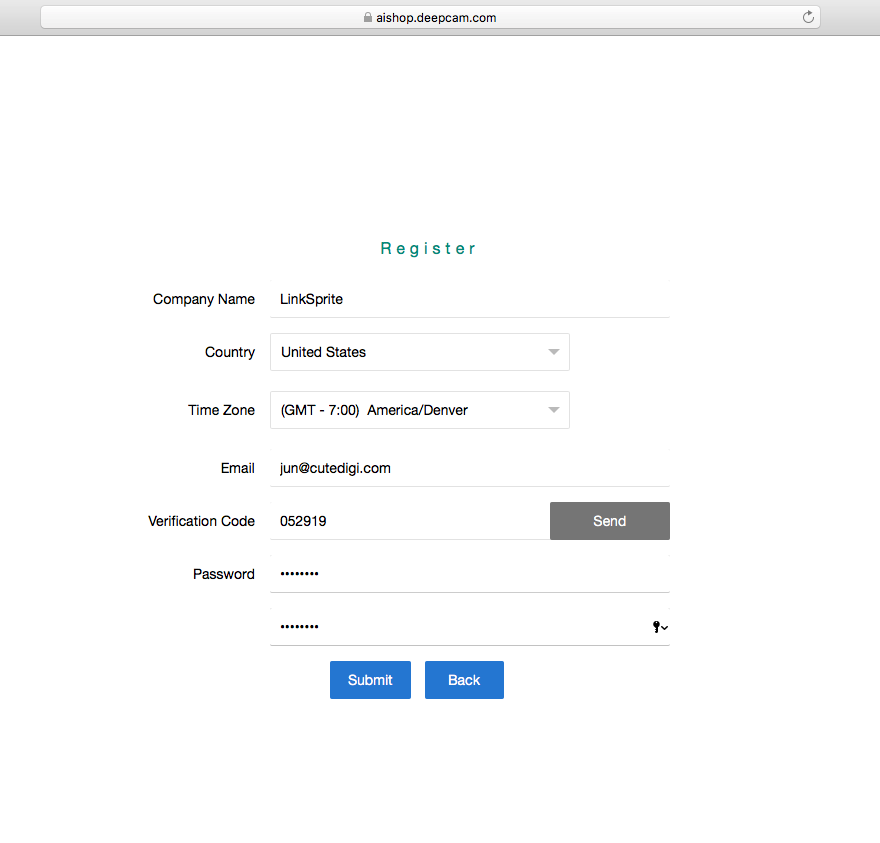
Click on 'Sign Up', then fill in the relevant information as required below,
After click send, check the verification code in the email. If the code doesn’t show up, it could be tagged as spam by your mail provider.
Click Submit to register, and then you can log in to your account.
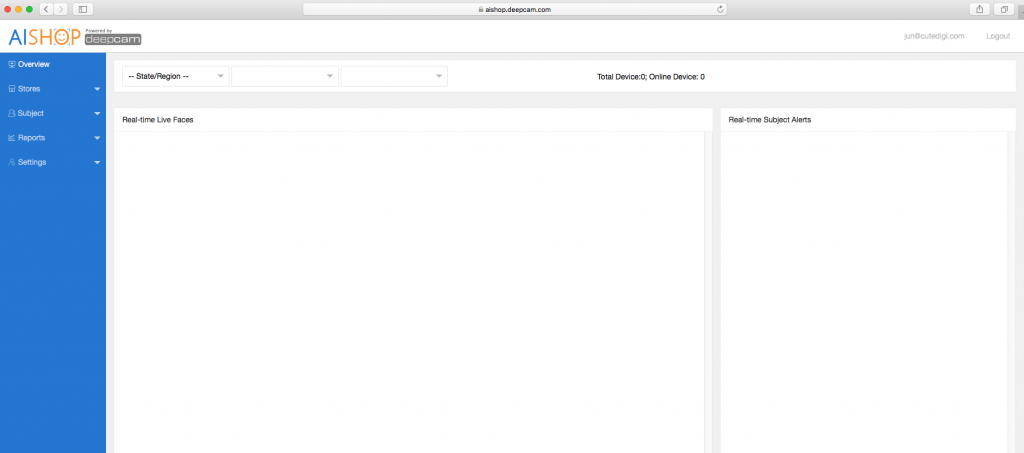
When you first log in to your account, it will be shown below:
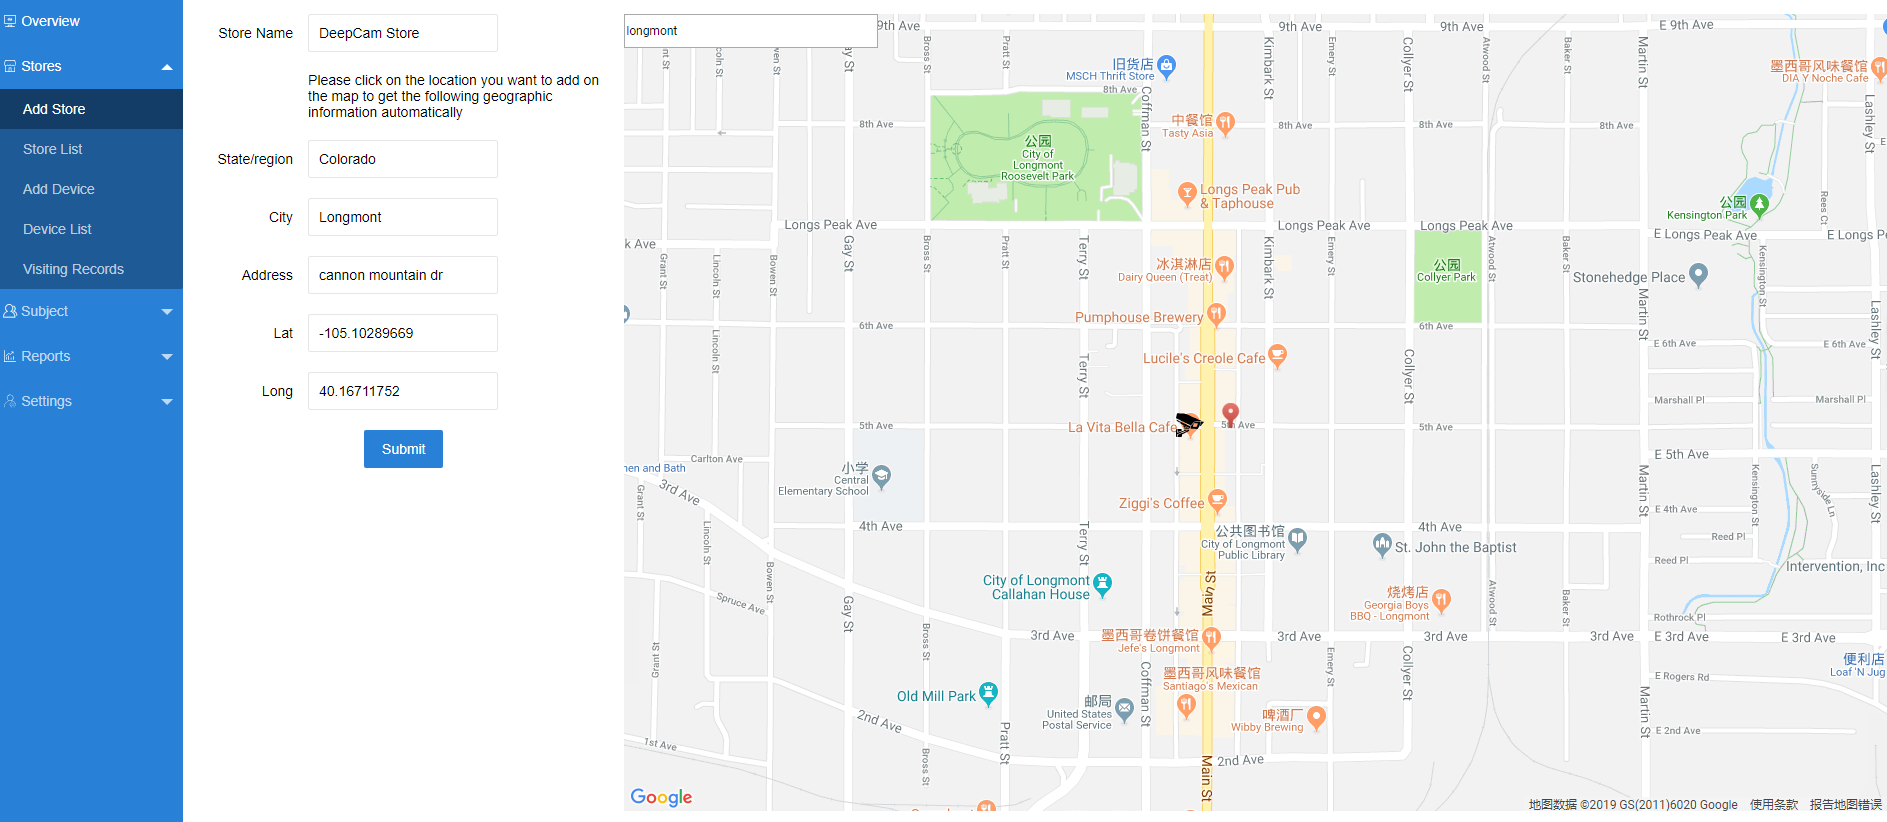
Add Store
The lat and long will be filled automatically when you click the point on the map where the camera is installed. Note: it doesn’t need to be accurate.
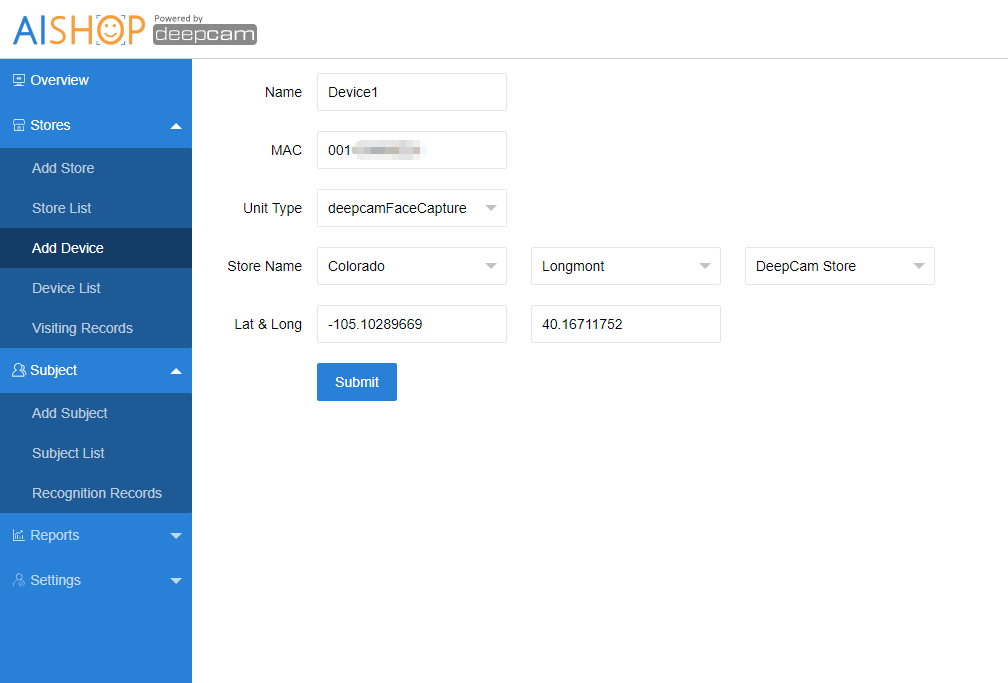
Add Device
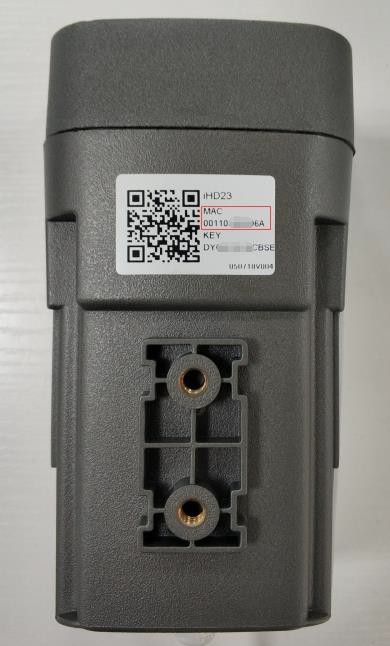
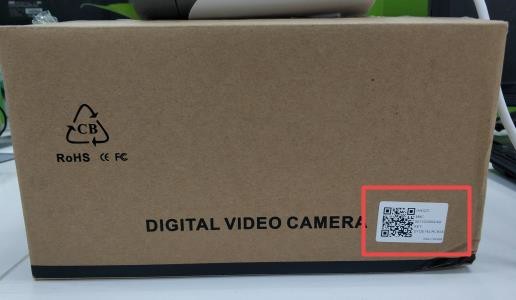
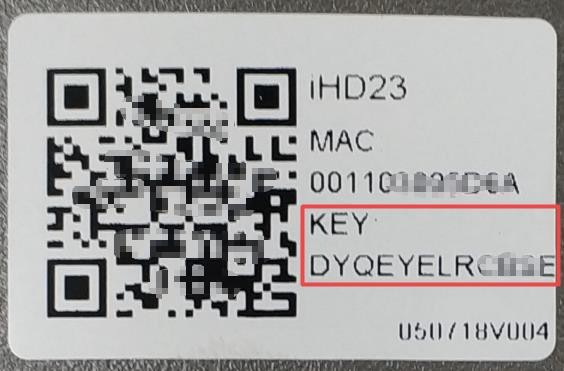
a) Enter the camera name and MAC address in turn.The camera MAC address can be obtained by wrapping or by removing the bottom cover of the camera to view the fuselage tag.( The bottom cover of the camera is snap-fastened and can be removed directly without tools.)
The MAC address is a 12-bit string consisting of only numbers and letters. It must be filled in all uppercase. Do NOT put colon.
b) Select "deepcamFaceCapture" for device type
c) Select the corresponding stores that the camera needs to add through the drop-down box in turn
d) Click [Submit] to complete the device addition.
e) On the [Device List] page, you can query the list of added cameras. At this time, the online status is red, indicating that the device is offline.
f) Power cycle your camera, and waits for about 3 to 6 minutes. When you refresh the page, you can find that the online status is green, indicating that the device is online.
If the camera is powered on before adding the device, please power on the device again and follow the steps described above to ensure that the device is online.
Adjust The Mounting Angle And Focal Length Of The Camera
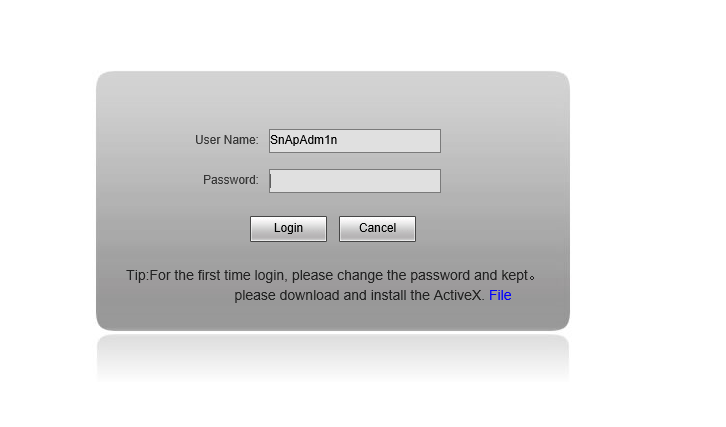
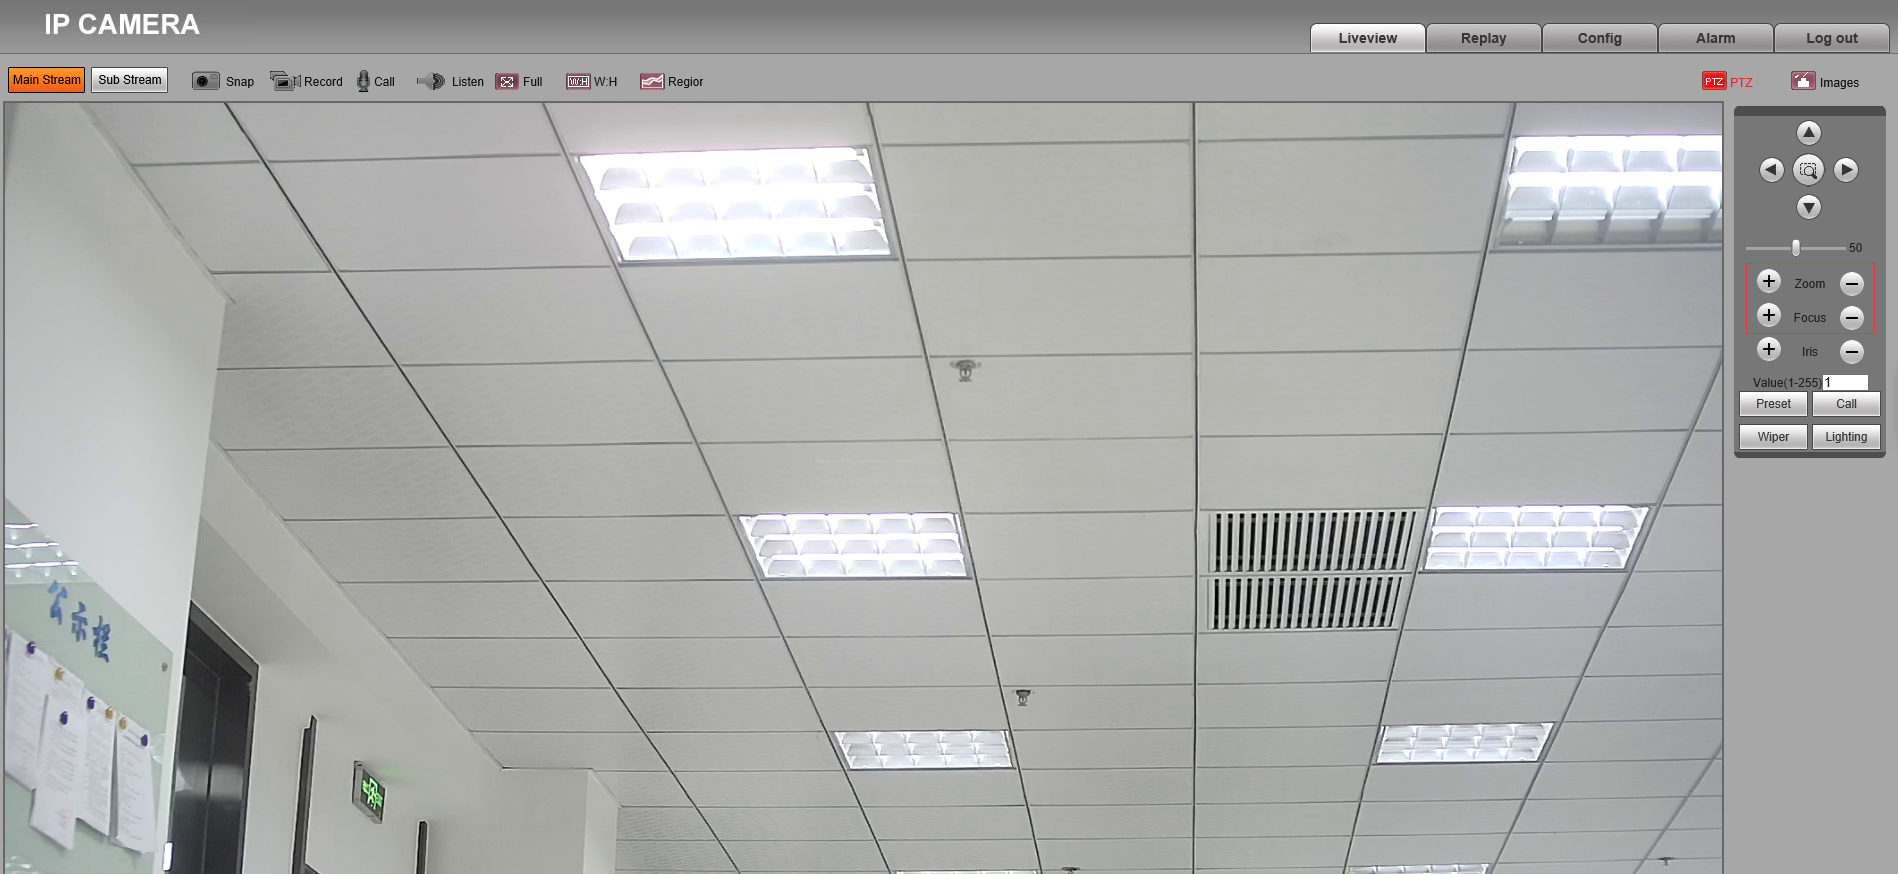
After the device is online, a very critical step is to adjust the mounting angle and focal length of the camera. Please refer to the installation specification for specific requirements. We can log in to the web page of the webcam or work on the app. Here, we use the login camera web background page as an example.
1. Enter the IP address of the camera in the Internet Explorer address bar and enter the login page. When accessing with IE browser for the first time, plug-ins must be installed. Background Web access only supports IE kernel browsers.
2. User name is SnApAdm1n, password is KEY on the label. In order to ensure the normal operation of the device, please do not modify user name and password at will.
3. After successful login, zoom operations can be performed on the right side of the [Preview] page to make the face captured by the camera clear.
Visiting Records Enquiries
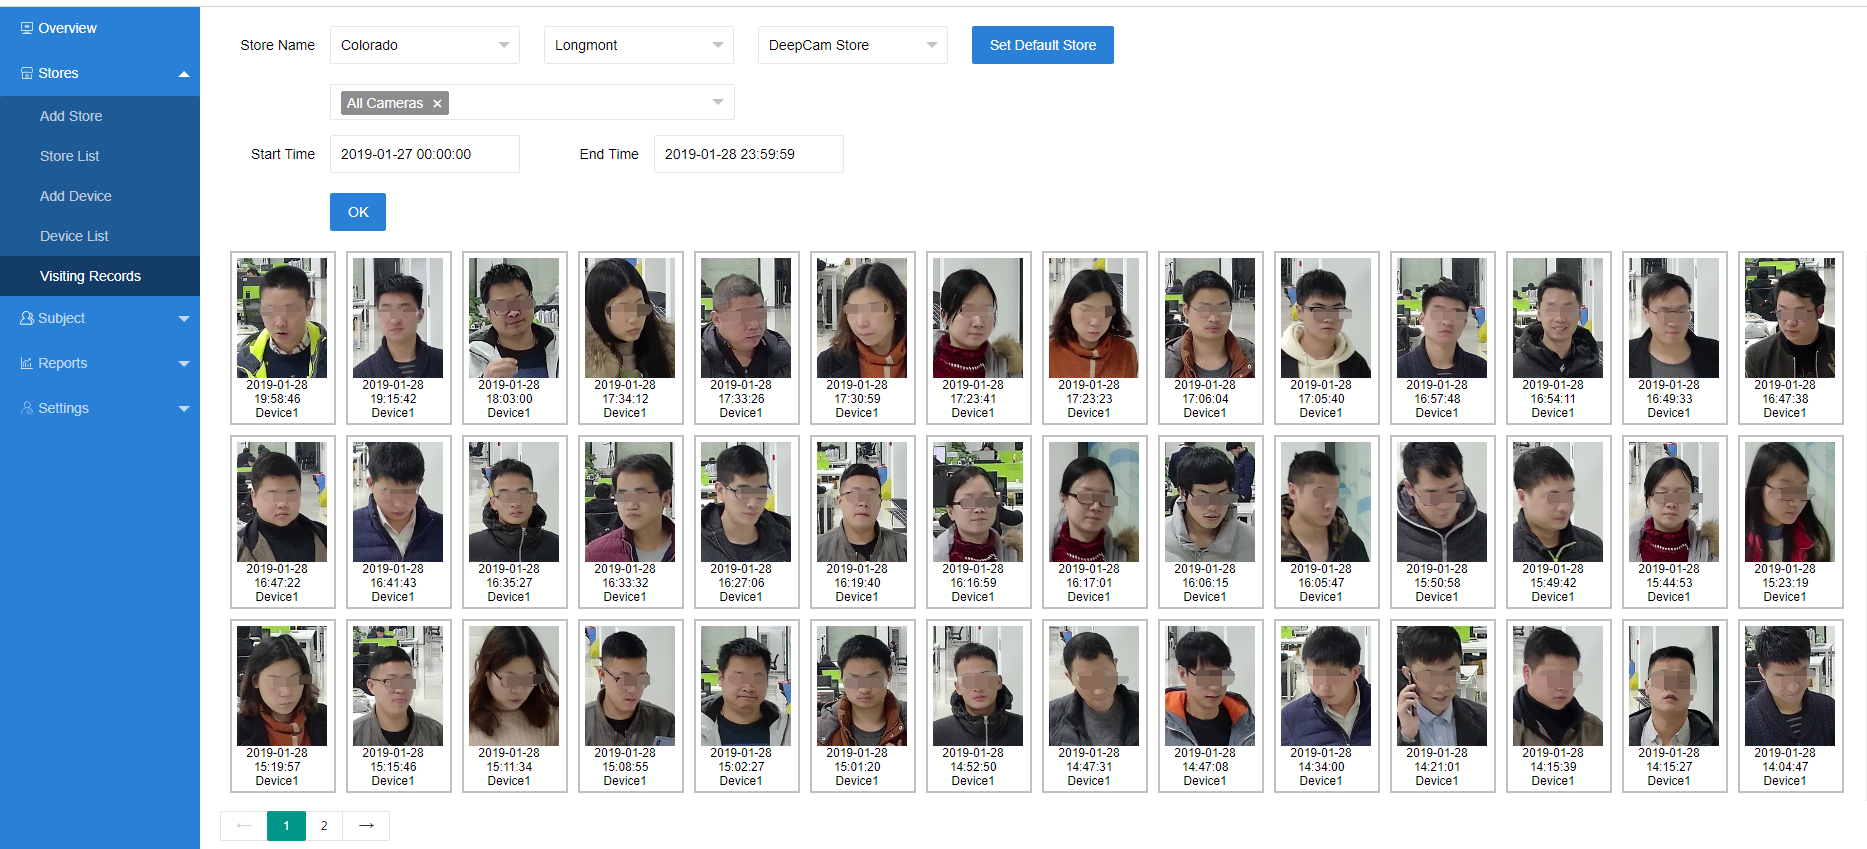
Click [Store] →[Visiting Records], you can select the time to query the visit record.
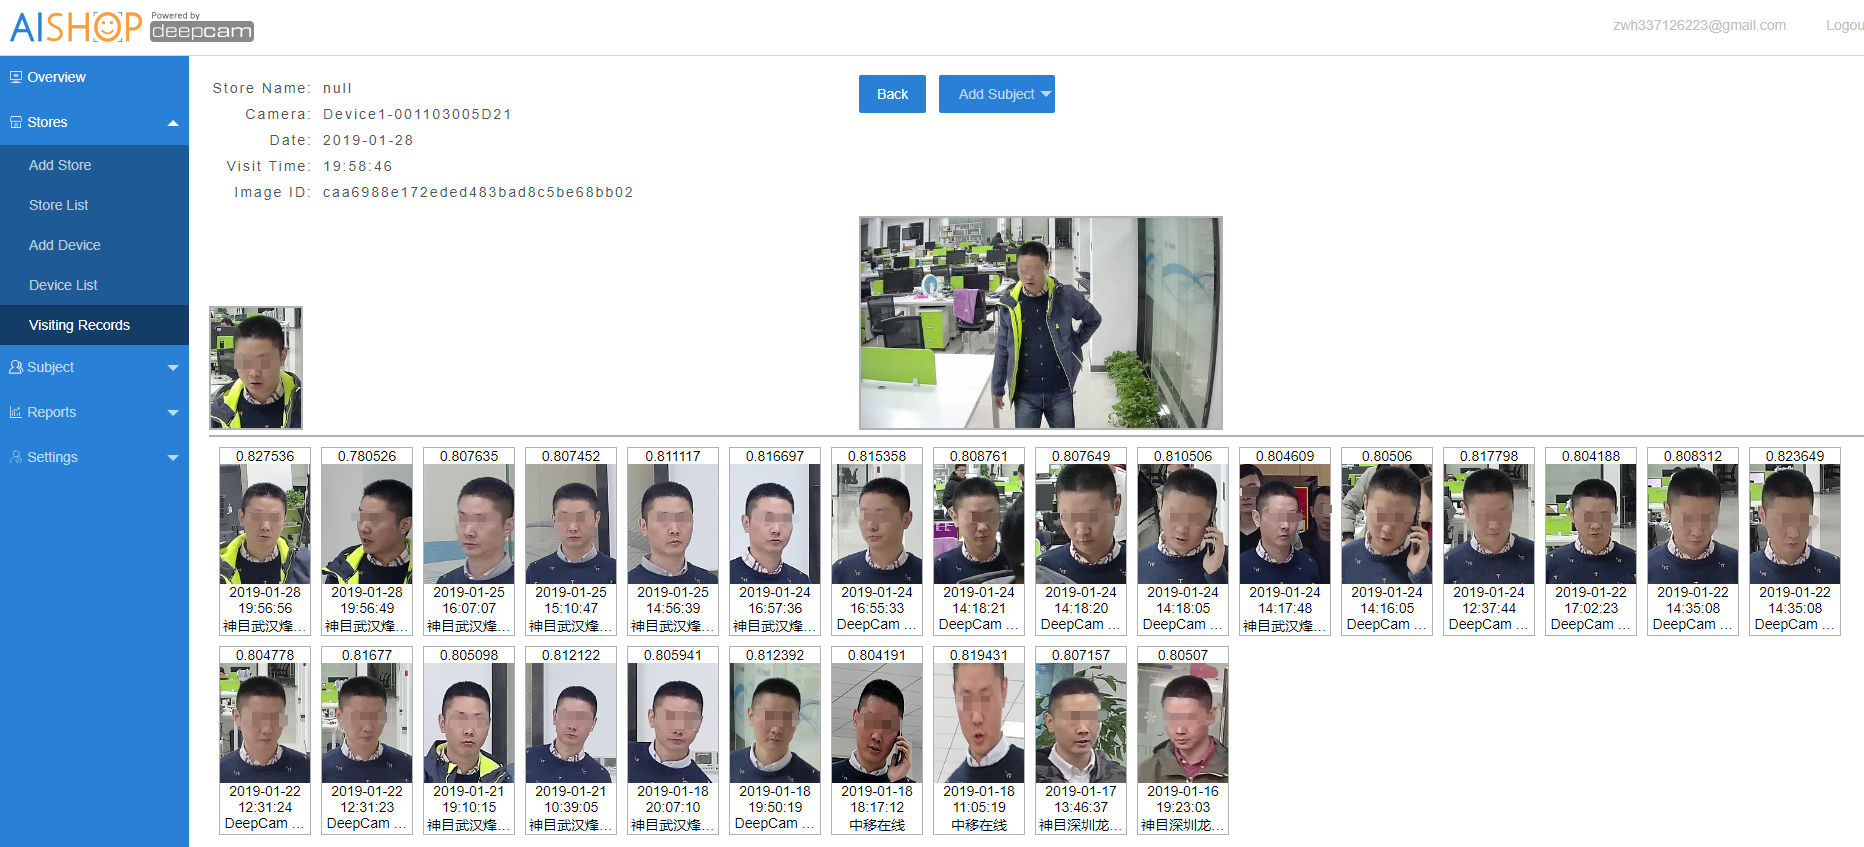
After clicking on any face image, the detailed information of the face image will appear, and the face will be clustered and displayed.
Add Subject
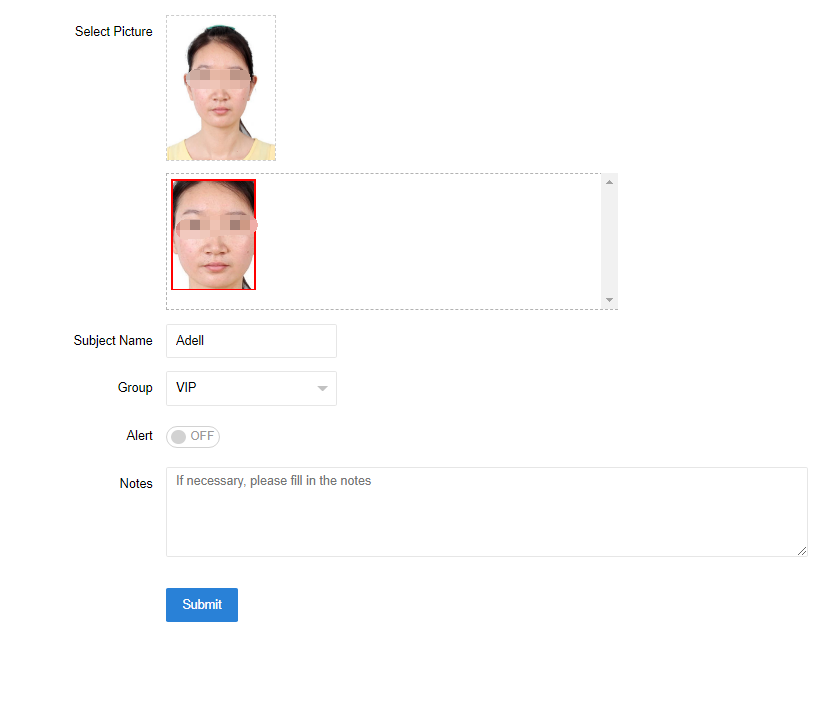
There are two ways to add the target person: one is to input the external face photos, the other is to add the face captured by the device.
Method 1: Select [Subject] → [Add Subject] to add face photo from the local PC
a) Select the photo of the person you want to add from the local PC.
b) When a person's photo is added from a local PC, the system will detect and intercept the face part of the photo. If there are more than one person in the photo, the system will return several face photos for selection. Please click on the face photo of the target person you want to add.
c) Enter the name of the target person in turn, select the corresponding grouping, choose whether to open the message push or not, and choose to enter the comment information.
d) Click [Submit] to complete the entry of the target person addition
f) Click [Subject List], you can see the successfully added person and modify their names, groupings, whether to open message push, notes.
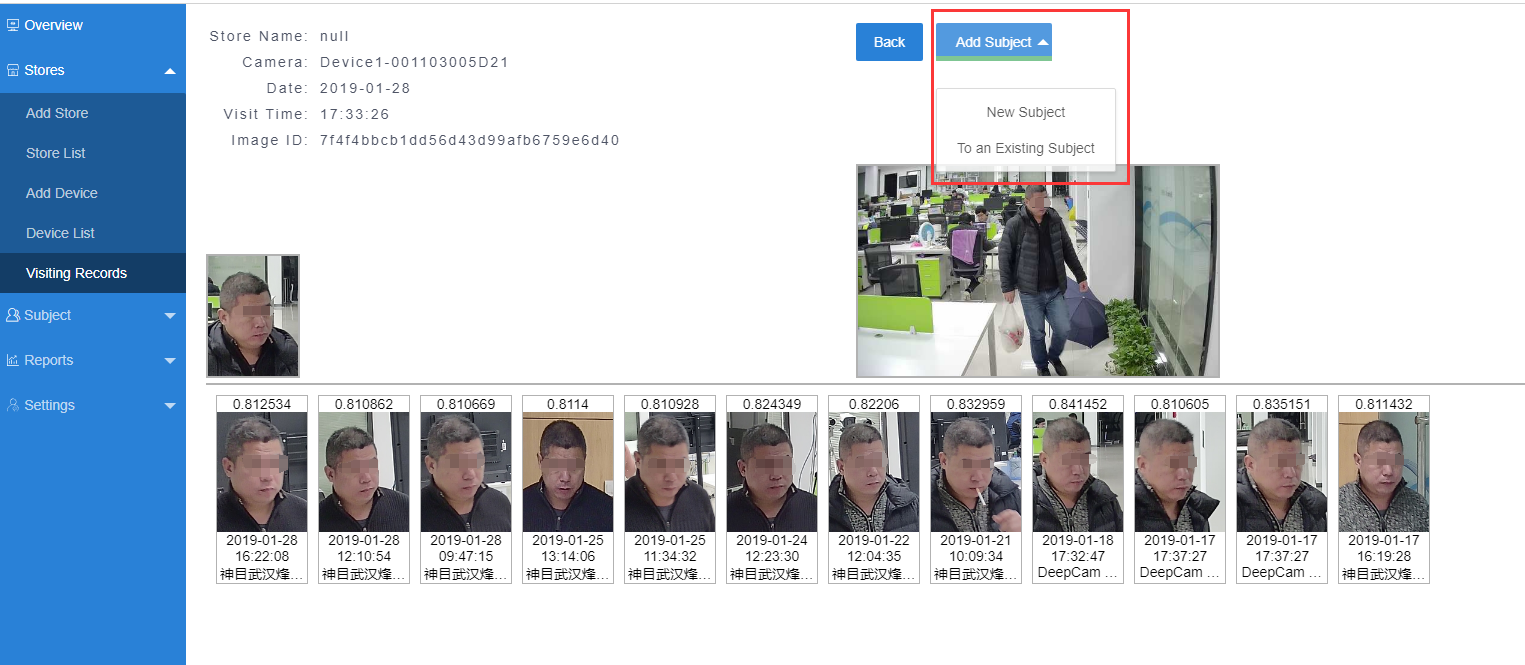
Method 2: Click on [Stores] → [Visiting Records], then click on the photo of the target person you want to input. and input the captured face by clicking on "Add Subject"
Adding More Face Photos To The Target Person
Click [Subject] →[Subject List], then click icon to add more face photos of target persons.
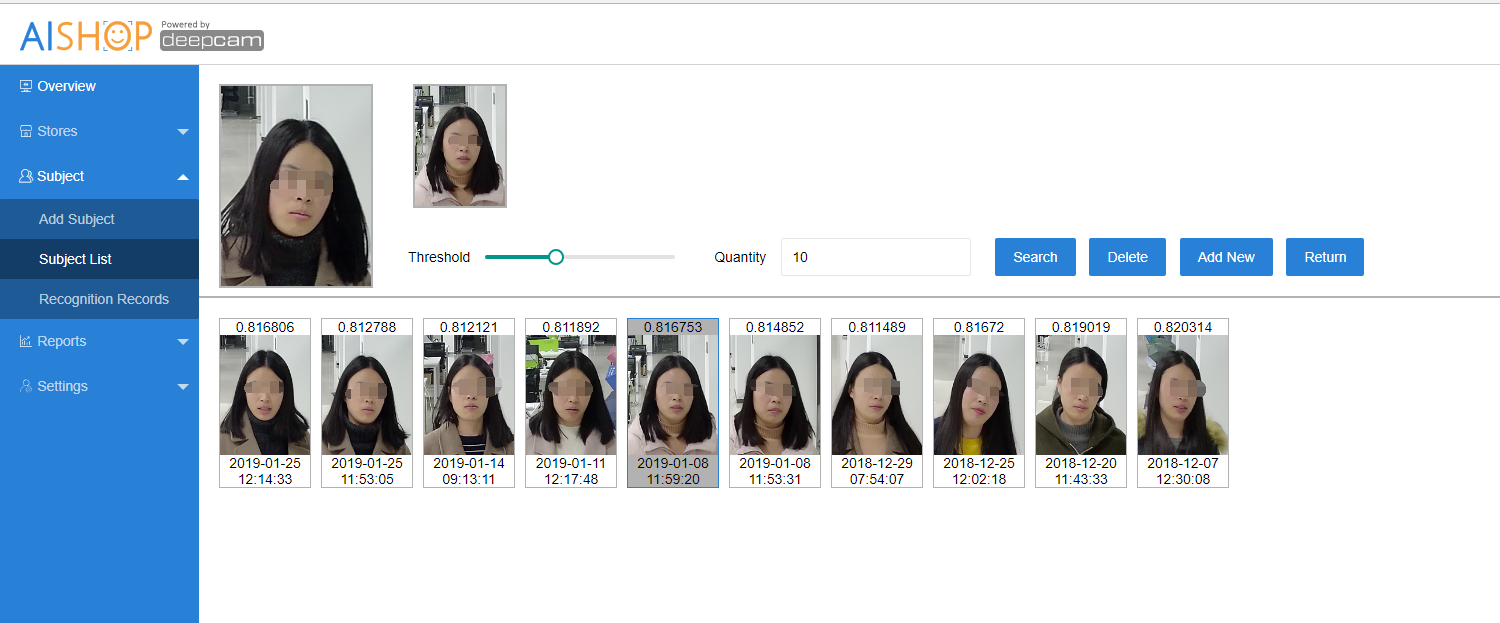
a) Drag the appropriate threshold and click [Search]
b) In the search results, select the clear face photos of the same person that you want to append and click on [append]. Maximum 5 face images are allowed to be appended by association.
c) When the addition is successful, the result will be displayed on the right side of the person's main picture, as shown in the following figure
d) Additional images can be deleted. It should be noted that the first registered face image, that is, the main image of the person is not allowed to be deleted, and can only be operated by deleting the target person, but also means that the subsequent identification records of the person before deletion can not be queried.
Create Sub Account
Click [Settings] → [Account Settings] to create sub account
You can select the operation permission level of the new sub-account you will create. In the above picture, when [Company Name] is empty, the current selection is the highest permission level. The same level as the primary account by default. If a company is selected, then sub-accounts can only view and operate the stores belonging to the company. It should be noted that the target person is added to the company's name, regardless of the rights of the sub-account, you can see all registered personnel.
Alert Settings
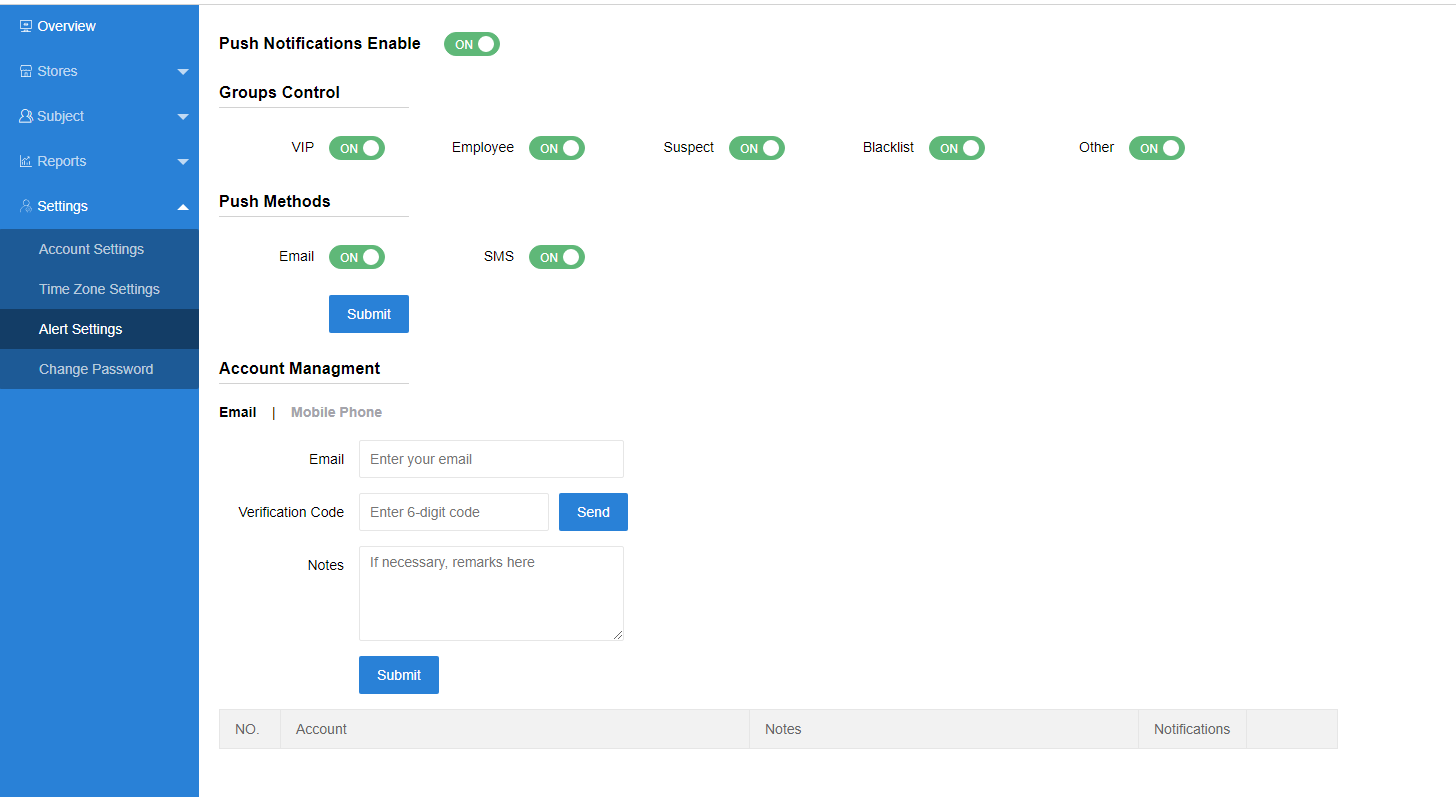
Alert Setting means that when the registered target person is recognized by AISHOP platform, the system will push the reminder message to the e-mail or (and) mobile APP client.
About Control Switch:
• Push Notifications Enable. It is the main switch, and the other settings will be valid when it is turned on. If it is closed, the system will not push any messages out.
• Groups control. Each group can be controlled separately. If the switch of one group is off, the system will not push any messages out whether the target person in the group has opened the message push or not. If the switch of one group is on, the target person who opens the receiving message push under the group, the system will push the information to the specified account once it is recognized by the system.
• Push Methods. At present, two push modes can be realized, Email and App. APP push needs to be set up in APP.
APP Video
LinkSprite Now You Know Training Video
