Difference between revisions of "NFC PN532 Shield"
Katherine.d (talk | contribs) (→Programming) |
Katherine.d (talk | contribs) |
||
| Line 55: | Line 55: | ||
| − | == | + | == Application Programming Interfaces == |
Revision as of 06:43, 6 December 2012
Contents
Introduction
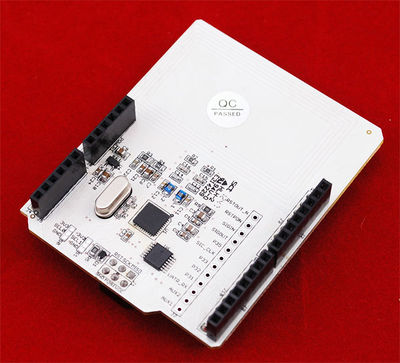
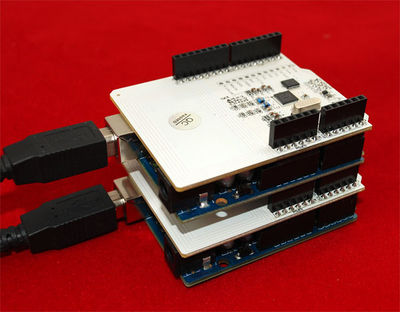
LinkSprite’s NFC (Near Field Communication) shield is a NFC shield for Arduino built around the popular NXP PN532 integrated circuit.
NFC is a short-distance radio technology that enables communication between devices that are held close to each other.
NFC traces its roots in RFID technology and is an open platform technology standardized in ECMA-340 and ISO/IEC 18092.
NFC is widely used similar to RFID to recognize cards/tags (NXP Mifare cards /tags). NFC can be used as an alternative to Travelcard using the read/write memory provided in cards/tags.
Few mobile phones come with built-in NFC - they are used as readers of cards, tags, smart posters with a web URL (like a mobile QR-code reader). This technology is also being applied in smart cashless purchases.
Like many other standards, NFC technology is regulated by the NFC which standardizes NFC communication - how the devices pair, share data and allow a secure transaction to happen. The NFC Forum develops and certifies devices compliant with the NFC standards.
NFC operates on unlicensed ISM (Industry Scientific Medical) band of 13.56 MHz Frequency. NFC’s communication range is up to 10 cm. But, this is limited by the antenna and power radiation design. Most devices work within a range of 5mm. NFC shield antenna is designed to work within a range of 1cm. The NFC shield provides all necessary circuitry for PN532 like 27.12Mhz crystal and power supply. It also breaks-out the I/O pins of PN532 for easy access.
The communication between Arduino and the NFC shield is via SPI.
Features
- Compatible with Arduino shield. No soldering required.
- SPI interface. Hence, most Arduino pins are available for other applications.
- Built in PCB Antenna.
- Supports both 3.3V and 5V operation using TI's TXB0104 level translator.
- Socket to connect with other shields.
- The maximum communication range of this NFC shield is about 5 cm.
- Not being able to read/write Mifare’s Ultralight C chip, only to read it’s ID.
Application Ideas
- Use as a RFID reader with Mifare One tags (ISO14443 Type-A) and cards (13.56 MHZ).
- Build visiting card sharing systems.
- Build attendance systems.
- Design authentication systems.
- Read Smart Posters.
- Securely exchange small data with other NFC devices.
- Use with Arduino ADK Main Board for creating mobile NFC applications.
- Many other applications.
Cautions
Schematic
Specification
Application Programming Interfaces
Mechanic Dimensions
Usage
Hardware Installation
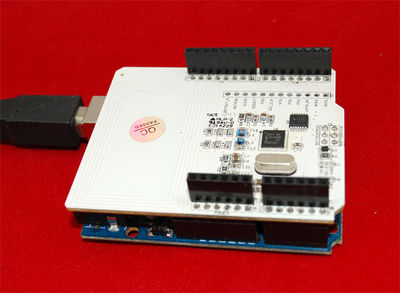
- Connect the NFC shield to Arduino as shown below.
- Compile and upload the example sketch provided.
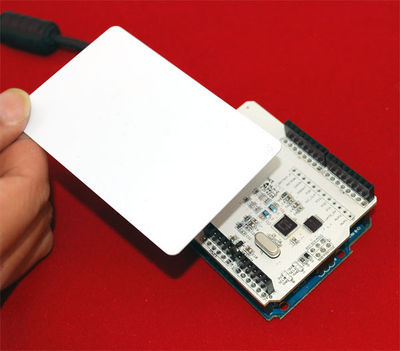
- Hold the Mifare card near the antenna. The NFC shield will read the passive ID data.
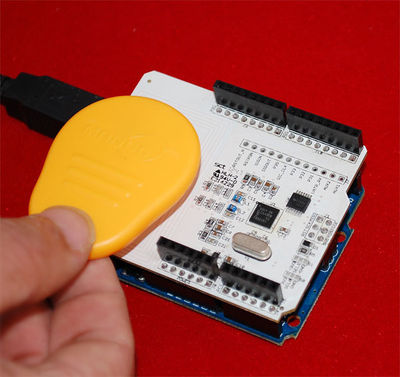
- Hold the Mifare tag near the antenna. The NFC shield will read the passive ID data.
- Use the following setup for establishing peer to peer communication between two Arduinos using two NFC shields.
Programming
The PN532 software library for the NFC shield is derived from the PN532 library. The original library provides API for reading passive target ID of Mifare card/tags. This is enough for card/tag identification purpose. We have added APIs for authentication, reading from and writing to Mifare cards/tags. The software library only provides low level functionality for demonstration. Users need to implement their own NFC application layer (if required).
Please note: Arduino 1.0 users have to change the #include <WProgram.h> lines to #include <Arduino.h> in PN532.cpp and PN532.h.
- Quick Start Demo
A simple sketch is provided herein to read the passive target ID of Mifare cards and tags. Passive target ID is a unique, permanent and read-only number programmed on to the Mifare card by the manufacturer.
This number is used to identify one card from another.
- Connect the NFC shield to Arduino / Arduino as shown above.
- Compile and upload the program to Arduino.
- Bring a Mifare card near the NFC antenna as shown above.
<syntaxhighlight lang=c>
- include <PN532.h>
- define SS 10
- if defined(__AVR_ATmega1280__) || defined(__AVR_ATmega2560__)
 #define MISO 50
 #define MOSI 51
 #define SCK 52
- else
 #define MISO 12
 #define MOSI 11
 #define SCK 13
- endif
PN532 nfc(SCK, MISO, MOSI, SS);
void setup(void) {
 Serial.begin(9600);
 nfc.begin();

 uint32_t versiondata = nfc.getFirmwareVersion();
 if (! versiondata) {
   Serial.print("Didn't find PN53x board");
   while (1); // halt
 }
 // Got ok data, print it out!
 Serial.print("Found chip PN5"); Serial.println((versiondata>>24) & 0xFF, HEX);
 Serial.print("Firmware ver. "); Serial.print((versiondata>>16) & 0xFF, DEC);
 Serial.print('.'); Serial.println((versiondata>>8) & 0xFF, DEC);
 Serial.print("Supports "); Serial.println(versiondata & 0xFF, HEX);

 // configure board to read RFID tags and cards
 nfc.SAMConfig();
}
void loop(void) {
 uint32_t id;
 // look for MiFare type cards
 id = nfc.readPassiveTargetID(PN532_MIFARE_ISO14443A);

 if (id != 0) {
   Serial.print("Read card #"); Serial.println(id);
 }
} </syntaxhighlight>
FAQ
Please list your question here:
Support
If you have questions or other better design ideas, you can go to our forum to discuss or creat a ticket for your issue at linksprite support.
Resources
How to buy
See Also
Other related products and resources.
Licensing
This documentation is licensed under the Creative Commons Attribution-ShareAlike License 3.0 Source code and libraries are licensed under GPL/LGPL, see source code files for details.
