Difference between revisions of "Laser Virtual Keyboard"
(→Introduction) |
(→Introduction) |
||
| Line 11: | Line 11: | ||
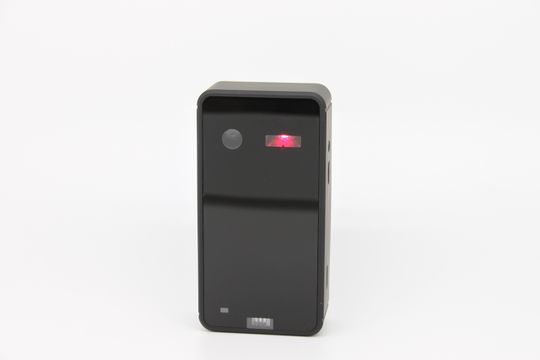
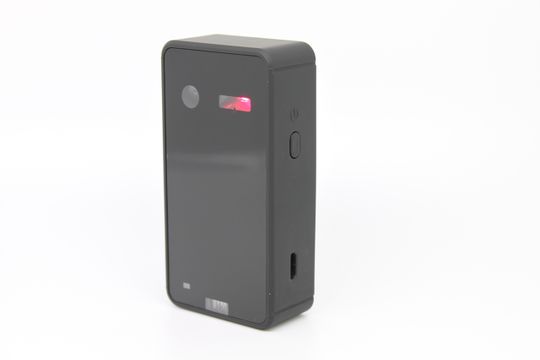
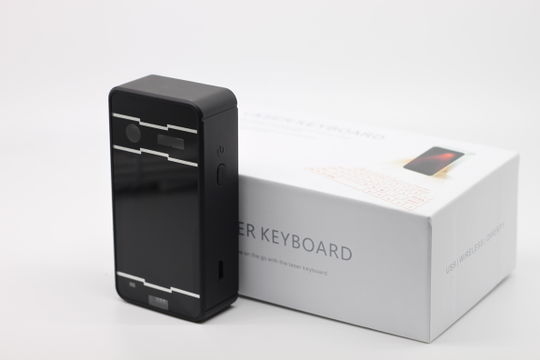
[[File:IMG_3304.JPG|540px]] | [[File:IMG_3304.JPG|540px]] | ||
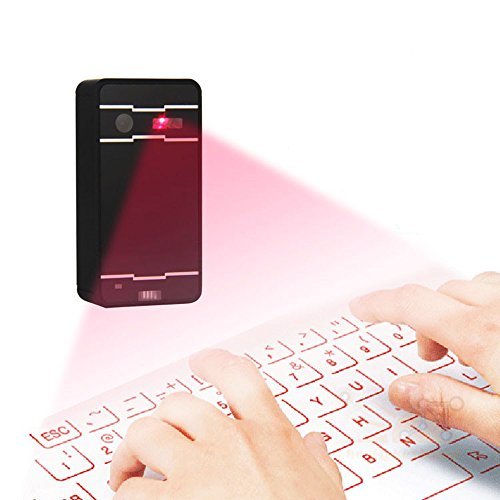
| − | [[File: | + | [[File:keyboardA.jpg|540px]] |
= Laser Virtual Keyboard User Guide = | = Laser Virtual Keyboard User Guide = | ||
Latest revision as of 07:49, 5 August 2016
Contents
Introduction
Laser Virtual Keyboard User Guide
Safety Precautions
1. Avoid exposing this product to direct sunlight for extended periods of time, and keep it away from heat sources.
2. There is a risk of malfunction if product is used in places where sudden or extreme temperature changes occur.
3. Applying excessive force or impact to this product may result in product damage, and will void warranty.
4. To ensure safety and prevent damage, use only the dedicated Micro-USB to USB cable supplied with this product.
5. Never attempt to disassemble or service this product yourself. Doing so can result in electrical shock and will void the warranty.
6. Avoid placing any object within the space between the main unit and the laser projection keyboard layout.
7. Please do not use this product on uneven or irregular surfaces. Place the product on a flat surface. Avoid table or surface that is as transparent or reflective as glass or mirror.
8. Avoid direct light into eyes.
1.Product Features
- Compact and ultra-portable for mobility
- English QWERTY keyboard layout
- Easy connection via Bluetooth HID profile or USB
- Lithium-ion Polymer rechargeable battery, Mini-B Type charge interface
- Compatible with latest operating systems:
Windows XP/VISTA/7/8, Windows Phone 7, IOS4/5/6,Android 3.1 higher, Mac OS X.
2.Package Contents
- Laser keyboard
- USB cable
- User Guide
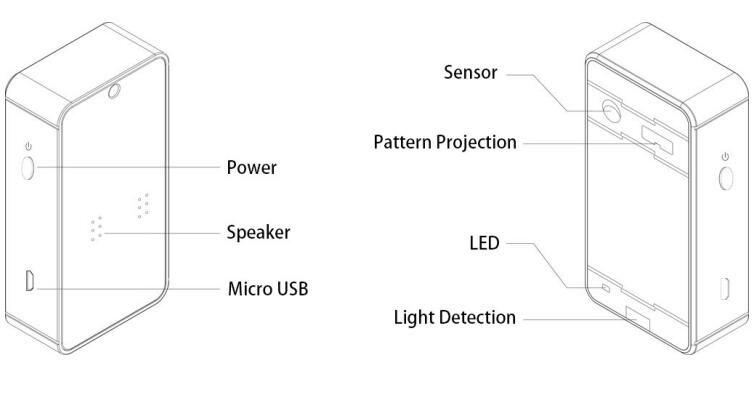
3.ID Identification and Function Explanation
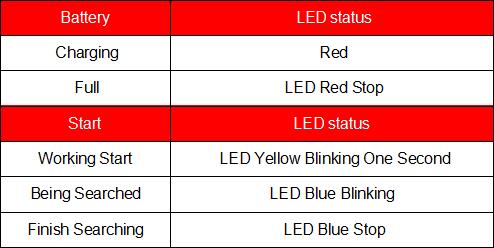
3.1LED Status
Remark: each time press on the virtual key, it will buzz one time.
- FN+B Clear the current Bluetooth pair and search status
Note: Please press Power button the device after clearing the current Bluetooth search status so that Bluetooth start new searching. FN+P Switch on/off key stroke sound Adjusting keyboard brightness:
- FN+ Increase the keyboard brightness
- FN+ Lower the keyboard brightness
Note: when users press every key on the projected keyboard, the device will make ’’beep’’ key stroke sound.
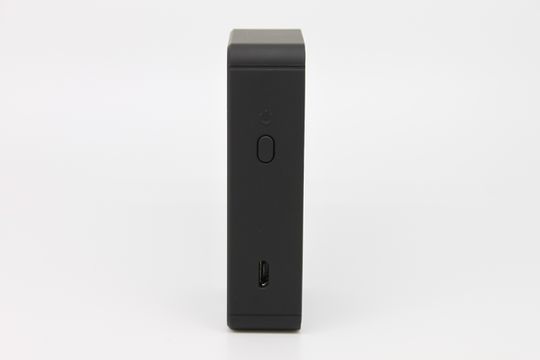
3.2USB Connection Terminal
Method: USB connect
USB type: standard USB Mini-B type
Interface Specification: USB HID keyboard
Input Power: 1A 5V USB charge
4.Using the Projection Keyboard
This product is used as keyboard via Bluetooth HID and USB HID connection.
This device is compatible with all USB HID capable operation system. USB HID connection allows plug-n-play without installing separate driver.
4.1USB HID Connection instruction
- Connect virtual keyboard and host device using supplied USB cable, and your host device must support USB HID, which is applied by most of the Windows devices.
- Turn on virtual keyboard
- If LED indicates blinking red, it is charging; LED red indication done means charging finished. Function well also under charging status.
4.2Bluetooth HID connection instruction
Connection via Bluetooth HID
Compatible with All Microsoft OS,IOS4/5/6, Android 3.1 and above, Mac OS X.
Laser keyboard support Bluetooth HID, it’s connection does not require installation of separate driver. It only needs to connect with your device for one time and automatically set copy defaults, if user wants to connect another, it needs clearing by press and hold ’’ FN+B ’’ on the projection keyboard.
- Power on device
- Press and hold ’’FN+B’’, device become pairing status after beep, then shutdown restart, it can be researched by other host.
- Blue LED with flash fast indicates that the device is ready to pair
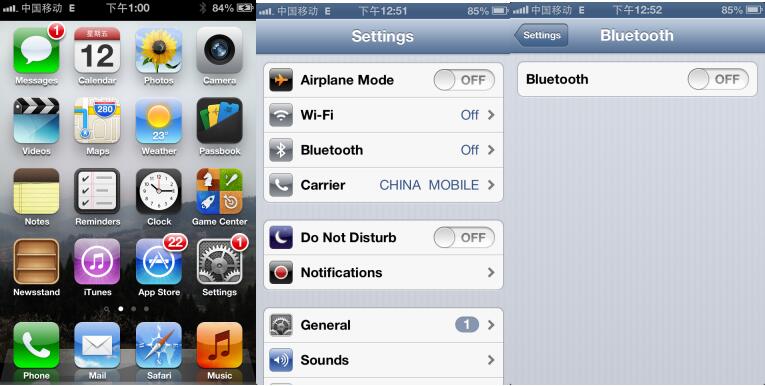
- Scan Bluetooth device from your host. On IOS, tap on Settings-General-Bluetooth
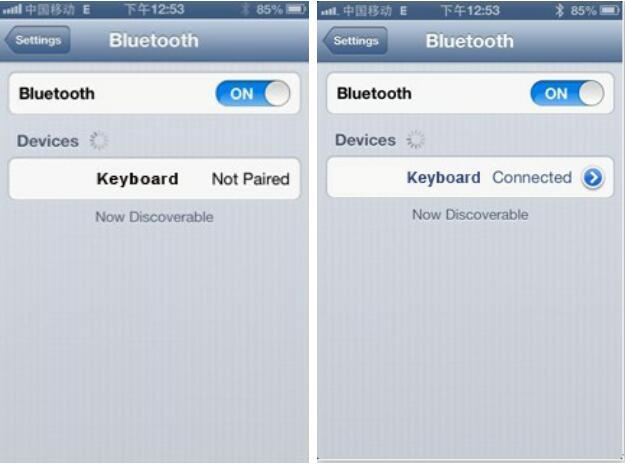
Turn on Bluetooth by tapping the ON button.
Done paring shows connected, and blue LED will stop blinking.
4.3 Connection to Android devices
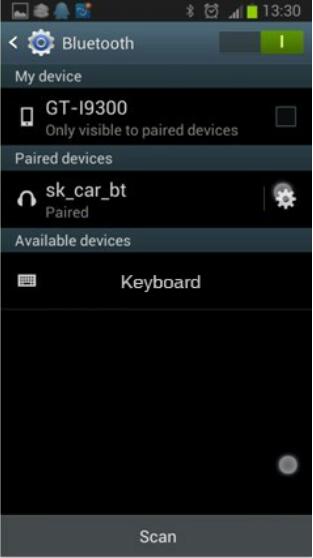
- Navigate through Android as follows:
Home → Main Menu → Settings Wireless and Network → Bluetooth setting.
- Type “Laser keyboard” to pair
- Done paring shows connected, and blue LED will stop blinking.
4.4 Combo function keys
- Press and hold “FN” key and press up arrow key to increase brightness
- Press and hold “FN” key and press down arrow key to decrease brightness
- FN+K turn on/off key Speaker
- FN+P turn on/off keyboard beep sound
- FN+left/right arrow adjust tone volume
- FN+mouse key , Entry/exit mouse model
4.5 The mouse function using method
- Press FN + mouse key , projection keyboard dimming, into the mouse model.
- On the projection keyboard slide a finger can move the mouse, two fingers sliding for the mouse wheel up and down, one finger click of the left mouse button, two fingers at the same time click of the right mouse button.
- Press FN + mouse key again, the keyboard lights, exit the mouse model, switch back to the keyboard mode.
- The mouse function support Android, PC and MAC, IOS need to download and install BTC Mouse&trackpad software.
4.6 Input shift
- On IOS ,Press and hold MENU+ Space
- Refer to specified input method which will be shown on the device under Android and Windows OS
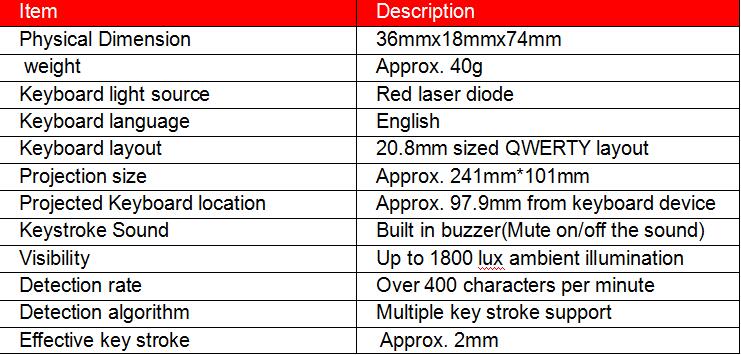
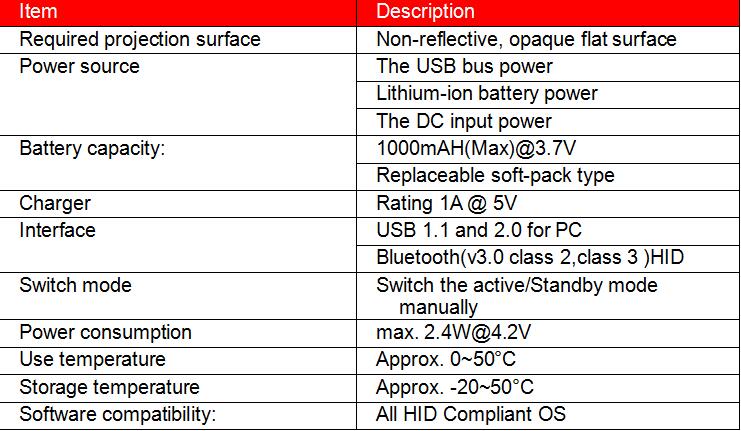
5.Specification
Documents
Video of Laser Virtual Keyboard
LK100S Laser Virtual Keyboard Instructions in Chinese and English.doc
