Tutorial of compiling OpenWRT
Introduction
Since the IOS source code of the Linux-based wireless router was released to public by Cisco/ Linksys on March 2003, enthusiasts have been working on the modification of the source code. There are many different versions with enhanced features appearing on the Internet.
Among these versions, 99% uses original LinkSys source codes, and only 1% of the source files are newly developed code. Every different version addresses different markets. By doing this, there are two drawbacks: The first is that it's difficult to merge the advantages of different versions. The second is that it departs more and more away from the official Linux release.
OpenWrt chooses another path. It starts from scratch, adds functions into it one by one, and makes it closer and closer to the original firmware of LinkSys. One prominent feature of Openwrt is that its file system is rewritable. Developer doesn't need to recompile the whole system after every modification. This feature makes it more like a small linux system, and speed up the development.
Advantage:
When you buy a Openwrt compatible router, you get an embedded system with CPU, FLASH and RAM. After the completion of the development, this router can be used in real life. Because it is based on Linux, linux provides many open source applications, user can install and port these open source applications.
Install Linux Cross Compile Environment
Install Linux system
In this tutorial, we are going to use Ubuntu 10.X as an example. The linux system can be installed on the virtual machine and can also be installed on the real PC. We recommend to install on the virtual machine.
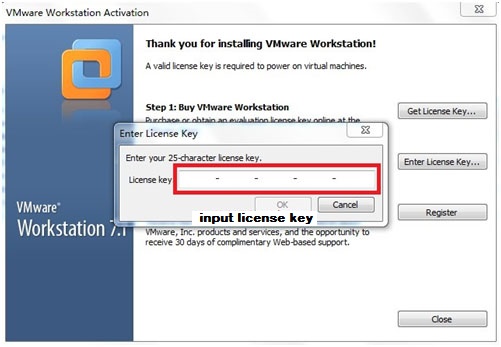
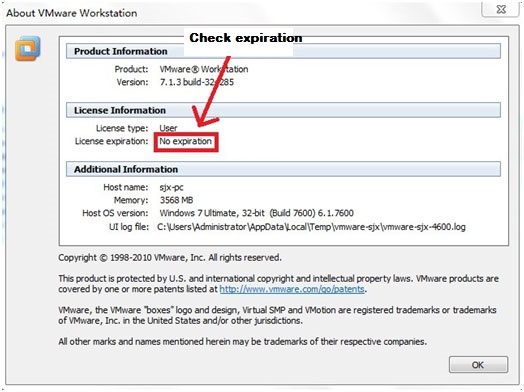
Install virtual machine (use VMWare 7.1 as example)
Install Ubuntu on virtual machine
We can download Ubuntu from Ubuntu download.
Configure virtual machine environment:
- Launch VMware, click menu "file", and select "New"->"Virtual Machine".
- Pop up the create new virtual machine wizard, and click "Next step".
- In the "Virtual machine configuration", click option 2 "self define", and clock "next step".
- In "Virtual machine format", select "Workstation 8", and click "Next step".
- Select "Linux" in the operation system, and select "Ubuntu" in the version, then click "Next Step".
- Select the virtual machine storage directory and provide virtual machine name, and click "Next step".
- For virtual machine processors number, select "1" and "Dual core" and click "Next Step".
- For virtual memory, it is suggested to set between 512MB and 1024MB, and click "Next Step".
- For the network connection type, it is recommended to use "NAT". This option will allow the virtual machine to use host's IP to access network. Click "Next Step".
- I/O adapter. Please select "SCSI Logic" and click "Next Step".
- Hard Drive. Please select "Create a new virtual hard drive" and click "Next Step".
- Virtual hard drive type. Please select "SCSI" and click "Next Step".
- Hard drive capacity. Please set according to your need.
- Path for the disk image. Please set according to your real situation, and click "Next Step".
Install Operation System:
- Switch to the newly configured virtual machine, and click "Setting" of the virtual machine menu. Select "CD-ROM1" device, and right click "use ISO image", and select the Ubuntu image file, and then click "OKAY" to turn off the windows.
- Click "Turn on Virtual Machine" to turn on the virtual machine.
- Ubuntu will boot from virtual machine, and we select "Language","Dislay" and "Resolution".
- Select GUI installation.
- After the loading, we enter into the installation interface.
- Select the keyboard layout. We will select "American English".
- Scan for hardware and CD. It will take a while.
- Automatically configure network.
- Configure network, and first it needs computer name.
- It will scan for hard drvie.
- Partition setup. It can be manual or automatic. We will select automatic partition.
- Time setup.
- Ask for username and password.
- Finishing the installation.
Compile Openwrt firmware
Prepare the compilation environment package
We will use root to install the package.
- sudo apt-get install gcc
- sudo apt-get install g++
- sudo apt-get install binutils
- sudo apt-get install patch
- sudo apt-get install bzip2
- sudo apt-get install flex
- sudo apt-get install bison
- sudo apt-get install make
- sudo apt-get install autoconf
- sudo apt-get install gettext
- sudo apt-get install unzip
- sudo apt-get install subversion
- sudo apt-get install libncurses5-dev
- sudo apt-get install ncurses-term
- sudo apt-get install zlib1g-dev
- sudo apt-get install gawk
- sudo apt-get install git-core
- sudo apt-get install libz-dev
After the installation is done, we can use 'apt-get clean' to clean cache.
Prepare openwrt source files
Logout root and login use normal user. The source files has two favors: trunk (latest and not stable) and backfile (stable).
Switch to home directory:
cd /home
Download trunck source files:
svn co svn://svn.openwrt.org/openwrt/trunk
Download back file source files:
svn co svn://svn.openwrt.org/openwrt/branches/backfile
Select the version you want.
Switch to the download directory by using:
cd /home/trunk
or
cd /home/backfile
Update the source files using:
svn up
Update software package:
./scripts/feeds update –a
./scripts/feeds install –a
Prepare to compile
- 'make defconfig' to generate the .config file including all default options.
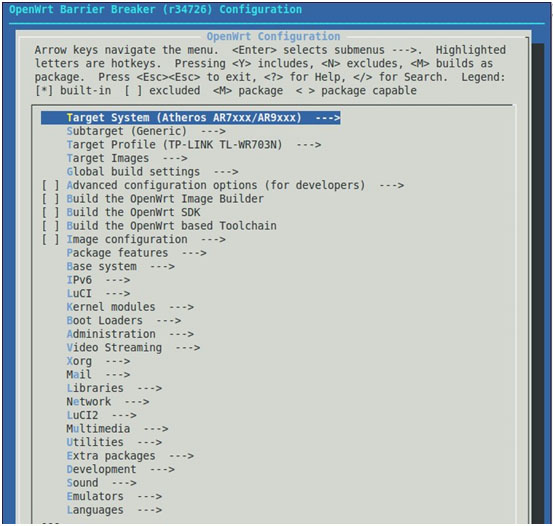
- 'make menuconfig' to custom make the firmware.
Select TP-LINK TL-WR703N in the Target Profile, where it is the target router. Other options can be chosen according to real need, [*] means complied into the kernel, [M] means selecting to install after boot, [] means removing the package.
After selection, select "EXIT" and save.
- 'make V=99' to begin compilation. First time compilation takes about 4 hours.
Finish the compilation
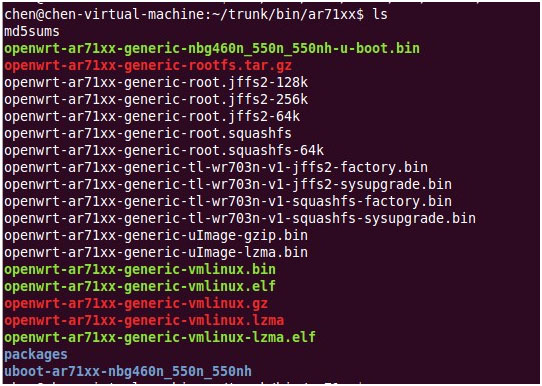
The target files are generated under /home/trunk/bin/ar71xx.
Under the directory "packages", there are generated package file, ipk format.
Factory firmware: openwrt-ar71xx-generic-tl-wr703n-squashfs-factory.bin Upgrade firmware: openwrt-ar71xx-generic-tl-wr703n-squashfs-sysupgrade.bin


