IOIO V15
Contents
IOIO FOR ANDROID BEGINNER'S GUIDE
Step by step, this tutorial will help you install and configure the software needed to start developing IOIO applications for Android!
While there is already a Beginner's guide on github's IOIO page, the information is quite scattered. The aim of this is to regroup all the needed information into a simple and convenient tutorial to quickly get you developing your first IOIO for Android application! Note: This tutorial involves a lot of downloads and installations, so make sure you have some time ahead of you!
STEP 1: System Requirements
Source: [1]
Supported Operating Systems
- Windows XP (32-bit), Vista (32- or 64-bit), or Windows 7 (32- or 64-bit)
- Mac OS X 10.5.8 or later (x86 only)
- Linux (tested on Ubuntu Linux, Lucid Lynx)
- GNU C Library (glibc) 2.7 or later is required.
- On Ubuntu Linux, version 8.04 or later is required.
- 64-bit distributions must be capable of running 32-bit applications.
For information about how to add support for 32-bit applications,
see the Ubuntu Linux installation notes.
STEP 2: Installing Java Development Kit (JDK)
Get the latest Java SE version on the Java SE download page.
Click on the JDK, accept the license agreement, and download the right Java Development Kit version for your Operating System. Note: if using a 64 bits OS, you must download the 64 bits version.
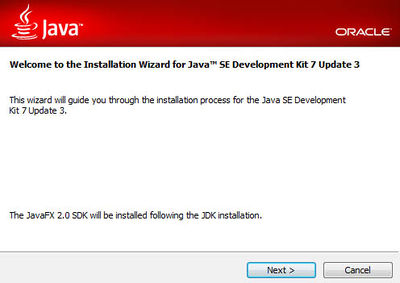
Follow the installation wizard steps and install all of the components. You don't have to register.
STEP 3:Installing Eclipse IDE
Go to the Eclipse Download Page
While any of those 3 is recommended to develop Android Applications, just take
the Classic version if you're a IOIO beginner.
- Eclipse IDE for Java Developers
- Eclipse Classic
- Eclipse IDE for Java EE Developers
Download Eclipse for your OS.
Eclipse Classic is a standalone program, you don't have to install it. Just put the Eclipse folder wherever you want on your computer, and the "eclipse" executable is the application.
STEP 4: Installing the Android SDK
Source:Setting up an Existing IDE
Go to the SDK download page and download the installer for your OS.
Run the installer and follow the steps.
Troubleshoot: If the installer cannot find your Java SDK and you have the JAVA_HOME variable error, follow these steps.
When the installation finishes, the installer will ask you to run the SDK manager.
Don't, we will go through this step later.
STEP 5: Run Eclipse IDE
This is the easiest step!
Run the "eclipse" application and create a shortcut if you want.Upon first launch, Eclipse will ask you to create a workspace. Think about is as your "My Documents for Eclipse", this is where your projects will be. Set this folder as you please. This can be changed later.


