Diamondback WiFi Platform Compatible With Arduino
Contents
Introduction
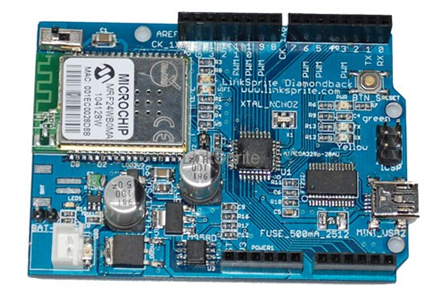
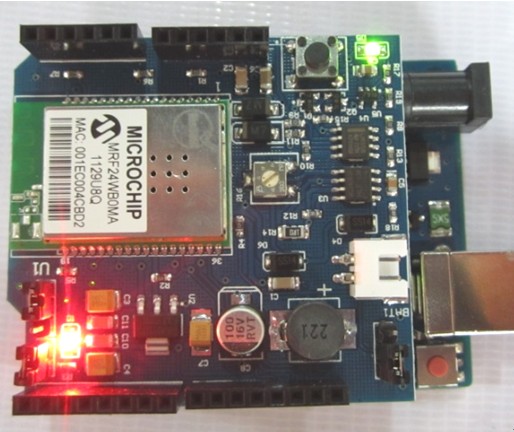
The DiamondBack is an Arduino Duemilanove compatible clone that has 802.11b wireless connectivity baked directly onto the board. The components have been switched out for surface mount equivalents to free up space for the wireless module. It is fully compatible with the Processing/Wiring IDE. The DiamondBack will give your Arduino projects added wireless connectivity without the need for additional bulky shields!
Diamondback use low consumption MRF24WB0MA embedded Wi-Fi Transceiver Module,match 2.4 GHz IEEE 802.11b™ RF Standard. At the same time, Diamondback guide out all the I/O interface of ATmega328, such that support user development.
Features
- size compatible with existing Arduino Uno, Duemilanove and Diecimila boards
- up to 14 digital I/O pins
- 6 analog input pins
- Atmel Mega 328P microprocessor
- 32KB flash RAM (2KB used for bootloader)
- 2KB SRAM
- 1KB EEPROM
- lower profile USB 5-pin mini-B connector
- auto-switchable power between USB and external DC power
- 2-pin JST connector allows for more varied external power options (JST to DC barrel jack, Litihium-ion battery pack, etc.)
- 802.11b 1 and 2 mbps wireless connectivity
- on-board PCB antenna
- switchable interrupt between INT0 and digital pin 8
- supports infrastructure mode (BSS) and adhoc (IBSS) network modes
- support for WEP, WPA, and WPA2 security
- LED attached to digital pin 9 used to indicate a successful wireless connection
Video Tutorials
Schematics
Usage
Hardware Installation
Prepare Hardware
- Diamondback module
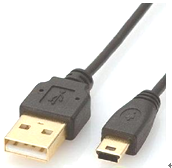
- USB CABLE
Prepare Software
- Arduino 1.0
Download link: Arduino 1.0 Software
- ZG2100BasedWiFiShield’s Library files and code / WiFiShield’s Library files and code
Download link: ZG2100BasedWiFiShield
Download link: WiShield
Programming
Connect to WIFI
- Download file:linksprite-ZG2100BasedWiFiShield-68b2001.zip, unzip it and rename it as ZG2100BasedWiFiShield, then put it under the arduino-1.0\libraries directory.

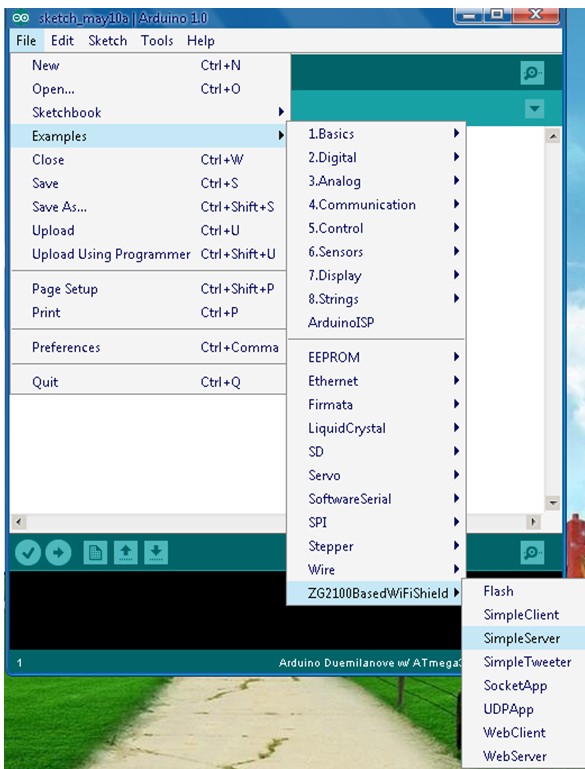
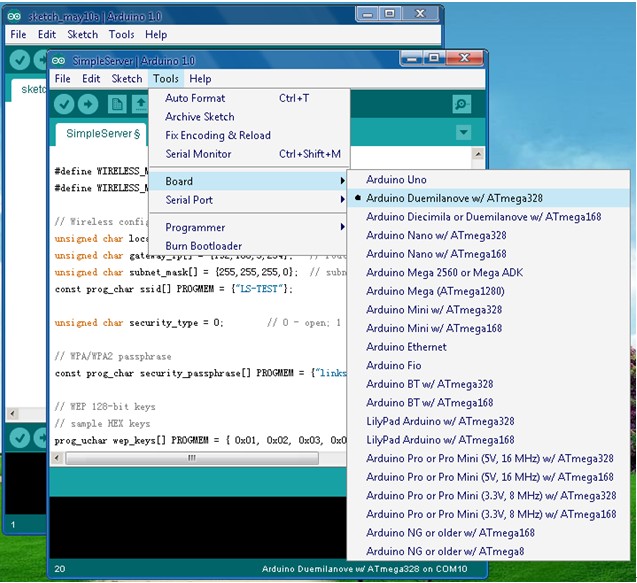
- Open arduino.exe,choose an example such as SimpleServer.
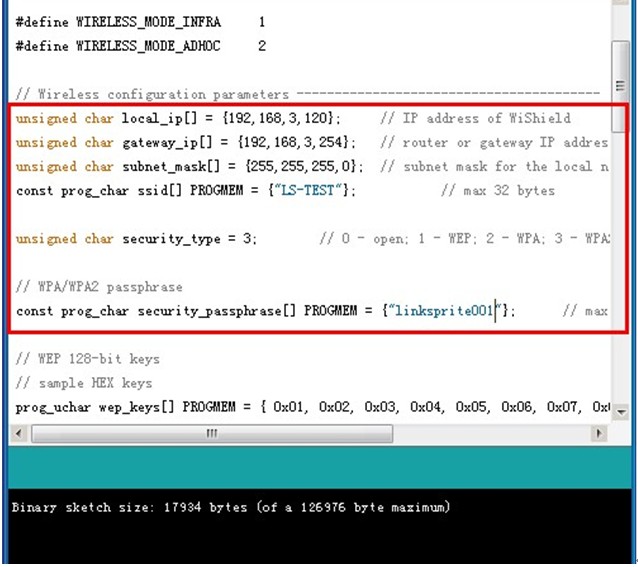
- Change the settings, input the right IP address, default gateway and subnet mask according to your wireless router settings.
- Choose the right Serial Port and Board.
- When Cuhead V2.0 connected to the router through WiFi,the red LED will turn on.
- Input the IP address of Cuhead V2.0 as we set it:192.168.3.120, it showed what SimpleServer is about.(this IP is for demo)
Download the DataFlash
- Download file : linksprite-DataFlash-e90ea99.zip , unzip it and rename it as DataFlash, then put it under the arduino-0022\libraries directory.
- Please note: Using Arduino-0023 and Arduino-0023 the following version, download Data Flash ( DataFlash Download link: DataFlash )
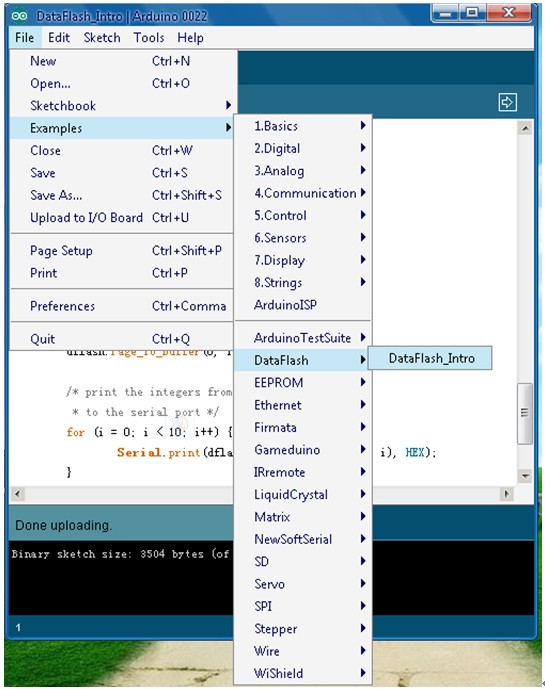
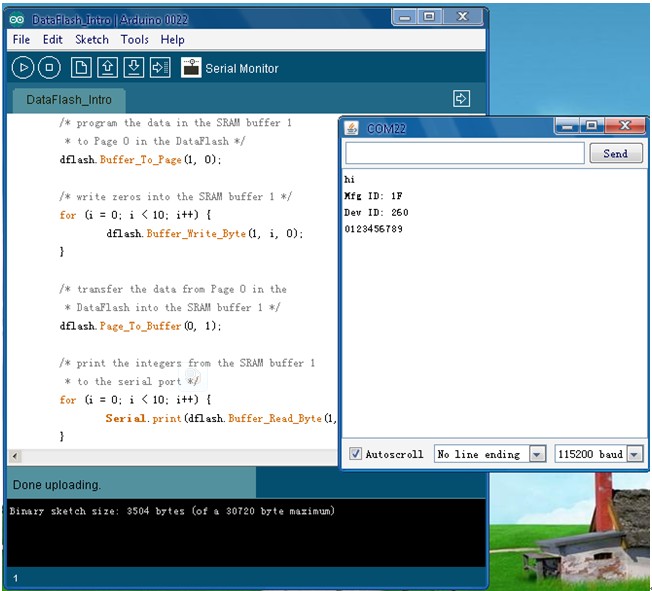
- Open arduino.exe,choose an example such as DataFlash_Intro.
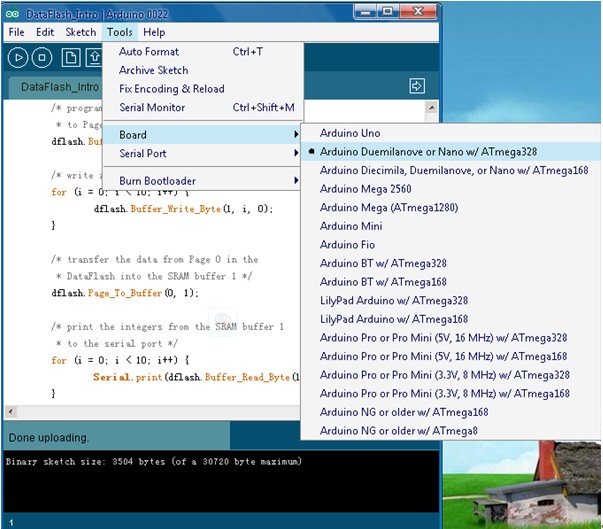
- Choose the right Serial Port and Board.
- Click on the Serial Monitor, COM22 window appears information.
FAQ
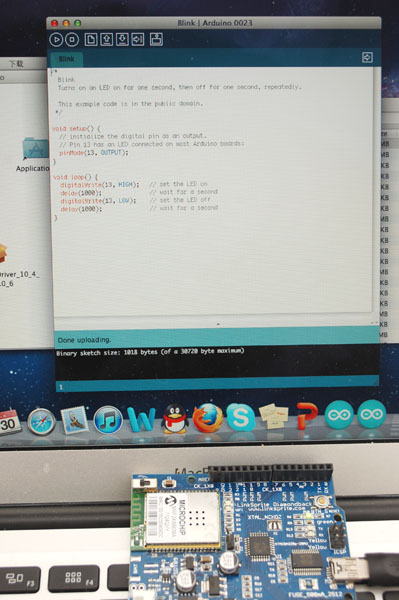
- Diamondback on MacBook?
- We have tested, and we need to stay with Arduino 0023, not the latest Arduino as the FDTI driver for Mac is not included in lastest version.
Q1. Program can't be compiled
A1:Check these if you found that the example we provide cannot compile.
Whether you choose the right Board. You should choose the board you are using when compile.
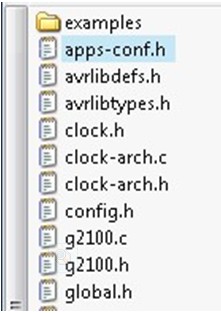
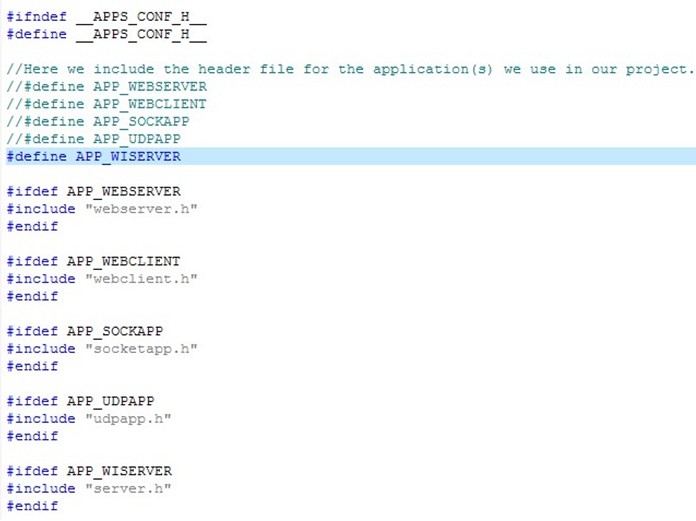
Here enter ZG2100BasedWiFiShield![]() , and open apps-conf.h
, and open apps-conf.h
To prevent repeated quotation of the same file, which will cause compile error like duplicate definition and nested quoted.
You have to change it here according to your needs. To different examples, the macro definition is different, the default is:
#define APP_WISERVER
If you want to use another example, such as how to use webserver.h,
#define APP_WEBSERVER
//#define APP_WISERVER
Q2. Red LED(D1)not on
A2:If the program has been downloaded to Arduino, yet red LED(D1)on Cuhead V1.0 is not on, which means Wi-Fi not connected,please check below part.
Check the IP address,default gate way and subnet mask in the code if it is right with the WiFi routor settings.
And check the SSID、PASSWORD and encryption method. Or you can reset Cuhead V2.0/Arduino module and reconnect them.
Check the jump line parts:
- INTX1, used to choose to interrupt mode, jump line 1, 2 pin is D8, jump line 2, 3 pin is D2. No influence on the use of Cuhead V2.0, not normally use.
- Flash_sn, jump line 1, 2 pin is SS, jump line 2, 3 pin is CS, when you using Wi-Fi choice SS, make Flash invalid.
- Wi-Fi connection indicator light, jump line 1, 2 pin. Cuhead V2.0 leave factory, need to jump line of the part we have adjusted, you can use directly.
Q3. Using UNO R3
A3:When Cuhead V2.0 connected to Arduino UNO R3, Cuhead V2.0 may be unable to connect to wifi.
You need to download the latest version of the Bootloader to Arduino microcontroller (ATmegaXXXX).
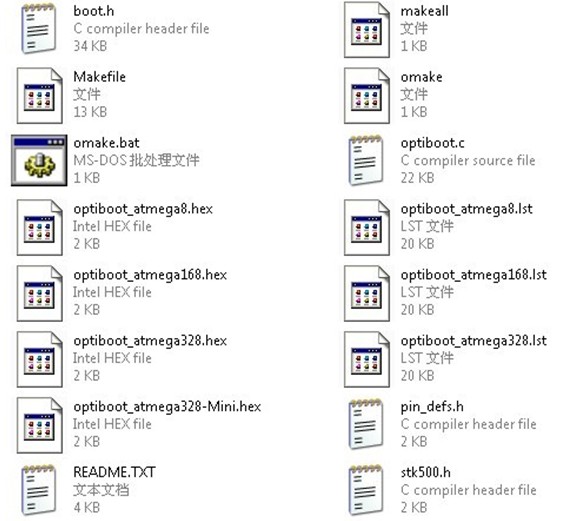
Open optiboot folder ( X: \ arduino-XXXX \ hardware \ arduino\ bootloaders \ optiboot )
Bootloader (.hex file) download to corresponding version of the Arduino microcontroller (ATmegaXXXX).
Q4.I have your Cuhead module,but when i connect it with my Arduino Mega 2560,it is not working.what can i do now?
A4:Please check the connections with the arduino board carefully,it is different with different arduino boards.
For example,Arduino Mega uses different pins for the SPI interface than the previous boards, so you may not able to use the headers to stack the shield onto the Mega.
And you may have to pull pins to match the correct SPI pins to get it working.
