LED Cube Shield for Arduino
Media:Example.ogg== Introduction ==
The 4x4x4 Light Cube shield uses 64 LEDs. It can be driven by pcDuino/Arduino directly.
Note: This is a kit and soldering is required.
The LED color will be blue.
Contents
Features
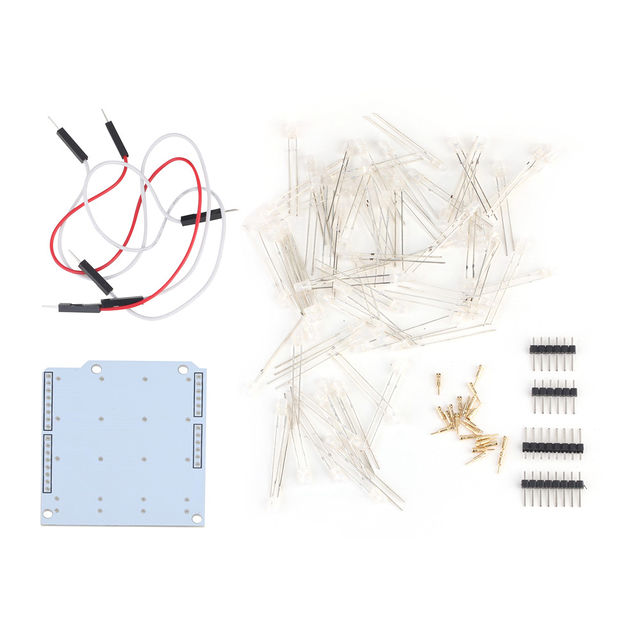
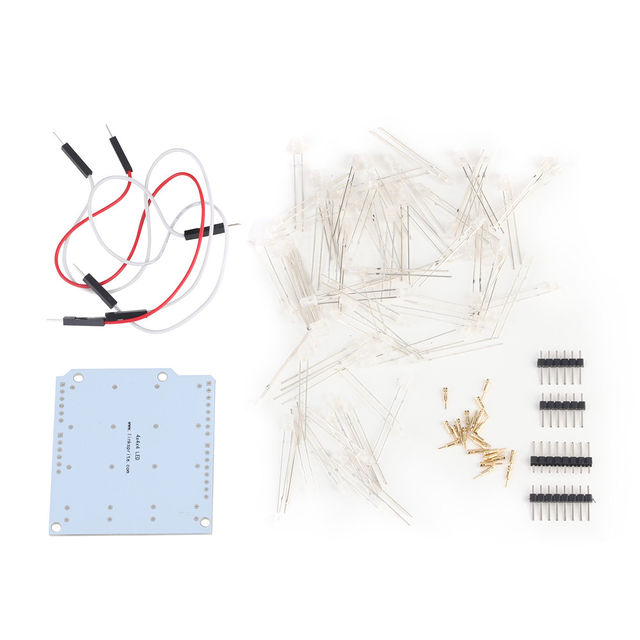
Parts list:
- 70 X 3mm LED Blue Light Pin Length 28mm [IT_LEDBLU5MM_FL28MM] [DC101101]
- 24 X LED Cube Seat[IT_PIN_CRYSSEAT][WA101101]
- 1 X PCB for (4X4X4 LED) [IT_PCB_4X4X4LED] [FB101103]
- 1 X 2.54MM Spacing 1*40P Single Row Female Needle [IT_SIRWNE2.54MM_1X40P] [GA101101]
- 2 X Single as Jumper Wires Male-to-Male with 20cm [IT_JUMR_MM_PK40_WI20CM][BB101104]
Application Ideas
Cautions
Schematic
Specification
- View-able planes" 5
- Pixel: Every pixel is represented by a LED.
- Distance between pixels: 14mm
- Number of pixels: 4 x 4 x 4
- Sockets to hold the cube: 20
- Size of PCB: 52.98mm x 77.81mm
Pin definition and Rating
Mechanic Dimensions
Usage
Hardware Installation
Assembly Instructions:
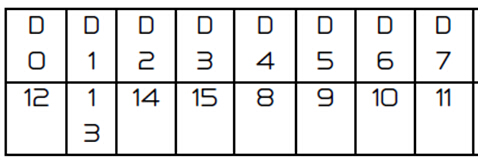
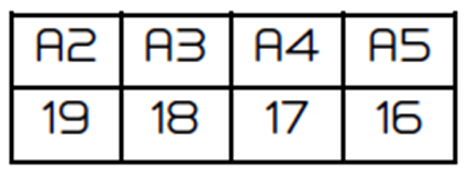
Dx means Digital pin, Ax means Analog pin, please refer to the picture below:
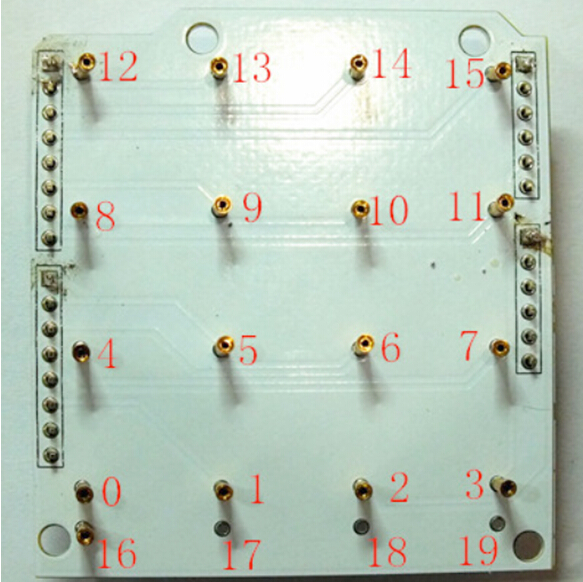
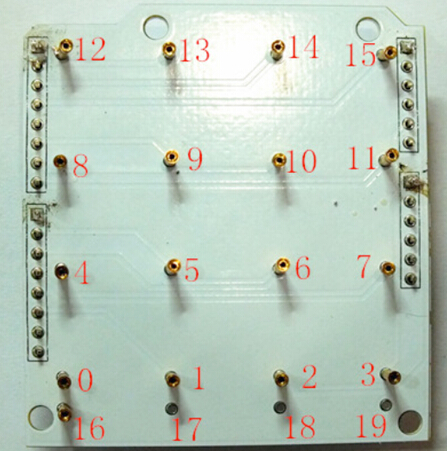
These 0-15 slots indicated in the table below are used for plugging in LED’s anode.
These 16-19 slots indicated in the table below are used for plugging in LED’s cathode.
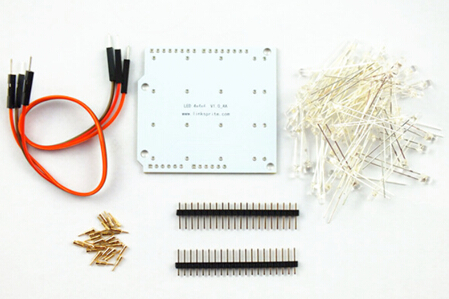
Ⅴ.Usage 5.1 Hardware Installation After unpacking the kit, it looks like the following as:
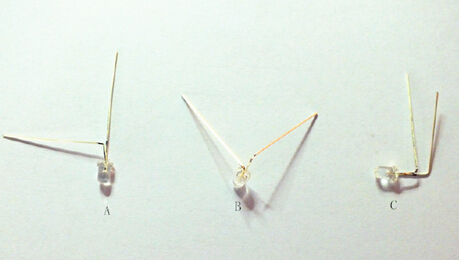
Assembly Instructions: Step 1: Bend all LEDs’ legs (the shorter leg is Cathode, while the longer one is anode) into three types as below:
Type A: 48 LEDs need to be bent like this, the longer leg needs to be bent down like the right leg shown as the type A in the picture above, please make sure the two legs angled in 90 degree. Type B: 15 LEDs need to be bent like this, after getting a type A LED, bend the shorter leg down 90 degree in vertical level at a higher joint than the longer leg while bending Type A LED(the higher joint helps to avoid short when using later on) . Type C: only 1 LED needs to be bent like this, after getting a type A LED, bend the shorter leg down 90 degree in the same level but also at a higher joint than the longer leg while bending Type A LED(the higher joint helps to avoid short when using later on).
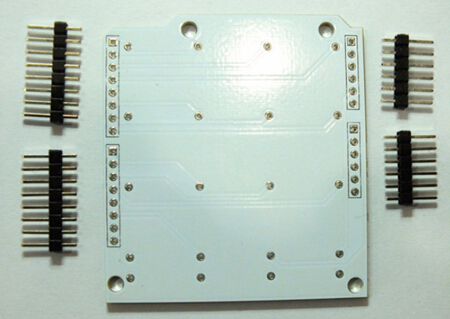
Step 2: Divide the 40 pin headers into 4 pieces as the picture below:
Step 3: Soldering:
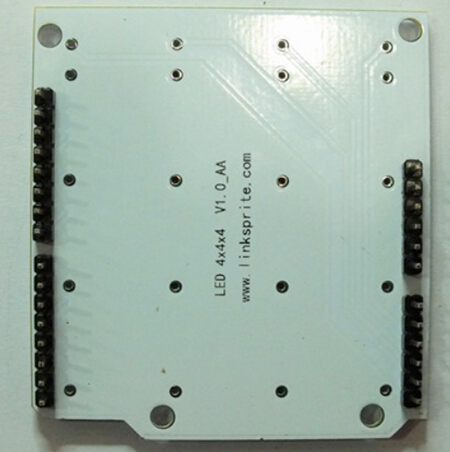
a. Solder all the headers, please make sure the side with silk screen is up:
b. Solder the 1P female sockets:
Please plug in 17 sockets onto other side without silk screen for slots 0-16, leave the slots 17-19 for plugging in jumper wires later, turn it over helping with a hardboard, and solder them all.
c. Solder LED:
File:4x4x4 Light Cube shield10.jpg
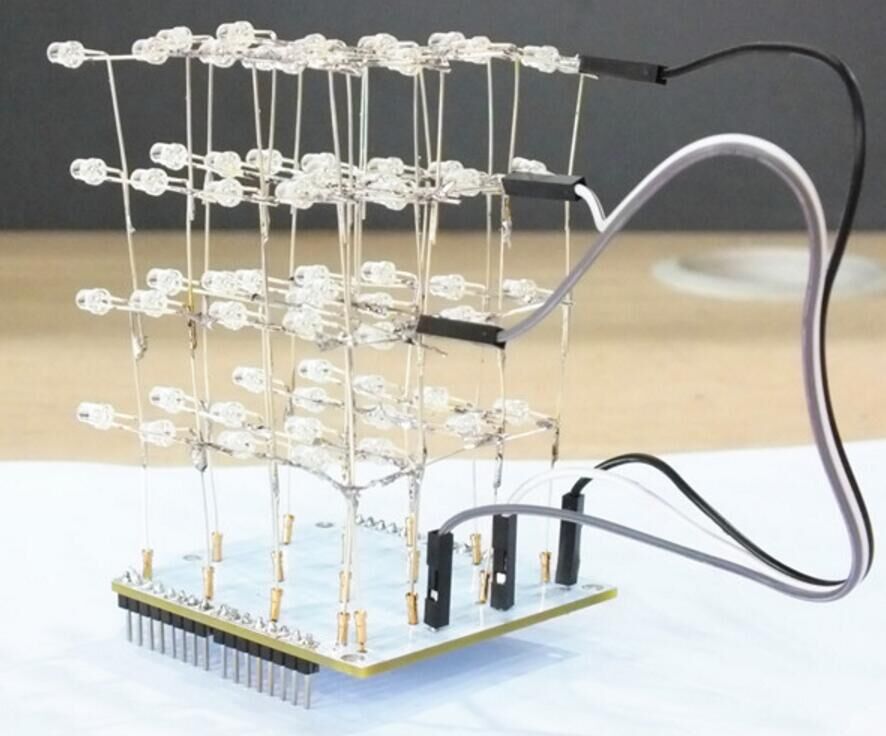
Solder the first layer, make sure different bent type LEDs are soldered in the right area accordingly as shown in above picture. While soldering, connect all cathode legs within the same layer, and connect all Anode legs between different layers. Please make sure all the LED’s are pointing at the same direction.Solder the rest three layers, solder as the same instruction for first layer,but replace Type B LEDs for area C.Solder each jumper wire header onto any Anode leg on layer A, B and C, and then connect each layer to slot 17, 18, and 19 accordingly, please refer to the picture below:
5.2 Programming Sample code can be downloaded from here. https://s3.amazonaws.com/linksprite/Shields/LED_CUBE/CUBE_V1.ino
- Bend LED's Cathode leg (the shoter one)
- Divide LEDs into 4 layers, connect all cathode legs within the same layer
- Connect Anode legs between layers
- Finally connect anode legs of different layers to the shield.
Programming
Sample code can be downloaded from here.
FAQ
Support
If you have questions or other better design ideas, you can go to our forum to discuss or creat a ticket for your issue at linksprite support.
Resources
How to buy
Here to buy LED Cube Shield for Arduino on store
See Also
Other related products and resources.
Licensing
This documentation is licensed under the Creative Commons Attribution-ShareAlike License 3.0 Source code and libraries are licensed under GPL/LGPL, see source code files for details.
