Linux设备驱动开发套件
套件介绍
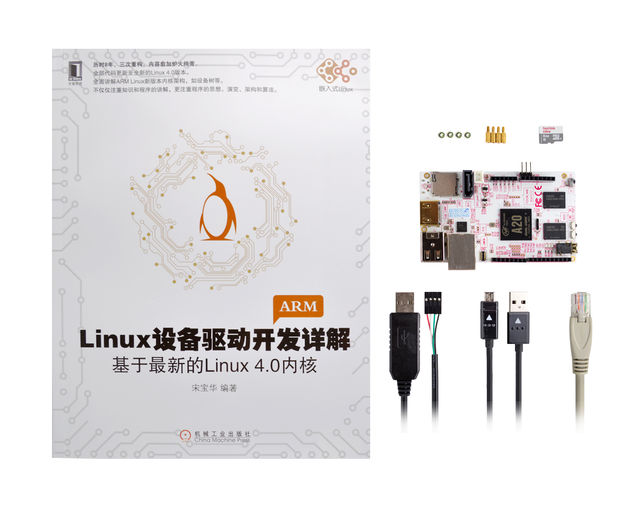
该套件是包含《Linux驱动开发详解:基于最新的Linux4.0内核》一书在内的全套实践平台。套件为读者提供了完整的linux4.0镜像文件和本书的配套工程文件。读者在阅读本书的同时,可以结合pcDuino3nano硬件平台相结合,边学习,边实践。本书适合宋宝华老师以下三门课程:
- 1.Linux内核与驱动深入剖析与编程
- 2.Linux系统编程与调试调优
- 3.ARM处理器以及Linux在ARM的实现原理
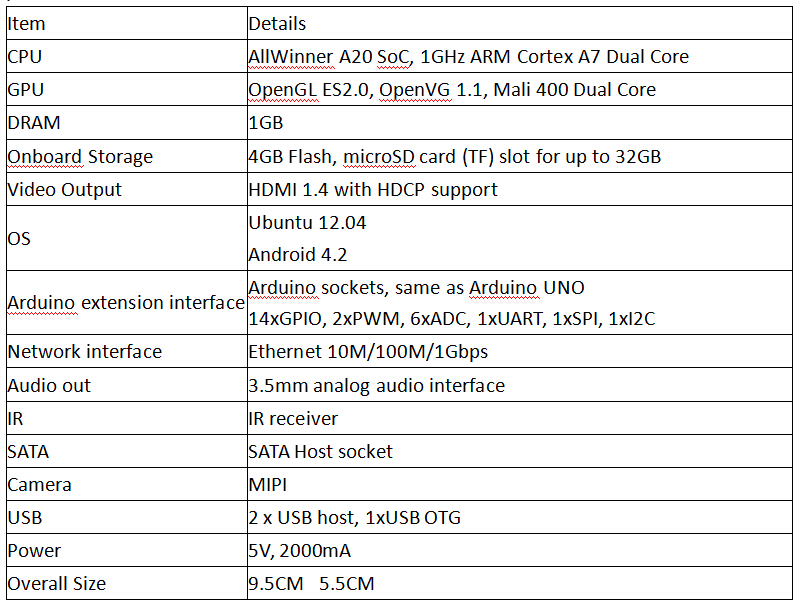
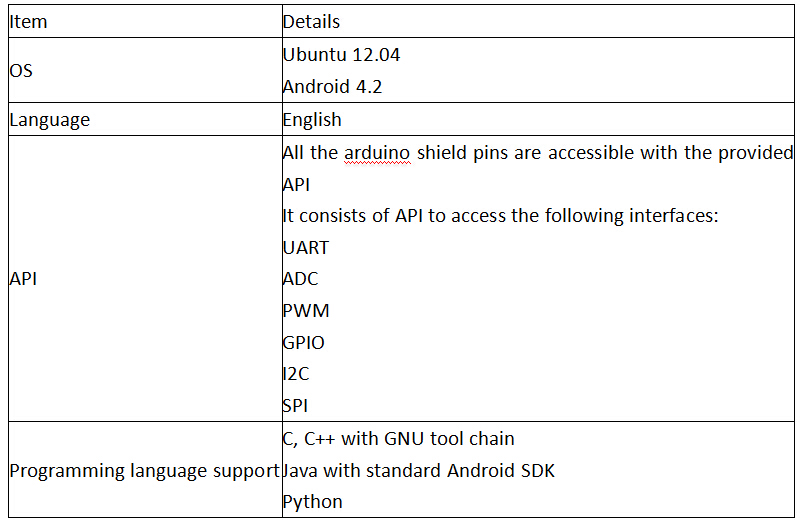
pcDuino3硬件规格
pcDuino3nano硬件规格
套件清单
- 《Linux驱动开发详解:基于最新的Linux4.0内核》1本
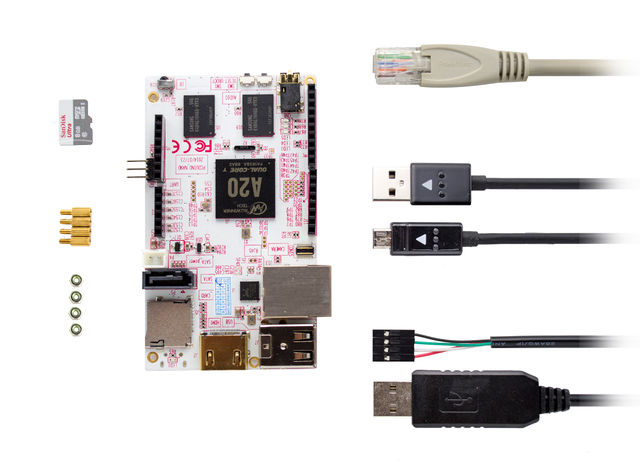
- pcDuino3nano 1个
- SD卡1个
- USB Micro数据线1条
- USB 串口线1条
- 交叉网线1条
Tutorial
Pre-requisites
- 1. 8G (or bigger) TF card( Speed class is recommended for Class 6 or higher)
- 2. TF card reader
- 3. for pcDuino3 nano
- 4. Windows tool: Win32DiskImager
- 5. Windows tool: Xshell
Create
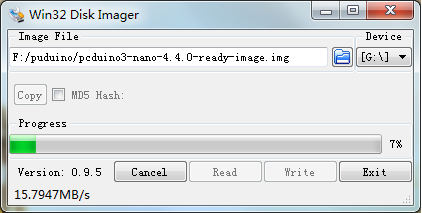
Plug TF Card Reader into Windows PC and open Win32DiskImager as administrator.
- Select the Image File that you unzip from the downloaded File
- Select the Device that the PC recognized
- Click the write button.
- It will say Write Successful at the end.
Run
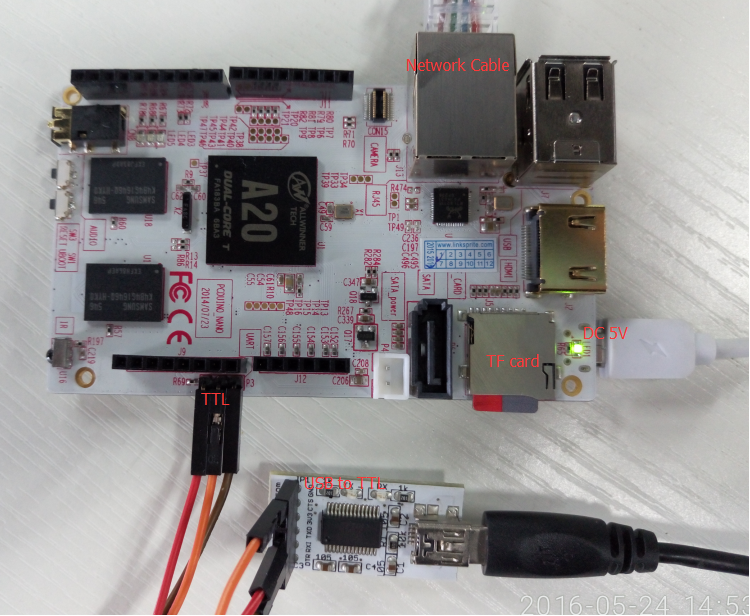
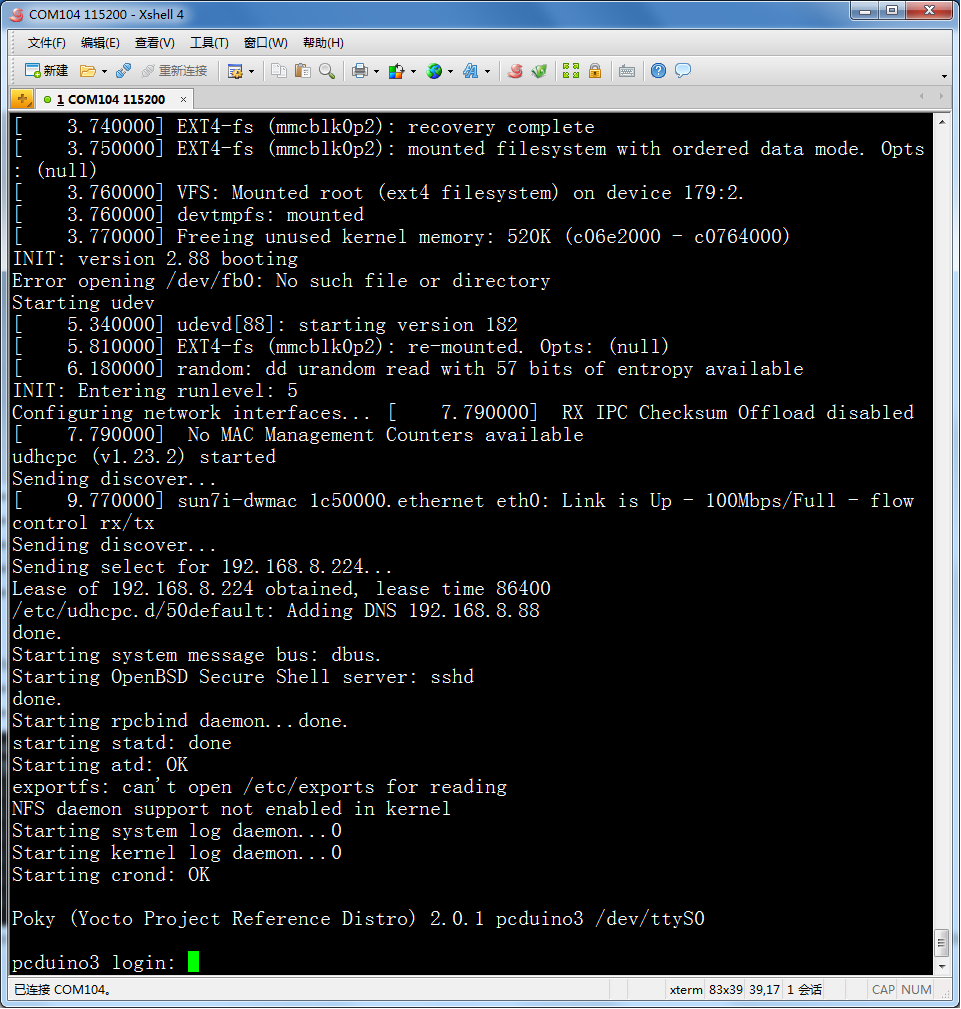
*Plug the TF card into pcDuino3 nano *Connect 5V DC power input via Micro USB port *Connect TTL port and USB to TTL *Open Xshell select serial and right COM Baud rate is 115200 *Power on and run
Network test
- Enter the login user "root"
- Input "sudo ping www.baidu.com"
If you see the above message, network is ok.
Note: For the first time boot, system initialization may take some time (about 2-3 minutes ), and USB port is disabled. Please do not shutdown before system restart.
The image of pcDuino 3 nano:https://s3.amazonaws.com/linksprite/pcduino/pcduino3-nano-4.4.0-ready-image.img
