Difference between revisions of "10K Breadboard Potentiometer"
Katherine.d (talk | contribs) (→Overview) |
Katherine.d (talk | contribs) (→Overview) |
||
| Line 1: | Line 1: | ||
==Overview== | ==Overview== | ||
| + | *'''Reading a Potentiometer (analog input)''' | ||
A potentiometer is a simple knob that provides a variable resistance, which we can read into the Arduino board as an analog value. In this example, that value controls the rate at which an LED blinks. | A potentiometer is a simple knob that provides a variable resistance, which we can read into the Arduino board as an analog value. In this example, that value controls the rate at which an LED blinks. | ||
| Line 8: | Line 9: | ||
By turning the shaft of the potentiometer, we change the amount of resistence on either side of the wiper which is connected to the center pin of the potentiometer. This changes the relative "closeness" of that pin to 5 volts and ground, giving us a different analog input. When the shaft is turned all the way in one direction, there are 0 volts going to the pin, and we read 0. When the shaft is turned all the way in the other direction, there are 5 volts going to the pin and we read 1023. In between, analogRead() returns a number between 0 and 1023 that is proportional to the amount of voltage being applied to the pin. | By turning the shaft of the potentiometer, we change the amount of resistence on either side of the wiper which is connected to the center pin of the potentiometer. This changes the relative "closeness" of that pin to 5 volts and ground, giving us a different analog input. When the shaft is turned all the way in one direction, there are 0 volts going to the pin, and we read 0. When the shaft is turned all the way in the other direction, there are 5 volts going to the pin and we read 1023. In between, analogRead() returns a number between 0 and 1023 that is proportional to the amount of voltage being applied to the pin. | ||
| + | |||
| + | |||
| + | '''10K Breadboard Potentiometer ''' | ||
[[File:potentiometer.jpg]] | [[File:potentiometer.jpg]] | ||
Revision as of 09:39, 5 December 2012
Overview
- Reading a Potentiometer (analog input)
A potentiometer is a simple knob that provides a variable resistance, which we can read into the Arduino board as an analog value. In this example, that value controls the rate at which an LED blinks.
We connect three wires to the Arduino board. The first goes to ground from one of the outer pins of the potentiometer. The second goes from 5 volts to the other outer pin of the potentiometer. The third goes from analog input 2 to the middle pin of the potentiometer.
By turning the shaft of the potentiometer, we change the amount of resistence on either side of the wiper which is connected to the center pin of the potentiometer. This changes the relative "closeness" of that pin to 5 volts and ground, giving us a different analog input. When the shaft is turned all the way in one direction, there are 0 volts going to the pin, and we read 0. When the shaft is turned all the way in the other direction, there are 5 volts going to the pin and we read 1023. In between, analogRead() returns a number between 0 and 1023 that is proportional to the amount of voltage being applied to the pin.
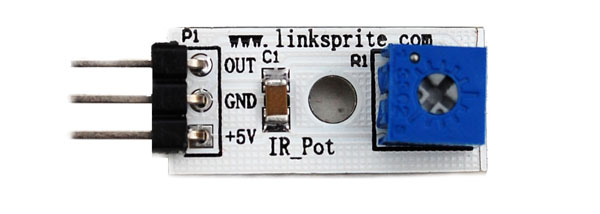
10K Breadboard Potentiometer
Sample Code
<syntaxhighlight lang="c">
/* Analog Read to LED
* ------------------
*
* turns on and off a light emitting diode(LED) connected to digital
* pin 13. The amount of time the LED will be on and off depends on
* the value obtained by analogRead(). In the easiest case we connect
* a potentiometer to analog pin 2.
*
* Created 1 December 2005
* copyleft 2005 DojoDave <http://www.0j0.org>
* http://arduino.berlios.de
*
*/
int potPin = 2; // select the input pin for the potentiometer int ledPin = 13; // select the pin for the LED int val = 0; // variable to store the value coming from the sensor
void setup() {
pinMode(ledPin, OUTPUT); // declare the ledPin as an OUTPUT
}
void loop() {
 val = analogRead(potPin);    // read the value from the sensor
 digitalWrite(ledPin, HIGH);  // turn the ledPin on
 delay(val);                  // stop the program for some time
 digitalWrite(ledPin, LOW);   // turn the ledPin off
 delay(val);                  // stop the program for some time
}
</syntaxhighlight>
