Difference between revisions of "Cube Solver Robot with Arduino"
(→Arduino Program) |
(→Debug Left Arm And Right Arm) |
||
| Line 109: | Line 109: | ||
Take the left arm as an example: | Take the left arm as an example: | ||
| − | Uncomment the line 82 in the code, compile and download the program. Now the left arm will spin at 0 degrees, 90 degrees, 180 degrees. Adjust the value of the three macro definition(LEFT_ARM_0、LEFT_ARM_90、LEFT_ARM_180) at the 16-18 lines in the program, to let the left arm just stop at 0 degrees , 90 degrees and 180 degrees. The formula of the value as follow: | + | |
| + | Uncomment the line 82 in the code, compile and download the program. Now the left arm will spin at 0 degrees, 90 degrees, 180 degrees. Adjust the value of the three macro definition(LEFT_ARM_0、LEFT_ARM_90、LEFT_ARM_180) at the 16-18 lines in the program, to let the left arm just stop at 0 degrees , 90 degrees and 180 degrees. | ||
| + | |||
| + | The formula of the value as follow: | ||
| + | |||
Result = angle * (100 / 9) + 500 | Result = angle * (100 / 9) + 500 | ||
| + | |||
Common angle values as following table: | Common angle values as following table: | ||
| + | |||
Angle Value | Angle Value | ||
| + | |||
0 500 | 0 500 | ||
| + | |||
30 833 | 30 833 | ||
| + | |||
60 1167 | 60 1167 | ||
| + | |||
90 1500 | 90 1500 | ||
| + | |||
120 1833 | 120 1833 | ||
| + | |||
150 2167 | 150 2167 | ||
| + | |||
180 2500 | 180 2500 | ||
Please comment this line of code again after debugging. | Please comment this line of code again after debugging. | ||
The debugging method of right is the same as left arm. | The debugging method of right is the same as left arm. | ||
Revision as of 08:11, 11 August 2016
Contents
Introduction
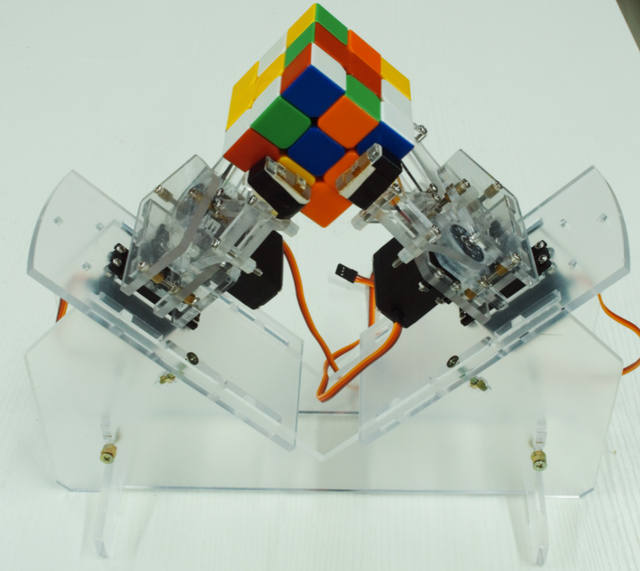
This product is a cube solver robot with Arduino. At present,there are 3 actions including 90 degrees clockwise rotation, 90° anticlockwise rotation and 180 degrees rotation. The robot executes the corresponding action depending on the Rubik's cube reduction formula to solve the cube.
The type of cube which the Robot can solve is Standard third-order cube(Flexible rotating cube will be more better) The size of cube: International standard Rubik's Cube (57*57*57mm)
Assembly instructions
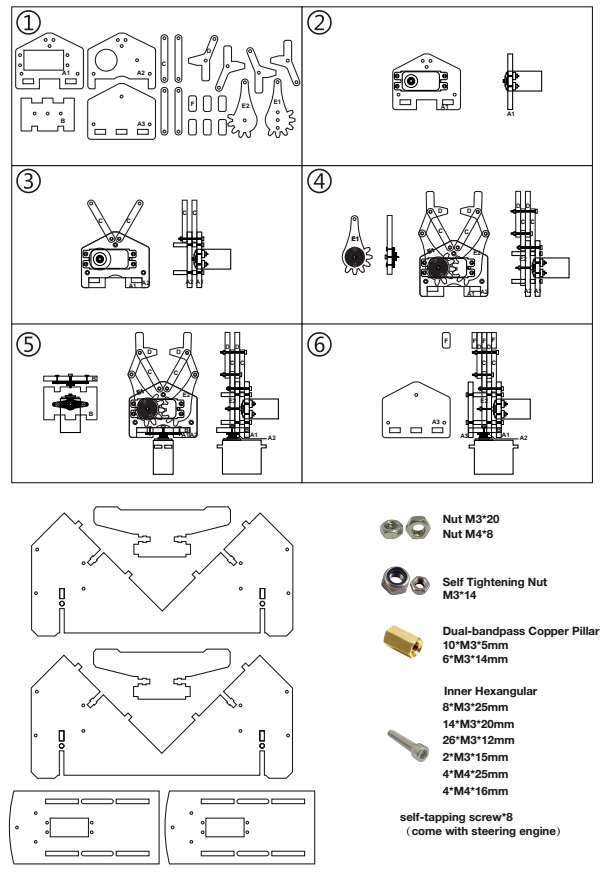
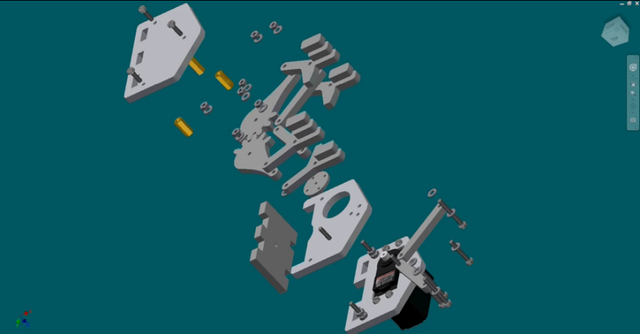
1.Mechanical assembly
Assembly diagram
2.Hardware List
- 1x Arduino Uno
- 1x Power Base Shield
- 1x External Power Supply
- 1x USB Cable
- 4x Servo
- 2x Acrylic Mechanical Arm
- 1x Acrylic Base Plate
- Screw And Nut
- 20x Nut M3
- 8x Nut M4
- 14x Self Tightening Nut
- 10x Dual-bandpass Copper Pillar M3*5MM
- 6x Dual-bandpass Copper Pillar M3*14MM
- 8x Inner Hexangular M3*25mm
- 14x Inner Hexangular M3*20mm
- 26x Inner Hexangular M3*12mm
- 2x Inner Hexangular M3*15mm
- 4x Inner Hexangular M4*25mm
- 4x Inner Hexangular M4*16mm
- 1x Power Adapter(5V/2A 5.5*2.5mm )
- 1x Packing Box
3.Installation steps
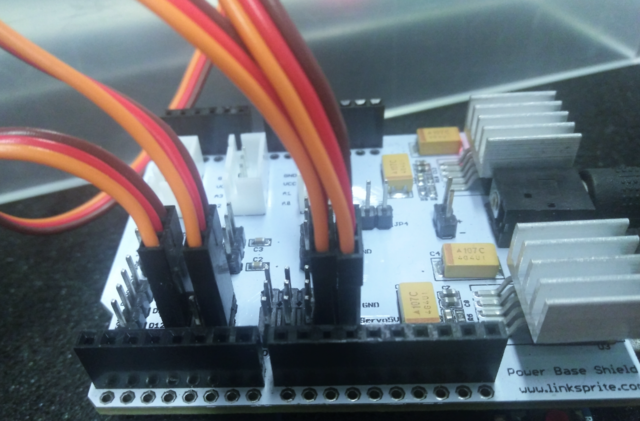
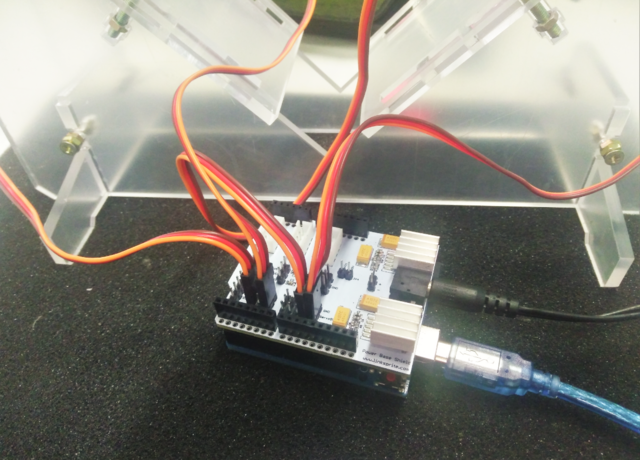
3.1 Insert the power base shield in the Arduino Uno
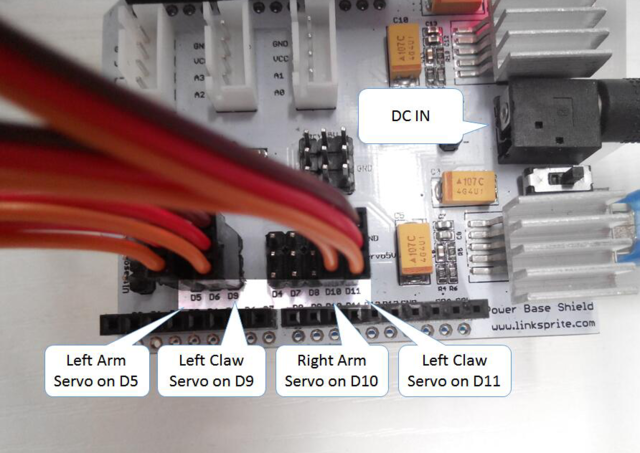
3.2 Connect the servos of left arm , left paw , right arm , right paw to D5,D9,D10,D11.
3.3 Connect external power supply to power base shield. note: enhance the heat dissipation of regulator IC on power base shield (Install heat sink or cooling fan)
3.4 Connect Arduino to computer with usb cable.
Note: Voltage of external power supply should be 6-12v, Output current should be greater than 2.5A, The lower voltage of power supply, the less heat of regulator IC on power base shield.
Software Installation
Cube Explorer
The software can calculate solution of a cube within several seconds .
1.Download the latest version of Cube Explorer from https://github.com/skycoder-official/cube-explorer , Extract the software to any folder to complete the installation.
2.Double-click cubeXXXhtm.exe to start the software (XXX is the version number of the software).
Arduino Program
1. Go go Arduino IDE libraries and open libraries/Servo/src/avr/Servo.cpp
2.Comments out 283 to 280 lines in the code , in order to more accurately correct the angle of steering, if the steering gear should be used in other program, you need to change the code back.
if( value < SERVO_MIN() )
value = SERVO_MIN();
else if( value > SERVO_MAX() )
value = SERVO_MAX();
3. Open MyCube.ino to compile and download to Arduino Uno
Debugging
Debug Left Arm And Right Arm
Take the left arm as an example:
Uncomment the line 82 in the code, compile and download the program. Now the left arm will spin at 0 degrees, 90 degrees, 180 degrees. Adjust the value of the three macro definition(LEFT_ARM_0、LEFT_ARM_90、LEFT_ARM_180) at the 16-18 lines in the program, to let the left arm just stop at 0 degrees , 90 degrees and 180 degrees.
The formula of the value as follow:
Result = angle * (100 / 9) + 500
Common angle values as following table:
Angle Value
0 500
30 833
60 1167
90 1500
120 1833
150 2167
180 2500
Please comment this line of code again after debugging. The debugging method of right is the same as left arm.
