Difference between revisions of "Mbed BLE Sensors Tag"
(→Schematic) |
|||
| Line 493: | Line 493: | ||
== Schematic == | == Schematic == | ||
| − | [https://s3.amazonaws.com/linksprite/Mbed+BLE+Sensors+Tag/lsmbed_interface_mcu.PDF | + | [https://s3.amazonaws.com/linksprite/Mbed+BLE+Sensors+Tag/lsmbed_interface_mcu.PDF lsmbed_interface_mcu] |
| − | [https://s3.amazonaws.com/linksprite/Mbed+BLE+Sensors+Tag/lsmed_sensor_tag.PDF | + | [https://s3.amazonaws.com/linksprite/Mbed+BLE+Sensors+Tag/lsmed_sensor_tag.PDF lsmed_sensor_tag] |
Revision as of 09:32, 18 January 2016
Contents
Introduction
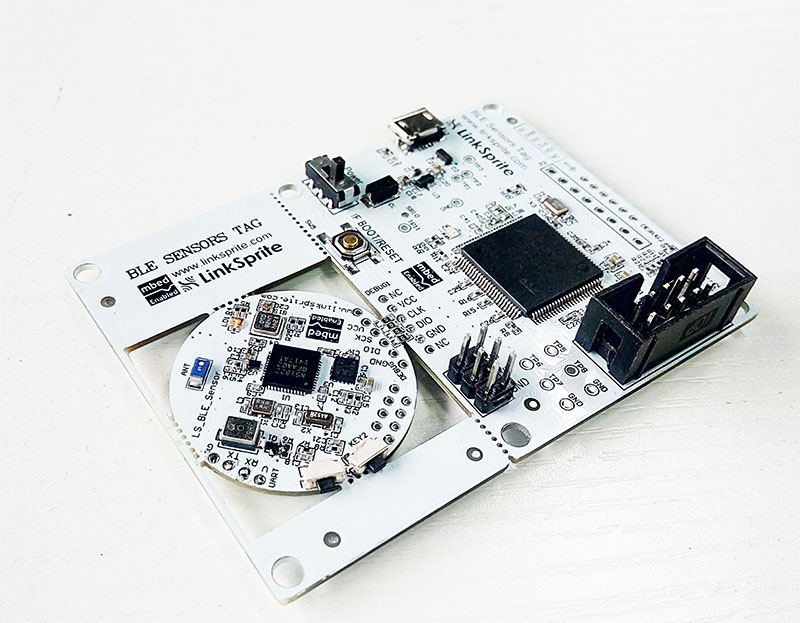
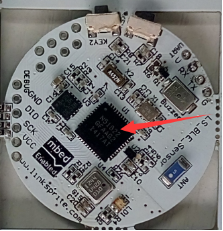
The Mbed BLE Sensors tag is a bluetooth 4.0 BLE sensor development board that is powered by Mbed. It integrates powerful devices, such as NRF51822, LIS3DH ,BMP180, buzzer, and dual-color LED. It also embeds an mbed compatible programmer to make program and download application very convenient.
The mbed BLE sensors tag is consisted of two modules: one is a bluetooth 4.0 BLE sensors tag powered by NRF51822 which is a Bluetooth Low Energy & 2.4GHz Wireless SOC. This mbed BLE sensor tag is mbed-enabled device which simplifies and speeds up the creation and deployment of bluetooth devices based on ARM micro-controllers. There is an mbed library supporting BLE sensors tag which provides the C/C++ software platform and libraries, and can speed up your BLE application development.
The other one works as a programmer like Jlink, but it is compatible with ARM’s mbed. It greatly simplifies the programming process. You just copy the compiled hex file to an emulated disk, which is recognized by PC when you plug this programmer into the PC and the programmer will automatically download the program into BLE SENSORS TAG without any other setting.
Features
- NRF51822 Bluetooth Low Energy & 2.4GHz Wireless SOC
- LIS3DH ultra low-power high performance three axes linear accelerometer
- BMP180 Bosch temperature and pressure sensor
- 1 x mbed programmer powered by ATSAM3U2CA-AU ARM-based flash MCU
- 8 x GPIO pins
- 1 x UART port
- 1 x Dual-color LED
- 2 x User buttons
- 1 x Buzzer
Tutorial
Blink
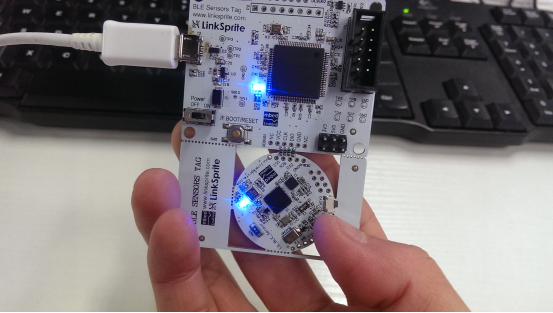
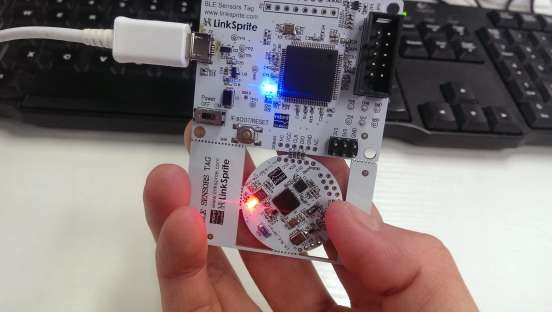
There are dual-color LED with common anode mounted on the BLE SENSORS TAG, and the colors are green and red. LED_R is connected to P0.20 pin, and LED_G is connected to P0.19 pin.
We use mbed online compiler as our development tool and the website address is : https://developer.mbed.org/compiler
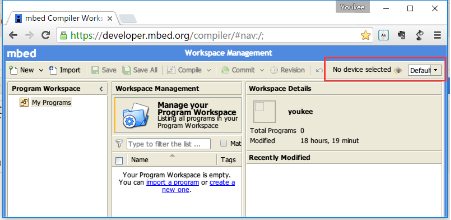
You need to register an account for free, then go to compiler. You will get a website like the followings:
Add Platform
Click No device selected button to add a new platform.
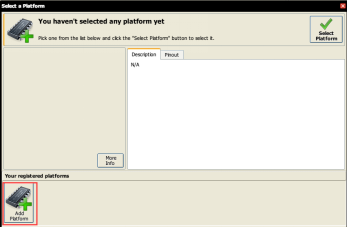
Click Add Platform.
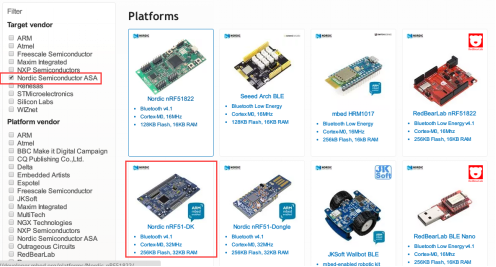
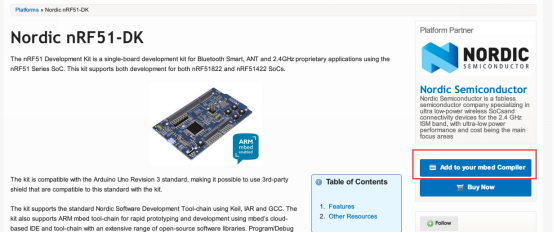
Select Nordic Semiconductor ASA on the left side bar. On the right side, you will get Nordic nRF51-DK platform and click it.
Click Add to your mbed Compiler. This will add Nordic nRF51-DK platform to your mbed compiler.
Then click Open mbed compiler button to go to the online compiler.
Create a new program
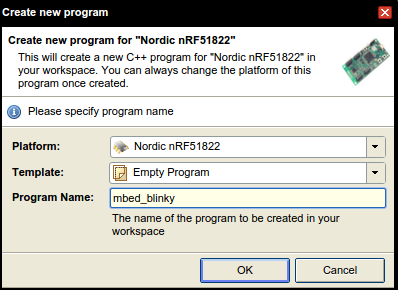
Create new program and add source code
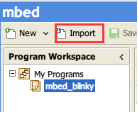
Import the mbed libraries.
Search the mbed libraries and choose mbed, then import it.
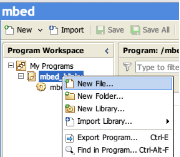
Create main.cpp file and add the source code.
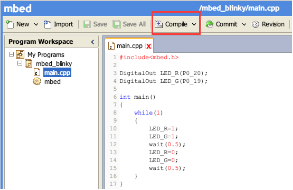
Click Compile button and you will get the hex file downloaded from this website, the name is edmbed_blinky_NRF51_DK.hex.
Compile and run
- Connect the BLE sensor TAG to PC with Micro-USB cable, the PC will recognized a new disk whose nane is jlink.
- Copy or move your downloaded hex file to this disk.
- After several seconds, programming BLE sensor TAG will be finished.
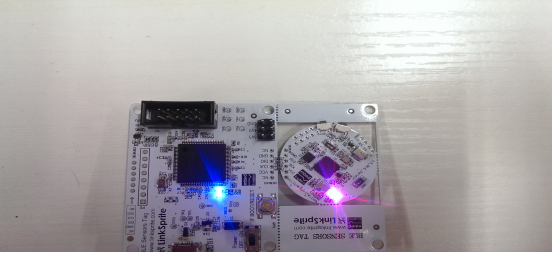
- Please check the LED_R and LED_G.
Source code
#include<mbed.h>
 DigitalOut LED_R(P0_20);
 DigitalOut LED_G(P0_19);
 int main()
 {
     while(1)
     {
         LED_R=1;
         LED_G=1;
         wait(0.5);
         LED_R=0;
         LED_G=0;
         wait(0.5);
     }
 }
More information If you want to get more materials about online mbed compiler, please check the following website: 1.https://developer.mbed.org/handbook/mbed-Compiler 2.https://developer.mbed.org/cookbook/Homepage
Button Control
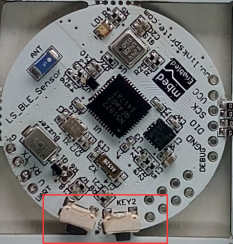
There are dual-button with common cathode mounted on the BLE SENSORS TAG which are key1 and key2. The key1 is connected to P0.28 pin, and key2 is connected to P0.29 pin.
Steps
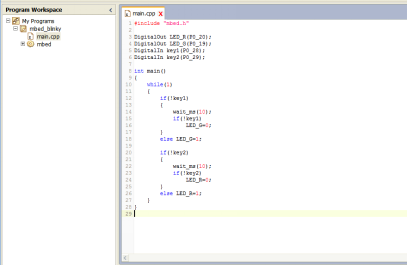
Open the mbed online compile Add the following source code to the main.cpp which you created before, or you can create a new program.
Compile the source code, you will get hex file. Move it to jink disk and program the BLE SENSORS TAG. Press and release the key1 and key2 to check the status of LED_R and LED_G.
Source code
#include<mbed.h>
 DigitalOut LED_R(P0_20);
 DigitalOut LED_G(P0_19);
 DigitalIn key1(P0_28);
 DigitalIn key2(P0_29);
 int main()
 {
     while(1)
     {
         if(!key1)
         {
             wait_ms(10);
             if(!key1)
                 LED_G=0;
         }
         else LED_G=1;

         if(!key2)
         {
             wait_ms(10);
             if(!key2)
                 LED_R=0;
         }
         else LED_R=1;
     }
 }
Buzzer
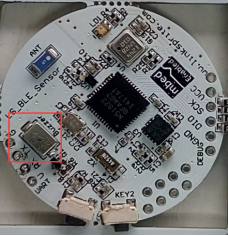
BLE SENSORS TAG board provides a passive buzzer, and its frequency is about 1KHz. The buzzer is drove by 2N7002 MOS transistor. The control port is connected to P0.22 pin .
Steps
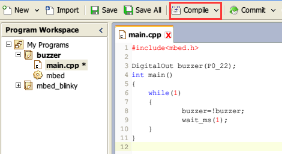
Open the mbed online compiler. Add the following source code to the main.cpp which you created before, or you can create a new program.
Move the downloaded hex file to jlink disk and program the BLE SENSORTS TAG. Listen the sound from the Buzzer.
Source code
 #include<mbed.h>
 DigitalOut buzzer(P0_22);
 int main()
 {
     while(1)
     {
             buzzer=!buzzer;
             wait_ms(1);
     }
 }
Send data via BLE
Introduction of nRF51 BLE nRF51822 supports Bluetooth® Smart protocol stacks as well as 2.4GHz protocol stacks, including Gazell, both available as downloads. nRF51822 requires a single power supply and gives the user the option of using on chip linear regulators giving a supply range of 1.8-3.6V, a direct 1.8V mode and a on chip DC-DC buck converter giving a supply range of 2.1-3.6V. The use of the DC-DC converter can be dynamically controlled during run time and enables nRF51822 to operate at radio peak currents below 10 mA @ 3V supply (TX @ 0 dBm & RX).
This tutorial will tell you how to send data via BLE between BLE SENSORS TAG and iPhone. Pre-requisites iPhone(IOS 4.0 or newer) x1 BLE SENSORS TAGS x1 Micro USB cable x1
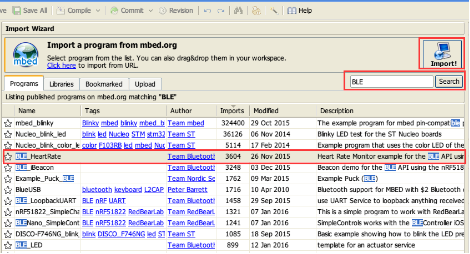
Steps BLE SENSORS TAG side Open online mbed compiler and import a program from mbed.org. Search programs using BLE keyword and you will find BLE_HeartRate Program.
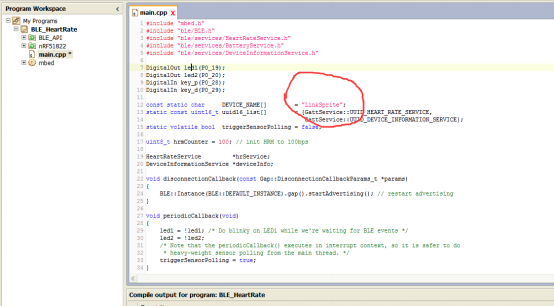
Open the main.cpp and modify it based on the code given below.
Compile the source code and move the downloaded hex file to jlink disk. After several seconds, Programming the BLE SENSORS TAG will be finished.
iPhone side
Install LightBlue APP to your iPhone.
Put all together to test
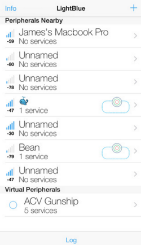
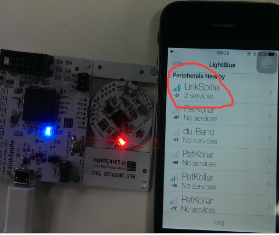
In the program, one button is used to make a variable plus 1, another button is used to make the variable minus 1. Then the program will send this variable to iPhone. Open LightBlue on iPhone, and search LinkSprite device which is defined in the program.
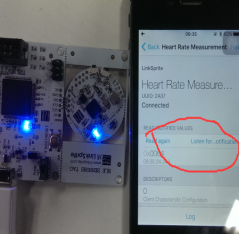
Click this device and connect it.
Click Heart Rate Measurement->Listen for...
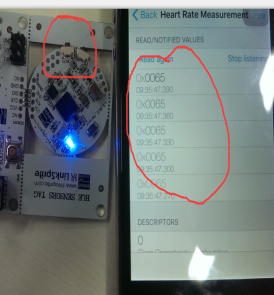
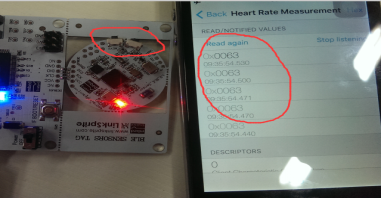
If you press the buttons and the data received on iPhone will change.
Source code
 #include "mbed.h"
 #include "ble/BLE.h"
 #include "ble/services/HeartRateService.h"
 #include "ble/services/BatteryService.h"
 #include "ble/services/DeviceInformationService.h"
 DigitalOut led1(P0_19);
 DigitalOut led2(P0_20);
 DigitalIn key_p(P0_28);
 DigitalIn key_d(P0_29);
 const static char     DEVICE_NAME[]        = "LinkSprite";
 static const uint16_t uuid16_list[]     = {GattService::UUID_HEART_RATE_SERVICE,                                              GattService::UUID_DEVICE_INFORMATION_SERVICE};
 static volatile bool  triggerSensorPolling = false;
uint8_t hrmCounter = 100; // init HRM to 100bps
 HeartRateService         *hrService;
 DeviceInformationService *deviceInfo;
 void disconnectionCallback(const Gap::DisconnectionCallbackParams_t *params)
 {
     BLE::Instance(BLE::DEFAULT_INSTANCE).gap().startAdvertising(); // restart advertising
 }
 void periodicCallback(void)
 {
     led1 = !led1; /* Do blinky on LED1 while we're waiting for BLE events */
     led2 = !led2;
     /* Note that the periodicCallback() executes in interrupt context, so it is safer to do
      * heavy-weight sensor polling from the main thread. */
     triggerSensorPolling = true;
 }
 void bleInitComplete(BLE::InitializationCompleteCallbackContext *params)
 {
     BLE &ble          = params->ble;
     ble_error_t error = params->error;
     if (error != BLE_ERROR_NONE) {
         return;
     }
ble.gap().onDisconnection(disconnectionCallback);
     /* Setup primary service. */
     hrService = new HeartRateService(ble, hrmCounter, HeartRateService::LOCATION_FINGER);
     /* Setup auxiliary service. */
     deviceInfo = new DeviceInformationService(ble, "ARM", "Model1", "SN1", "hw-rev1", "fw-rev1", "soft-rev1");
     /* Setup advertising. */
     ble.gap().accumulateAdvertisingPayload(GapAdvertisingData::BREDR_NOT_SUPPORTED | GapAdvertisingData::LE_GENERAL_DISCOVERABLE);
     ble.gap().accumulateAdvertisingPayload(GapAdvertisingData::COMPLETE_LIST_16BIT_SERVICE_IDS, (uint8_t *)uuid16_list, sizeof(uuid16_list));
     ble.gap().accumulateAdvertisingPayload(GapAdvertisingData::GENERIC_HEART_RATE_SENSOR);
     ble.gap().accumulateAdvertisingPayload(GapAdvertisingData::COMPLETE_LOCAL_NAME, (uint8_t *)DEVICE_NAME, sizeof(DEVICE_NAME));
     ble.gap().setAdvertisingType(GapAdvertisingParams::ADV_CONNECTABLE_UNDIRECTED);
     ble.gap().setAdvertisingInterval(100); /* 1000ms */
     ble.gap().startAdvertising();
 }
 int main(void)
 {
     led1 = 1;
     led2 = 0;
     Ticker ticker;
     ticker.attach(periodicCallback, 1); // blink LED every second
     BLE& ble = BLE::Instance(BLE::DEFAULT_INSTANCE);
     ble.init(bleInitComplete);
     /* SpinWait for initialization to complete. This is necessary because the
      * BLE object is used in the main loop below. */
     while (ble.hasInitialized()  == false) { /* spin loop */ }

     // infinite loop
     while (1)
     {
         if(!key_p)
         {
             wait_ms(10);
             if(!key_p)
                 hrmCounter++;
             while(!key_p);
         }

         if(!key_d)
         {
             wait_ms(10);
             if(!key_d)
                 hrmCounter--;
             while(!key_d);
         }

         hrService->updateHeartRate(hrmCounter);
         ble.waitForEvent(); // low power wait for event
 }}
LIS3DH accelerometer
Introduction of LIS3DH The LIS3DH is an ultra low-power high performance three axes linear accelerometer belonging to the “nano” family, with digital I2C/SPI serial interface standard output. The device features ultra low-power operational modes that allow advanced power saving and smart embedded functions.
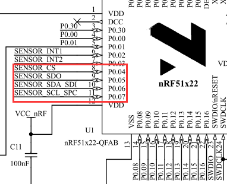
BLE SENSORS TAG integrates LIS3DH accelerometer which used as SPI communication mode, as shown below.
This tutorial will introduce how to get the data from the LIS3DH on BLE SENSORS TAG using mbed IDE.
Pre-requisites
BLE SENSORS TAG x1 Micro USB cable x1 USB UART cable
Steps
Open online mbed compiler and import a program from mbed.org. Search programs using BLE_basic keyword and you will find BLE_basic Program.
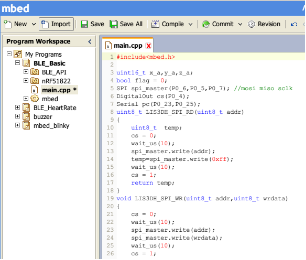
Open the main.cpp and modify it based on the code given below.
Compile the source code and download the hex file. Connect BLE SENSORS TAG to your PC using Micro USB. Move the downloaded hex file to jlink disk. After several seconds, Programming the BLE SENSORS TAG will be finished.
Run and Test
Connect USB UART cable to UART port on BLE SENSORS TAG.
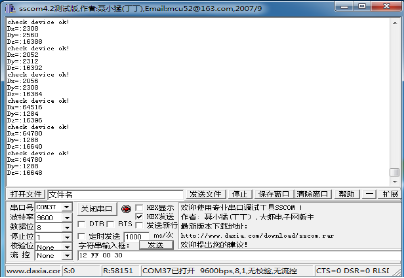
Open a serial program on PC to read the UART data sent from device. Baud rate: 9600 Data : 8 bit Stop: 1bit
If you move BLE SENSORS TAG, the values of Dx, Dy and Dz shown on the Serial window will change.
Source code
#include<mbed.h>
 uint16_t x_a,y_a,z_a;
 bool flag = 0;
 SPI spi_master(P0_6,P0_5,P0_7); //mosi miso sclk
 DigitalOut cs(P0_4);
 Serial pc(P0_23,P0_25);
 uint8_t LIS3DH_SPI_RD(uint8_t addr)
 {
     uint8_t  temp;
     cs = 0;
     wait_us(10);
     spi_master.write(addr);
     temp=spi_master.write(0xff);
     wait_us(10);
     cs = 1;
     return temp;
 }
 void LIS3DH_SPI_WR(uint8_t addr,uint8_t wrdata)
 {
     cs = 0;
     wait_us(10);
     spi_master.write(addr);
     spi_master.write(wrdata);
     wait_us(10);
     cs = 1;
 }
 void SPI_LIS3DH_Init()
 {
    spi_master.format(8,3);
    spi_master.frequency(100000);
    wait_ms(5);
    LIS3DH_SPI_WR(0x24,0x80);
    wait_ms(5);
    LIS3DH_SPI_WR(0x20,0x17);
    LIS3DH_SPI_WR(0x23,0x80);
 }
 void get_val(void)
 {
     uint8_t Dx_L=1,Dy_L=1,Dz_L=1;
     uint8_t Dx_H=1,Dy_H=1,Dz_H=1;
     if(LIS3DH_SPI_RD(0x0f|0x80)==0x33)
     {
          printf("check device ok!\r\n");
          flag=1;
          Dx_H=LIS3DH_SPI_RD(0x29|0x80);
          Dx_L=LIS3DH_SPI_RD(0x28|0x80);
          Dy_H=LIS3DH_SPI_RD(0x2b|0x80);
          Dy_L=LIS3DH_SPI_RD(0x2A|0x80);
          Dz_H=LIS3DH_SPI_RD(0x2d|0x80);
          Dz_L=LIS3DH_SPI_RD(0x2C|0x80);
     }
     else printf("check device err!\r\n");
     x_a=Dx_H<<8|Dx_L/16;
     y_a=Dy_H<<8|Dy_L/16;
     z_a=Dz_H<<8|Dz_L/16;
 }
 int main(void)
 {
   SPI_LIS3DH_Init();
   while(1)
   {
      get_val();
      if(flag)
      {
          printf("Dx=:%d\r\n",x_a);
          printf("Dy=:%d\r\n",y_a);
          printf("Dz=:%d\r\n",z_a);
          flag=0;
          wait(1);
      }
   }
 }

