From LinkSprite Playgound
Test Plan of Papilio Pro
Testing Prerequisites (What you need)
- Terminal Application - Hyperterminal is used in this guide but any terminal program can be used. In our case, we use X-CTU.
- Stimulus Board: We use a Papilio One 250K with Male headers soldered on facing downwards.
Testing Procedure
Prepare the stimulus board
- If this is the first time a Papilio board is being used on your computer then install the Papilio Loader and Drivers.
- Download the latest version of the Gadget Factory Test Plan package.
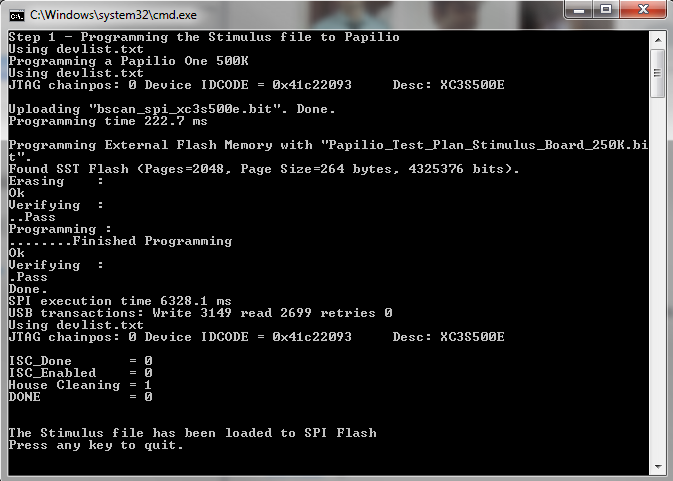
- Prepare the stimulus board with the stimulus bit file.
- Navigate to the directory where the Gadget Factory Test Plan is unzipped to and enter the "Papilio_Pro_Verification" folder.
- Connect the Stimulus board to the USB port.
- Run "Prepare_Stimulus_Board.bat" file. You can run this file by double clicking it.
- Verify the results:
- If the external flash memory of the 250K is Atmel, please download another [ programmer].
