Difference between revisions of "USB Host Shield for Arduino"
(Created page with "== Introduction == The Motor Shield is a perfect platform for robotics and mechanical applications. It enables the Arduino to drive two brushed DC motors or one 4-wire two-p...") |
|||
| Line 1: | Line 1: | ||
== Introduction == | == Introduction == | ||
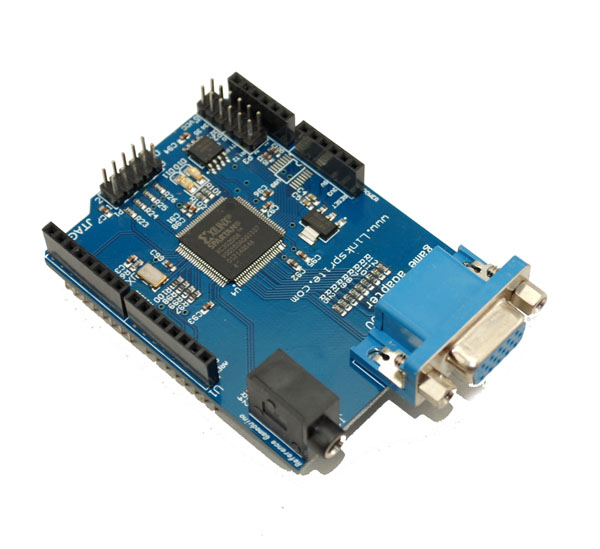
| − | + | Gameduino is a game adapter for Arduino (or anything else with an SPI interface) built as a single shield that stacks up on top of the Arduino and has plugs for a VGA monitor and stereo speakers. The sound and graphics are definitely old-school, but thanks to the latest FPGA technology, the sprite capabilities are a step above those in machines from the past. The adapter is controlled via SPI read/write operations, and looks to the CPU like a 32Kbyte RAM. (Unlike many 8-bit machines, there are no restrictions on when you can access this RAM). There is even a handy reference poster (which you can download below) showing how the whole system works. | |
| + | Model:[GAMEDUINO] | ||
| − | [[File: | + | [[File:gameduino.jpg]] |
== Features == | == Features == | ||
| − | * | + | *Video output is 400x300 pixels in 512 colors |
| − | |||
| − | |||
| − | |||
| − | |||
| − | |||
| − | + | *All color processed internally at 15-bit precision | |
| − | + | *Compatible with any standard VGA monitor (800x600 @ 72Hz) | |
| − | + | ||
| − | + | *Background Graphics | |
| − | + | *#512x512 pixel character background | |
| − | + | *#256 characters, each with independent 4 color palette | |
| − | + | *#pixel-smooth X-Y wraparound scroll | |
| − | |||
| − | |||
| − | |||
| − | |||
| − | |||
| − | |||
| − | |||
| − | |||
| − | |||
| − | |||
| − | |||
| − | |||
| − | |||
| − | |||
| − | |||
| − | |||
| − | |||
| − | |||
| − | |||
| − | |||
| − | |||
| − | |||
| − | |||
| − | |||
| − | |||
| − | |||
| − | |||
| − | |||
| − | |||
| − | |||
| − | |||
| − | |||
| − | |||
| − | |||
| − | |||
| − | |||
| − | |||
| − | |||
| − | + | *Foreground Graphics | |
| + | *#each sprite is 16x16 pixels with per-pixel transparency | ||
| + | *#each sprite can use 256, 16 or 4 colors | ||
| + | *#four-way rotate and flip | ||
| + | *#96 sprites per scan-line, 1536 texels per line | ||
| + | *#pixel-perfect sprite collision detection | ||
| − | + | *Audio output is a stereo 12-bit frequency synthesizer | |
| − | + | *64 Independent Voices 10-8000 Hz | |
| − | + | ||
| − | + | *Per-Voice Sine Wave or White Noise | |
| − | + | ||
| − | + | *Sample Playback Channel | |
| − | + | ||
| − | + | == Application Ideas == | |
| − | + | ||
| − | + | ||
| − | + | ||
| − | + | ||
| − | + | ||
| − | + | == Cautions == | |
| − | + | ||
| − | + | The warnings and wrong operations possible cause dangerous. | |
| − | + | ||
| − | + | == Schematic == | |
| − | + | ||
| − | + | [https://s3.amazonaws.com/linksprite/Shields/Gameduino/gameduino_sch.pdf Schematic of Gameduino for Arduino] | |
| − | + | ||
| − | + | == Specification == | |
| − | + | ||
| − | + | [https://s3.amazonaws.com/linksprite/Shields/Gameduino/Gameduino_Tutorial.pdf Tutotial of Gameduino] | |
| − | + | ||
| − | + | == Pin definition and Rating == | |
| − | + | ||
| − | + | ||
| − | + | ||
| − | + | ||
| − | + | ||
| − | + | == Mechanic Dimensions == | |
| − | + | ||
| − | + | ||
| − | + | ||
| − | + | ||
| − | + | ||
| − | + | == Usage == | |
| − | + | ||
| − | + | ||
| − | + | === Hardware Installation === | |
| − | + | ||
| − | + | *Physical Connection: | |
| − | + | Gameduino is the standard Arduino module. Arduino pins which have to be connected to it are as following picture shows: | |
| − | + | ||
| − | + | [[File:Physical Connection.png]] | |
| − | + | ||
| − | + | [[File:111.png]] | |
| − | + | ||
| − | + | Gameduino is superimposed on top of Arduino directly. | |
| − | + | ||
| − | + | ||
| − | + | === Programming === | |
| − | + | ||
| − | + | *How to burn the codes into SPI flash: | |
| − | + | FPGA Verilog codes:[http://excamera.com/files/gameduino/verilog/ Download] | |
| − | + | ||
| − | + | Composite these codes through the ISE. Program them. Then, the executable bit file can be generated. | |
| + | |||
| + | [[File:3104.jpg]] | ||
| + | |||
| + | Open ISE iMPACT | ||
| + | |||
| + | [[File:3128.jpg]] | ||
| + | |||
| + | Double click PROM File Formatter, | ||
| + | |||
| + | [[File:3201.jpg]] | ||
| + | |||
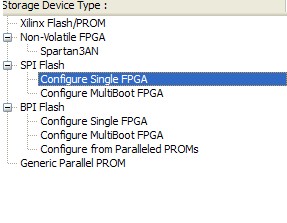
| + | Choose Configure Single FPGA in the SPI Flash of the Storage Device Type. Click next | ||
| + | |||
| + | [[File:3221.jpg]] | ||
| + | |||
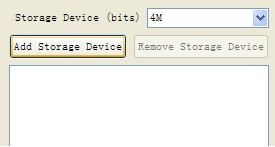
| + | Gameduino’s Flash capacity is 4M. Click Add Storage Device and click next | ||
| + | |||
| + | [[File:3237.jpg]] | ||
| + | |||
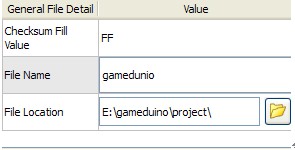
| + | Name the file and choose address. Click OK. | ||
| + | |||
| + | [[File:3306.jpg]] | ||
| + | |||
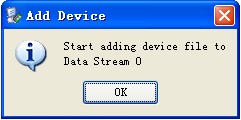
| + | Click OK. Add .bit file. | ||
| + | |||
| + | [[File:3318.jpg]] | ||
| + | |||
| + | [[File:3335.jpg]] | ||
| + | |||
| + | Click Generate File…,if | ||
| + | |||
| + | [[File:3351.jpg]] | ||
| + | |||
| + | Comes, means the .mcs file which has to be burnt into SPIflash is generated successfully. | ||
| + | |||
| + | [[File:5942.jpg]] | ||
| + | |||
| + | Double click Boundary Scan. Choose .bit file and following dialogue comes out: | ||
| + | |||
| + | [[File:0000.jpg]] | ||
| + | |||
| + | Click Yes,choose.mcs file and following dialogue comes out. | ||
| + | |||
| + | [[File:0015.jpg]] | ||
| + | |||
| + | The type of SPI PROM used on Gamedunio is AT45DB041B. Click OK | ||
| + | |||
| + | [[File:0054.jpg]] | ||
| + | |||
| + | Choose FLASH,program, | ||
| + | |||
| + | [[File:0109.jpg]] | ||
| + | |||
| + | Burn the codes into SPI FLASH successfully. | ||
| + | |||
| + | == FAQ == | ||
| + | [http://answers.gameduino.com/questions/ Gameduino FAQ Forum] | ||
| + | |||
| + | == Support == | ||
| + | |||
| + | If you have questions or other better design ideas, you can go to our [http://www.linksprite.com/forum/index.php forum] to discuss or creat a ticket for your issue at [http://www.linksprite.com/support/ linksprite support]. | ||
| + | |||
| + | == Resources == | ||
| + | |||
| + | *[http://excamera.com/sphinx/gameduino/ Gameduino web site] | ||
| + | |||
| + | *[http://dlnmh9ip6v2uc.cloudfront.net/datasheets/Dev/Arduino/Shields/poster.pdf Reference Poster in PDF] | ||
| + | |||
| + | *[http://dlnmh9ip6v2uc.cloudfront.net/datasheets/Dev/Arduino/Shields/Gameduino.zip Example Code and Library] | ||
| + | |||
| + | == How to buy == | ||
| + | |||
| + | Here to buy Gameduino for Arduino [http://www.cutedigi.com/arduino-shields/gameduino-for-arduino-a-game-adapter-for-microcontrollers.html GAMEDUINO] on LinkSprite [http://www.cutedigi.com/ Cart] | ||
| + | |||
| + | == See Also == | ||
| + | |||
| + | Other related products and resources. | ||
| + | |||
| + | == Licensing == | ||
| + | |||
| + | This documentation is licensed under the Creative Commons [http://creativecommons.org/licenses/by-sa/3.0/ Attribution-ShareAlike License 3.0] Source code and libraries are licensed under [http://www.gnu.org/licenses/gpl.html GPL/LGPL], see source code files for details. | ||
Revision as of 10:51, 27 December 2012
Contents
Introduction
Gameduino is a game adapter for Arduino (or anything else with an SPI interface) built as a single shield that stacks up on top of the Arduino and has plugs for a VGA monitor and stereo speakers. The sound and graphics are definitely old-school, but thanks to the latest FPGA technology, the sprite capabilities are a step above those in machines from the past. The adapter is controlled via SPI read/write operations, and looks to the CPU like a 32Kbyte RAM. (Unlike many 8-bit machines, there are no restrictions on when you can access this RAM). There is even a handy reference poster (which you can download below) showing how the whole system works.
Model:[GAMEDUINO]
Features
- Video output is 400x300 pixels in 512 colors
- All color processed internally at 15-bit precision
- Compatible with any standard VGA monitor (800x600 @ 72Hz)
- Background Graphics
- 512x512 pixel character background
- 256 characters, each with independent 4 color palette
- pixel-smooth X-Y wraparound scroll
- Foreground Graphics
- each sprite is 16x16 pixels with per-pixel transparency
- each sprite can use 256, 16 or 4 colors
- four-way rotate and flip
- 96 sprites per scan-line, 1536 texels per line
- pixel-perfect sprite collision detection
- Audio output is a stereo 12-bit frequency synthesizer
- 64 Independent Voices 10-8000 Hz
- Per-Voice Sine Wave or White Noise
- Sample Playback Channel
Application Ideas
Cautions
The warnings and wrong operations possible cause dangerous.
Schematic
Schematic of Gameduino for Arduino
Specification
Pin definition and Rating
Mechanic Dimensions
Usage
Hardware Installation
- Physical Connection:
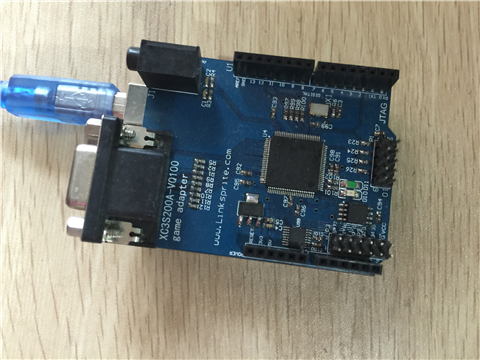
Gameduino is the standard Arduino module. Arduino pins which have to be connected to it are as following picture shows:
Gameduino is superimposed on top of Arduino directly.
Programming
- How to burn the codes into SPI flash:
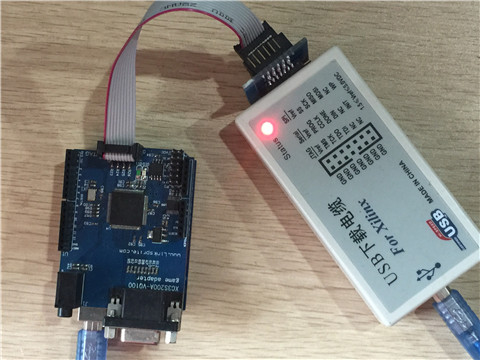
FPGA Verilog codes:Download
Composite these codes through the ISE. Program them. Then, the executable bit file can be generated.
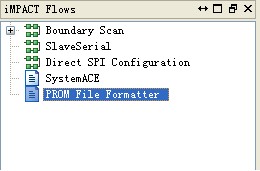
Open ISE iMPACT
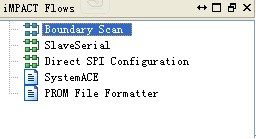
Double click PROM File Formatter,
Choose Configure Single FPGA in the SPI Flash of the Storage Device Type. Click next
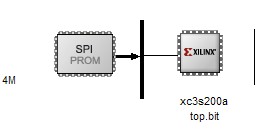
Gameduino’s Flash capacity is 4M. Click Add Storage Device and click next
Name the file and choose address. Click OK.
Click OK. Add .bit file.
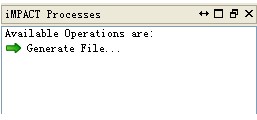
Click Generate File…,if
Comes, means the .mcs file which has to be burnt into SPIflash is generated successfully.
Double click Boundary Scan. Choose .bit file and following dialogue comes out:
Click Yes,choose.mcs file and following dialogue comes out.
The type of SPI PROM used on Gamedunio is AT45DB041B. Click OK
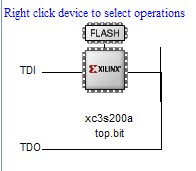
Choose FLASH,program,
Burn the codes into SPI FLASH successfully.
FAQ
Support
If you have questions or other better design ideas, you can go to our forum to discuss or creat a ticket for your issue at linksprite support.
Resources
How to buy
Here to buy Gameduino for Arduino GAMEDUINO on LinkSprite Cart
See Also
Other related products and resources.
Licensing
This documentation is licensed under the Creative Commons Attribution-ShareAlike License 3.0 Source code and libraries are licensed under GPL/LGPL, see source code files for details.
